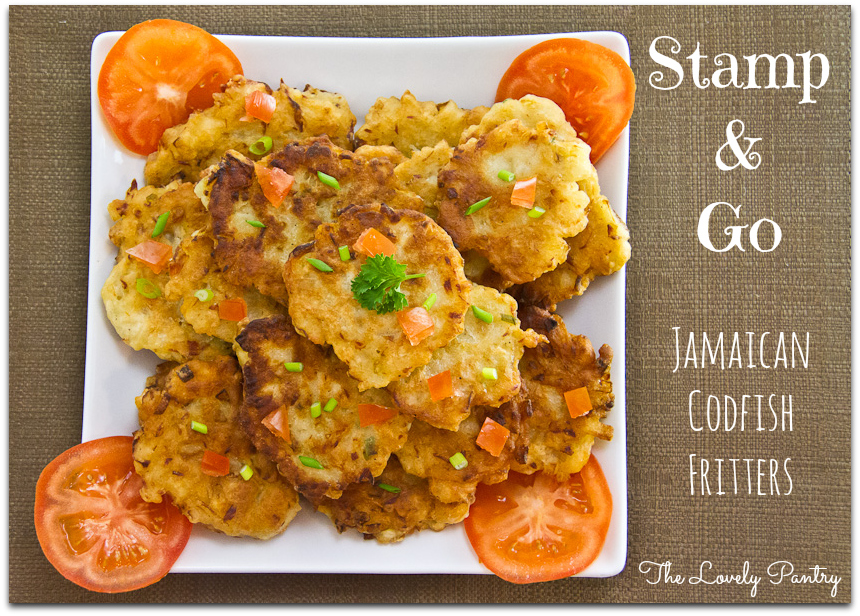
Stamp and Go! {Jamaican Codfish Fritters} for #SundaySupper

Feb 3, 2013 by

Today is a BIG #SundaySupper. Its Superbowl Sunday and we have so many good dishes for this spectacular occasion. It’s spectacular for a few reasons. If you love American Football, then you’ve probably been eagerly anticipating this day. If you love food, well there will certainly no shortage of food today. If you’re like me, you’ll be looking forward to the Superbowl commercials and the half-time performance. Yes, that really is all that I’m looking forward to. Well that and these Jamaican Codfish Fritters! It’s a wonderful snack or side dish/appetizer and is one of my favourite Jamaican treats. My Grandmother used to make these fritters for me. I just loved them. The saltiness of the Codfish will always win me over. I made them for the first time and now I’m in fritter heaven!


Stamp & Go_Codfish Fritters_1


My recipe today was taken from my very special Jamaican cookbook by Enid Donaldson, “The Real Taste Of Jamaica”. This book has not failed me yet! I’m comforted knowing that it keeps me close to home for so many occasions including game time!


Stamp and Go! {Jamaican Codfish Fritters}

Prep Time: 30 minutes

Cook Time: 20 minutes

Ingredients

  • 1 Cup Salted (deboned) Codfish
  • 2 Cups All Purpose Flour, Unbleached
  • 2 Onions, Finely chopped
  • 2 Tomatoes, finely chopped, seeds removed
  • 2 Cloves Garlic, minced
  • 2 Stalks Escallion, finely sliced
  • 2 Tsp Black Pepper
  • 1/2 Scotch Bonnet Pepper, finely chopped (I omitted this ingredient)
  • 2 Tbsp Vegetable Oil + more for frying
  • 2 Tsp Baking Powder
  • 1 1/2 Cups Water, at room temperature

Instructions

  1. Soak codfish overnight in water or bring to a boil twice (for 12-15 minutes), draining and adding fresh water after each boil.
  2. Drain and rinse the codfish under running cold water
  3. Using a fork or your fingers, flake the codfish into small pieces, taking care to remove any remaining bones
  4. To a small skillet, add oil and allow to get hot. Add onion, garlic, tomatoes and escallions. Sautee until soft about 5 minutes. Add black pepper then combine. Remove from heat and allow to cool
  5. Add codfish to the seasonings. Stir to combine
  6. In a medium bowl, add flour and baking powder. Stir to incorporate
  7. add codfish mixture to the flour and stir to combine.
  8. Add water gradually, mixing by hand until a firm but loose batter is achieved
  9. Add by about 3 tbsp at a time and fry in oil at medium heat on both sides (about 3-5 mins) until golden brown and cooked through
  10. Transfer to absorbent paper towels to get rid of any excess oil.
  11. Transfer to a platter and serve warm
https://lovelypantry.com/2013/02/stamp-and-go-jamaican-codfish-fritters-for-sundaysupper/


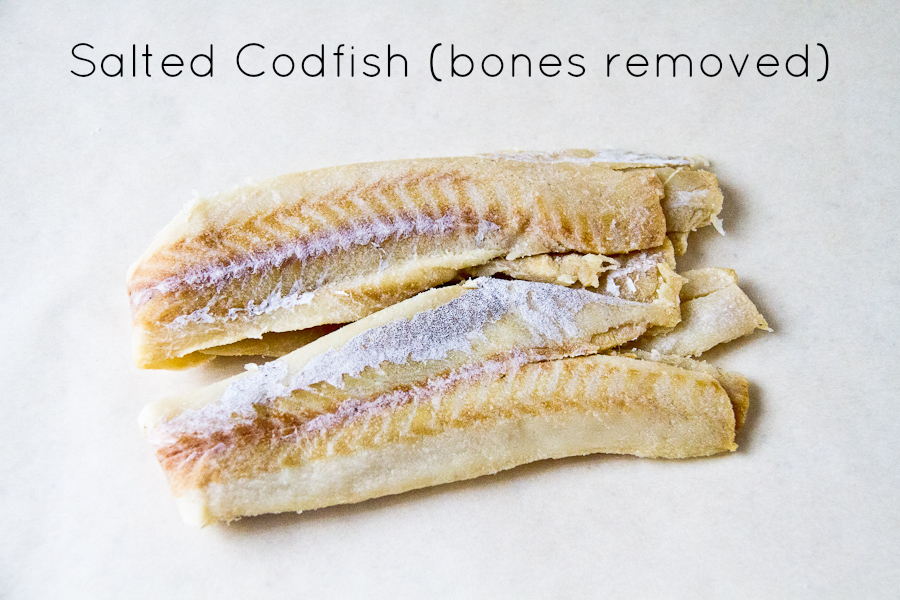
For those who are not familiar with Salted Cod/Cod Fish/Salt Fish – this is what it looks like straight out of the package. This looks pretty nice compared to what I grew up seeing. This is from an 11oz package. I used half of it to make this recipe. I got mine from the local West Indian Market but I have seen it in the regular supermarket also.


Stamp_and_Go_Salted Codfish

Salted Cod Fish direct from packaging


I remember having to flake codfish on a Saturday night in preparation for Ackee & Salt Fish on Sunday morning before church. The fish we had then wasn’t as refined and certainly was not de-boned. I had to use my fingers and flake while removing bones from the fish. Not a glamorous task at all. But I love Saltfish so it had to be done. I would flake the fish while my Mom would prepare the dumpling dough.

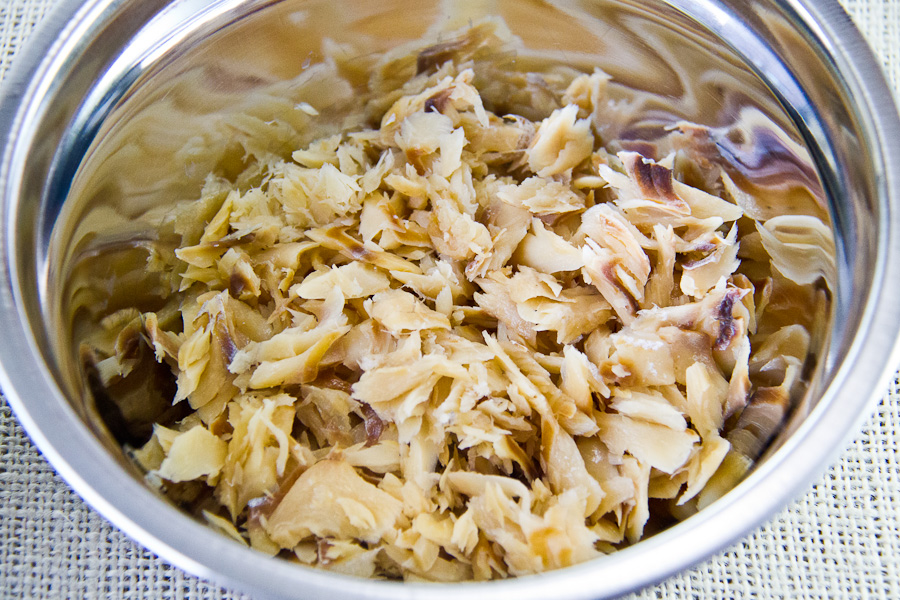
Once the fish has been boiled twice, taste the fish to see if it is to your liking. You don’t want to boil out all the salt. It should in fact still be salty. Keep in mind that it is going to be placed in a batter that will likely reduce the saltiness. Here is what the codfish looks like once cooled and flaked.


Stamp_and_Go_Codfish_Fritters-3

Flaked Cod Fish


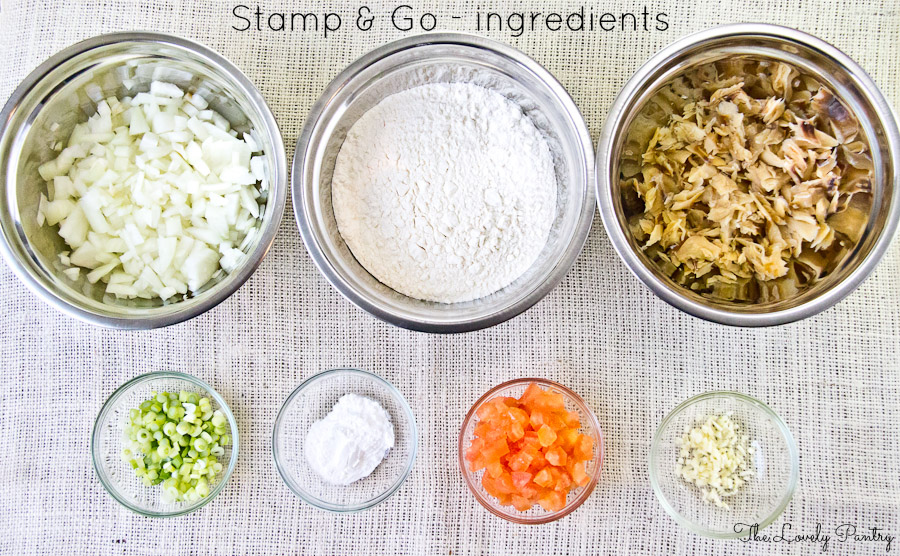
Stamp_and_Go_Codfish_Fritters_ingredients

Lets make Stamp & Go!


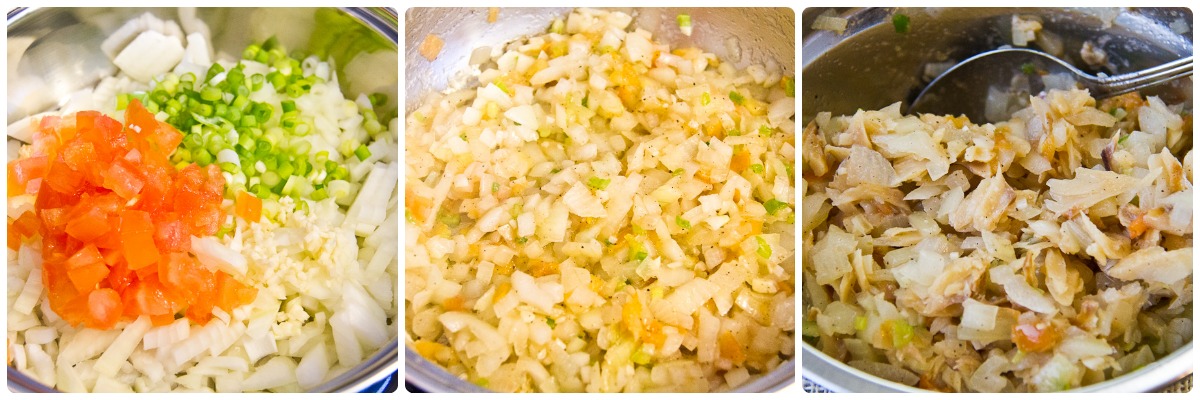
While sautéing the seasoning, you will notice the wonderful fragrance as they combine. I decided not to add Scotch Bonnet pepper this time but I’m sure I will the next time. I added black pepper instead.


Stamp & Go_ Seasoning + Fish

Sautee the onion, garlic, tomatoes and escallions. Combine with codfish.


Creating the batter was interesting. The recipe did not state how much water to use. I added 1/4 Cup of water at a time until I arrived at a nice consistency. I tested out a fritter to see how it came out after adding a cup of water to the batter. I only needed half a cup more to get it right. Fry these fritters at medium heat. And do not leave the skillet unattended while browning these fritters.


Stamp & Go_Prep


Wouldn’t you like to see these on your Superbowl party platter?  These are a definite crowd pleaser.


Stamp_and_Go_Codfish_Fritters_platter

Codfish Fritter Platter

Grab yourself a plate and dig in!


Stamp_and_Go_Codfish_Fritters_plate

Jamaican Cod Fish Fritters, also known as Stamp & Go


Be sure to visit the rest of the #SundaySupper team to see the amazing game day buffet items.

#SundaySupper Super Bowl Appetizers & Snacks:

#SundaySupper Super Bowl Main Dishes:

#SundaySupper Super Bowl Desserts:


#SundaySupper Super Bowl Tablescape:  10 Tips For A Winning Superbowl Buffet Table from An Appealing Plan

***

Join the #SundaySupper conversation on Twitter on Sunday, February 3rd to talk all about our Super Bowl Recipes!

We’ll tweet throughout the day and share recipes from all over the world.

Our weekly chat starts at 7:00 pm ET and you do not want to miss out on the fun.

Follow the #SundaySupperhashtag, and remember to include it in your tweets to join in the chat.

Check out our #SundaySupper Pinterest board for more fabulous recipes and food photos!


read more

Hawaiian Bread

Jan 31, 2013 by

I did  it!! I got my list of breads that I would like to make, and went for it. I feel so accomplished right now. Making bread has been on my culinary bucket list since forever. I have been quietly saving, comparing, pondering recipes for some time now. Of course, Pinterest is where I store many bread recipes, but I have also been looking in books, magazines and e-books too. You’d be surprised to know how many free Kindle e-books are available on Amazon as a promotion. Either free or cheap. Either way, I’m all over recipe books.

This bread was very different to me. I had no idea how the taste/texture would be but I thought it was pretty cool that pineapple juice was an ingredient. When I took the bread out of the oven, I started taking pictures with my phone. I had to tell my friends and loved ones what I did! This is the kind of news that can’t be kept to myself!


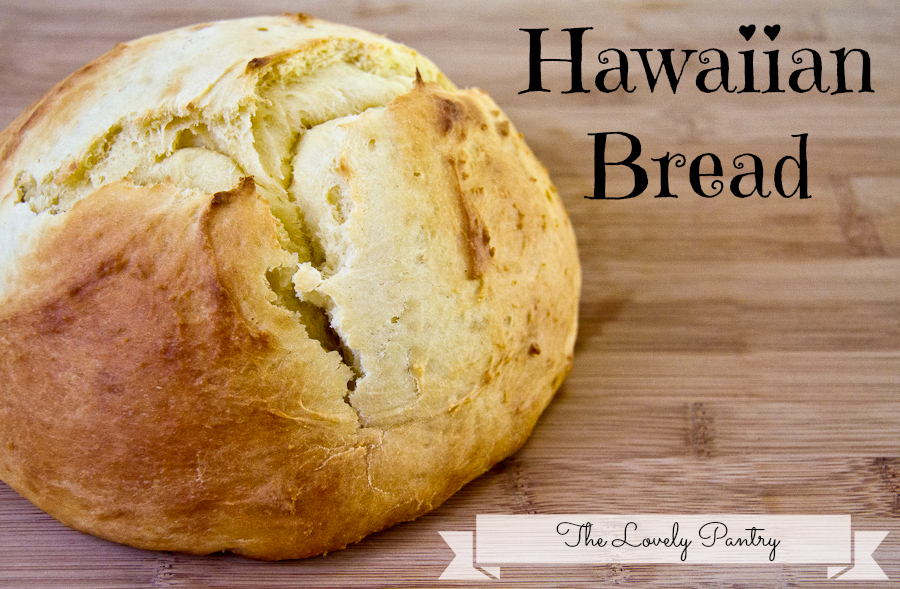
Hawaiian Bread


Hawaiian Bread

Prep Time: 20 minutes

Cook Time: 40 minutes

Total Time: 60 minutes

Ingredients

  • 1 Cup Pineapple Juice
  • 1 Cup Water
  • 1/2 Cup Sugar
  • 1 1/2 Tsp Salt
  • 2 Tsp Active Dry Yeast
  • 1/2 Tsp Ground Ginger
  • 1 Tsp Vanilla
  • 1/2 Cup Unsalted Butter, softened
  • 2 Eggs
  • 5 Cup Flour, Unbleached

Instructions

  1. In a medium bowl, add flour, salt and ginger. Whisk to combine.
  2. In a large mixing bowl, cream butter and sugar.
  3. Add eggs, vanilla and pineapple juice. Mixing after each addition.
  4. Add proofed yeast and mix in.
  5. Gradually add 2 1/2 Cups of the flour mixture and mix until fully combined.
  6. Add the remaining flour and mix again.
  7. Transfer to a container and container and cover loosely with saran wrap.
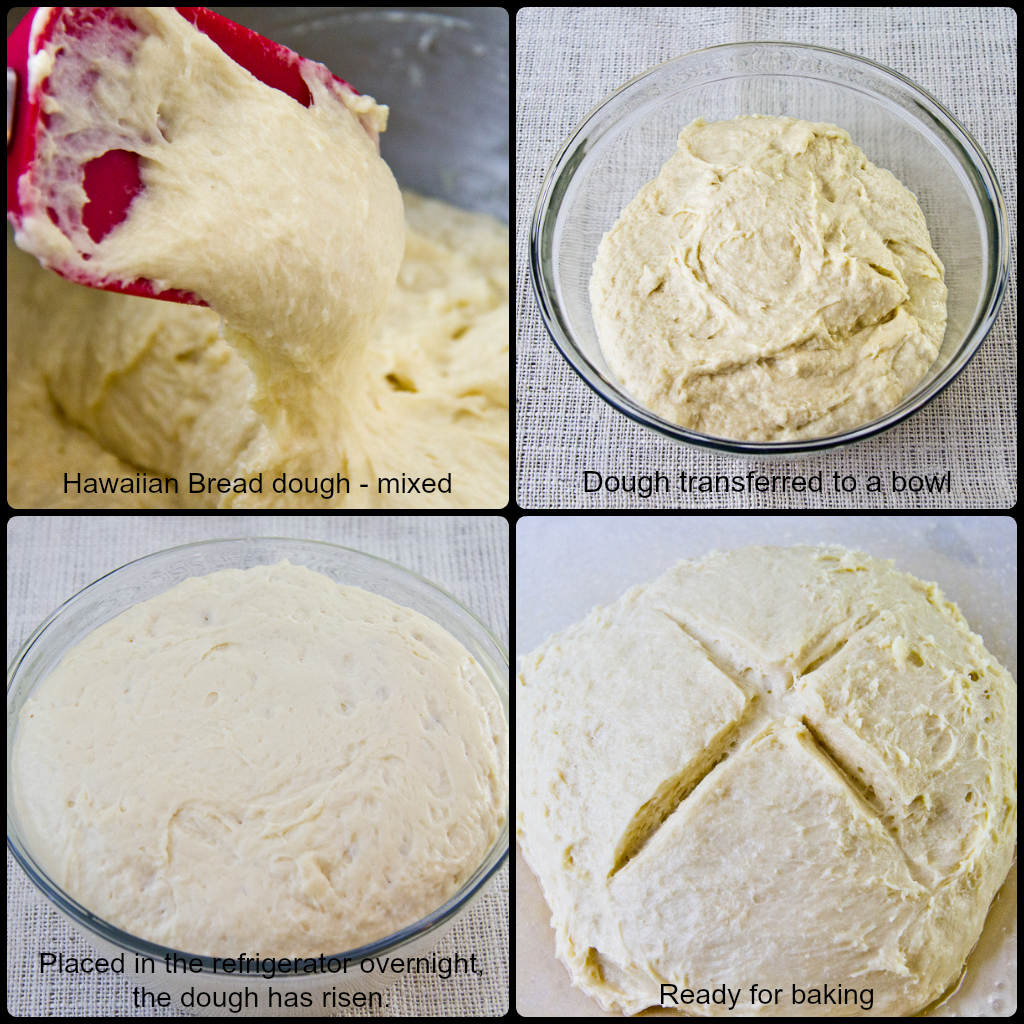
  8. Refrigerate for at least 8 hours up to 5 days. (Overnight works well)
  9. Divide your dough in two portions and form into boules by folding the ends underneath and placing on a greased baking sheet - seam side down
  10. Make an "X" at the top of the boule.
  11. Bake at 350F for about 40 minutes
  12. Remove from oven and allow to cool for about 30 minutes

Notes

This recipe is from Kindle eBook "Easy, Fabulous Bread Making: A Collection of quick, no-knead, homemade bread recipes" by Barbara Mack

https://lovelypantry.com/2013/01/hawaiian-bread/


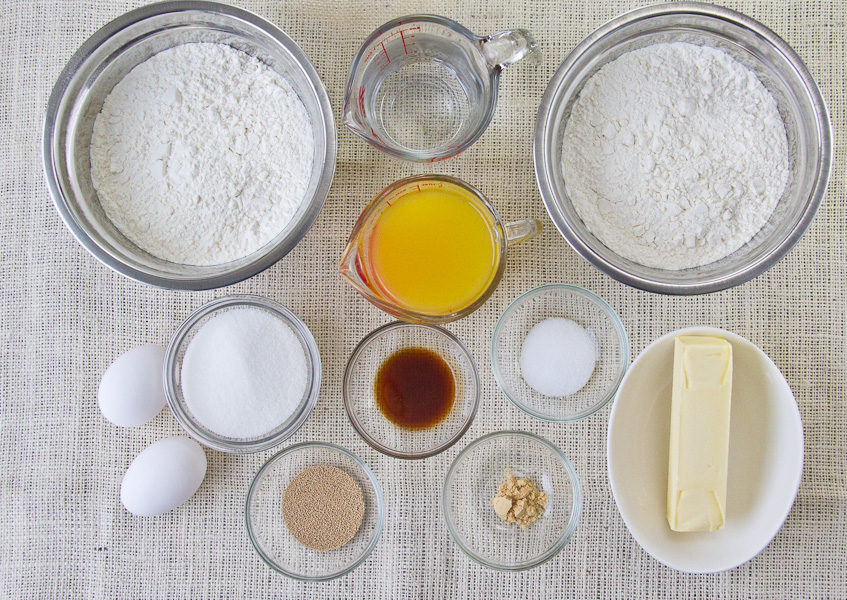
Ingredients for Hawaiian Bread

Ingredients for Hawaiian Bread


Just to clarify, in the photograph above, I have 2 bowls with flour. I split it but realized after that I didn’t need to do two portions.

One of the things I loved about this type of bread, is that it requires no kneading. This is a very important aspect of the recipe for me. Why? Well because kneading wouldn’t be a good thing for me to do. A few months ago, I developed tendonitis in my right thumb joint. So something as simple as writing can be slightly painful. I fully realize that the hours spent on the computer and on my cell phone are wreaking havoc on my hands. My left wrist is showing signs of stress also. I was advised to step away from the computer. Chances of that happening are pretty close to nil, although I have decreased my online activity a little. Less time on the computer doesn’t mean I’m resting though. Because I’m in the kitchen making AWESOME breads like this one!

I was so excited about making this bread that I went ahead and prepped 2 more no-knead breads. That’s another great thing about this recipe. You can prepare from the night before so you can have fresh bread in a jiffy. Also you can store the dough in the freezer for up to 3 months, and take it out as needed. Just allow it to thaw and rise again in the fridge.

I learned something about yeast while making this bread. When using Active Dry Yeast, you have to proof it before you incorporate it into the batter otherwise the dough wont rise. Lesson learned. No more wasting ingredients!

Proofing your yeast

In a small bowl, add 1 package of active dry yeast (about 2 1/4 Tsp). Add 1 Tsp sugar and 1/4 cup of warm water. Allow to stand for about 10 minutes. If the mixture starts to foam and increases in volume, you can use it in your recipe. If it doesn’t foam, discard it. I added the yeast to the wet ingredients just before adding the dry ingredients.


 Hawaiian Bread Prep Collage2


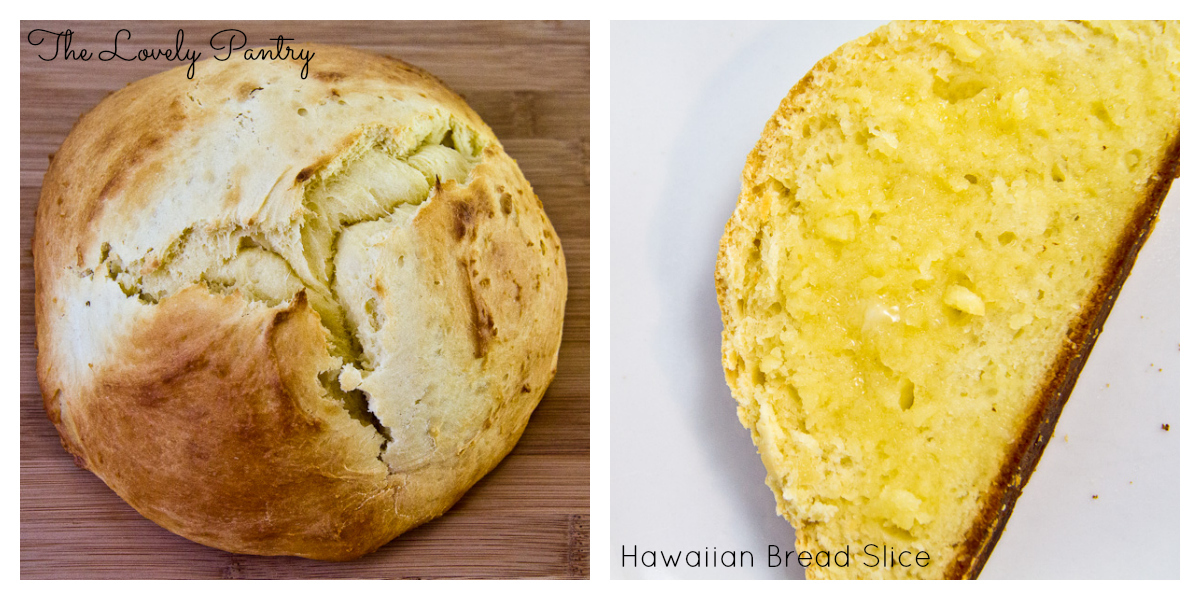
Is this bread perfect? I’m not sure. It’s my first homemade bread. It tasted much different from the commercially made bread that I have become accustomed to. But I’ve always heard that once you start making bread at home, you may not want to go back to store-bought bread. We’ll see!  I probably don’t have the perfect technique when it comes to bread making yet, but I’m looking forward to learning more and most definitely baking more. I can’t wait to make the second portion of this recipe. And then some other recipes from the eBook.


Hawaiian Bread Slice2

 I’m really happy.

No no-knead recipe is safe now that I’ve made my first bread.

I’m sooooo doing the happy dance right now.


read more

Mushroom and Bacon Pasta

Jan 29, 2013 by

You have no idea how excited I get when I find a good recipe. I mean a really good recipe. One that I wouldn’t mind having in weekly rotation. A recipe that is surprisingly pleasant to the palate. A recipe that is easy to make and works well when you really don’t know what on earth you are going to make for dinner tonight. I’ve had a few nights like that recently.

My friends, as simple as this recipe is, I think its lovely. I even managed to get my son to eat it. He questioned the mushrooms for a moment (I didn’t put a lot in his plate) but he finished his serving quite happily. I LIVE for moments like that!! I can’t wait for my daughter to follow suit and actually enjoy food. My husband enjoyed it immensely and  I will say, it is hard to impress him if there is no meat on his plate!


Mushroom & Bacon Pasta_1


Mushroom & Bacon Pasta

Prep Time: 15 minutes

Cook Time: 30 minutes

Total Time: 45 minutes

Yield: 4

Ingredients

  • 12oz Rigatoni
  • 4 Slices Bacon
  • 1 Tbsp Olive Oil
  • 8oz Porcini Mushrooms
  • 1 Onion, chopped
  • 1 Tsp Dried Thyme
  • 2 Cloves Garlic, minced
  • 3/4 Cup Chicken Broth
  • 3 Tbsp Mascarpone
  • 3 Tbsp Fresh Parsley, chopped
  • 6 Tbsp Parmesan Cheese
  • Salt and Pepper

Instructions

  1. Prepare pasta according to package instructions
  2. In a large hot skillet, add bacon and cook until crispy. Remove from skillet and place on a paper towel to absorb oil. Chop bacon into bits
  3. In the same skillet, add olive oil
  4. Add onion, thyme and garlic. Saute for about 3 minutes on medium high heat.
  5. Add mushrooms and cook for about 5 minutes
  6. Add broth and bring to a gentle boil. Add mascarpone and stir to combine
  7. Drain pasta and add to skillet
  8. Toss until combined and coated in the creamy sauce
  9. Transfer to serving plates and sprinkle generously with parmesan

Notes

Adapted from Prevention.com

https://lovelypantry.com/2013/01/mushroom-bacon-pasta/


I guess I cheated and added bacon to this dish. Bacon is the magical ingredient that seems to give (almost) any dish the upper hand. I had a vision and I ran with it. I adapted a Mushroom Pasta recipe and decided to add bacon because I thought it would pair nicely with the mushrooms. I also substituted white wine for chicken broth.


Mushrooms in skillet with chicken broth and mascarpone

Mushrooms in skillet with chicken broth and mascarpone


I’ll be honest, mushrooms are not my favourite food. But in a recipe like this? I will have it and I will enjoy it. I love a good pasta dish. This certainly satisfied any carb cravings I had. I also loved how the mascarpone just melted into the broth and gave it such a creamy sauce-like texture…without the cream! Brilliant!


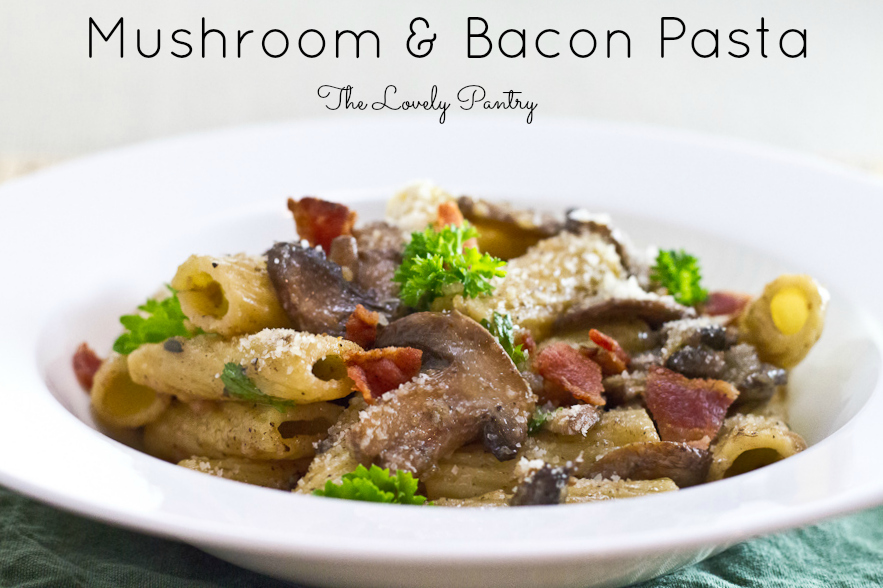
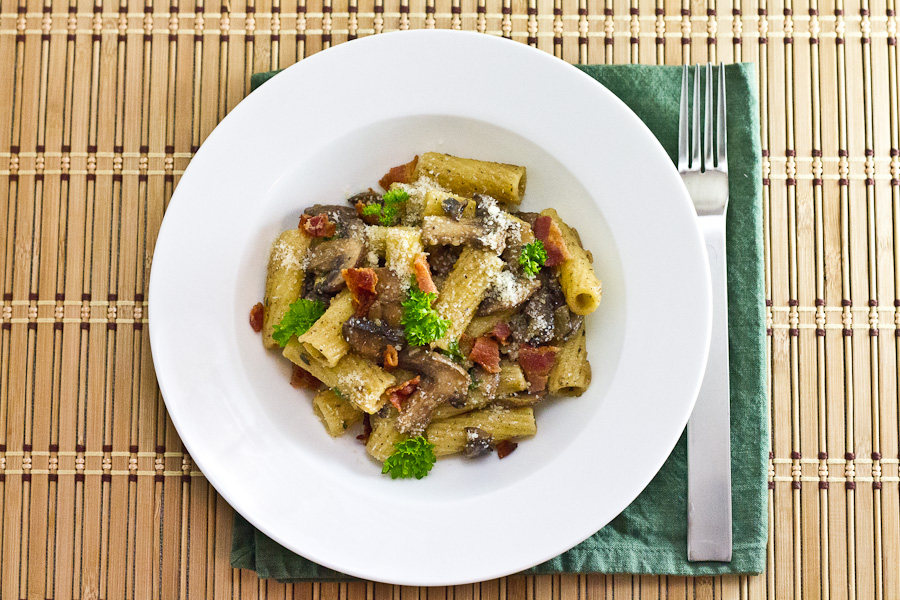
Mushroom and Bacon Pasta

Mushroom and Bacon Pasta


I’m always looking for easy meals that can nourish and satisfy. I believe this is definitely one of them.

read more

Jamaican Hot Chocolate

Jan 22, 2013 by

Brrrrrrr…

Seriously. I am currently in a deep freeze. I know that at this moment in time, in certain parts of Canada, they are experiencing temperatures somewhere around -45C…give or take a few degrees. This post isn’t meant to complain. Really, it’s not. How can I complain when we are only somewhere around -12C? Oh, and that’s the “high”. The low is a frightening -23C. Extreme cold alerts always have me wondering how I can remain indoors until it is at least -5C. I’m “okay” around -5C. Since life has a wonderful way of happening daily, staying indoors isn’t practical. So when it’s really really cold, its time for some tropical flavour to warm me up and bring a smile to my face.

This is a quick post since I’m missing my blanket that is strategically placed in front of the fireplace. It’s probably missing me too. So we will have to be reunited shortly.


Hot Chocolate-3

Jamaican Hot Chocolate


Jamaican Hot Chocolate

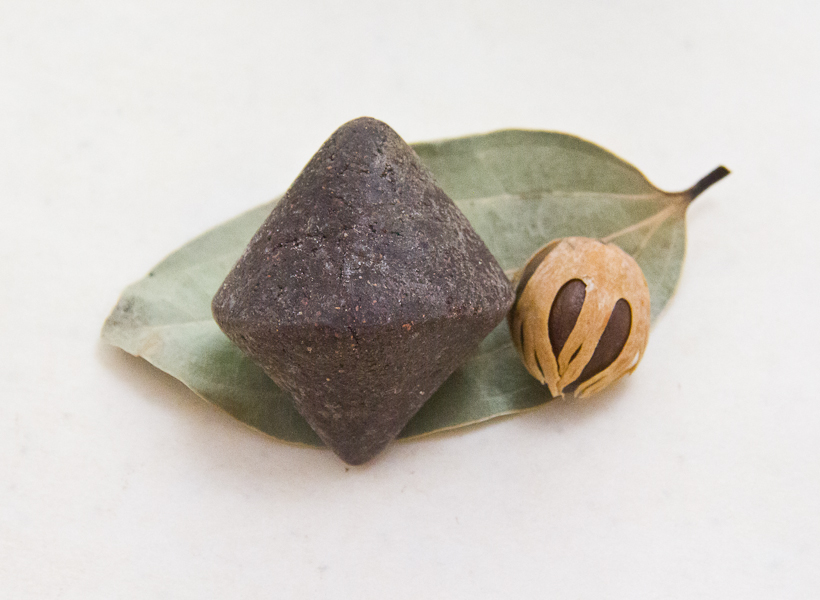
2 oz Jamaican Chocolate (1 chocolate ball), shredded or coarsely chopped

2 Cups Water

1 Cinnamon Leaf

1/8 Tsp Ground Nutmeg

1/2 Tsp Vanilla

1/4 Cup Sweetened Condensed Milk

1/2 Cup Milk (optional)

Instructions

In a medium pot, add water, cinnamon leaf and chocolate and bring to a boil. Reduce heat and allow to simmer for about 20 minutes

Add salt, nutmeg, vanilla, milk and condensed milk. Stir to combine.

Strain and sweeten with a little sugar if needed.

Serve and enjoy hot!

This recipe yields about 3 mugs of “Coco Tea” 


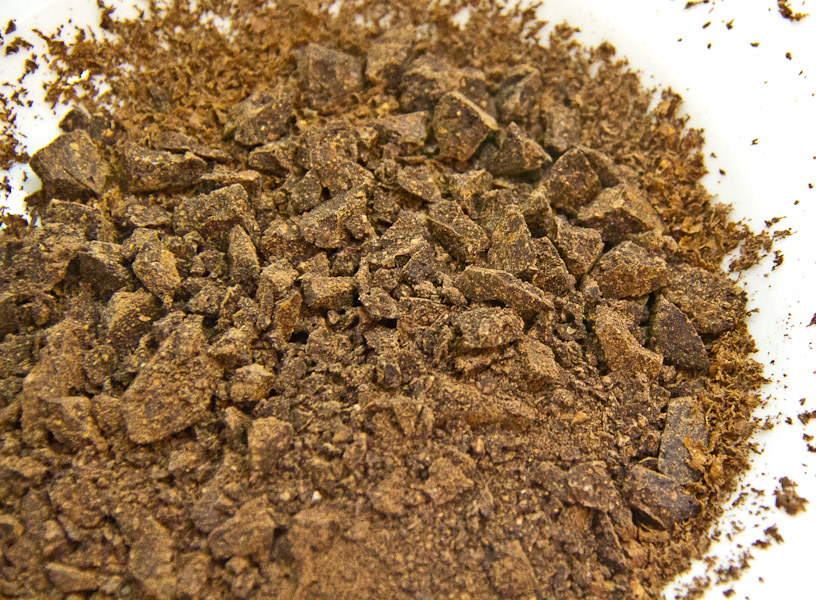
Typically, you grate the chocolate but as you see here, I started but my patience got the better of me. I chose to coarsely chop the chocolate instead. The goal is to break it down so that it cooks faster.


Hot Chocolate-2

Jamaican Chocolate coarsely chopped


This Jamaican beverage is known as Hot Chocolate Tea or simply Coco Tea. It tastes nothing like Swiss Miss or Nestle or whatever else you find at the grocery store. It is quite rustic, and rich. It’s also quite coarse as it does not completely dissolve, so straining is an absolutely necessary step (in my opinion) in order to fully enjoy this beverage without having to clear your throat every few sips.


Hot Chocolate-1

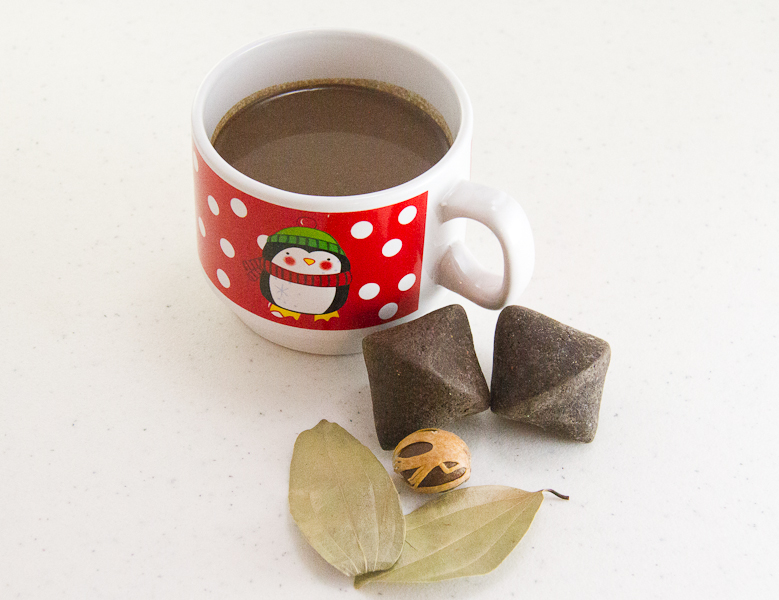
Jamaican Chocolate, Nutmeg and Cinnamon Leaf


Coco Tea is typically a breakfast beverage (especially around Christmas). I remember the BEST Coco Tea I’ve ever had, was at a hotel restaurant in Portland, Jamaica (a beautiful, rustic and fairly untouched part of the island located on the south coast). They refused to tell me their secret ingredient. I suppose that means I will be returning to the hotel to savour their wonderful chocolate bliss. It’s wonderful to have on a Sunday morning with a nice big traditional breakfast. But for me? It keeps me warm and comforted on cold winter nights. I’m glad I have a small stash to last me a little while.

~Lyn

read more

Victoria Sponge Cake With Cream Cheese for #SundaySupper

Jan 20, 2013 by

Welcome to another #SundaySupper! This Week’s theme is all about “Retro Recipes.”  You know, those food memories that immediately take us back in time.  There are some recipes that are tried and true. Some of them we wouldn’t think of making any changes, because it would become something totally different. And then there are some with room for flexibility and adventure. I love a little bit of both in my kitchen. These are the recipes that remind us of our childhood, our grandparents, our parents, or foods that were the norm during a certain era.

Most of the things that I make are either fairly new to me or remind me of home. Until I was about 11 years old, I lived in London, England. I don’t have too many memories of life there but I do recall some of the funny foods that I would eat at school or visiting my british friends or neighbours. When in London, eat what the Londoners eat! Toad In The Hole, Bangers & Mash, Crumpets, and how can I ever forget Fish & Chips. Whenever I had extra spending money, I would stop and buy myself some “chips” wrapped in newspaper, sprinkled with salt and vinegar. I remember how awesome it was to eat it as I walked home from school. These are what I think of when I think of retro. I don’t know of any Brit that didn’t have fish fingers with ketchup as part of their weekly meals. I know exactly where my tea drinking habit began! My Mom and I always enjoy a cup of tea before bed, even now. That’s the one thing I’m never without. It’s always a good time for a cuppa.

In Jamaica there are some recipes that have certainly stood the test of time! Grater Cake, Coconut Drops, Jerk Chicken, Oxtail, Curried Goat, Cornmeal Pudding, Black Cake (also known as Christmas Pudding), Sorrel, Blue Drawers, Stew Peas…the list goes on. But today, I’m going to share with you a recipe that I came across last year around the time of The Diamond Jubilee of Queen Elizabeth II. It’s called Victoria Sponge Cake and it is a British classic.


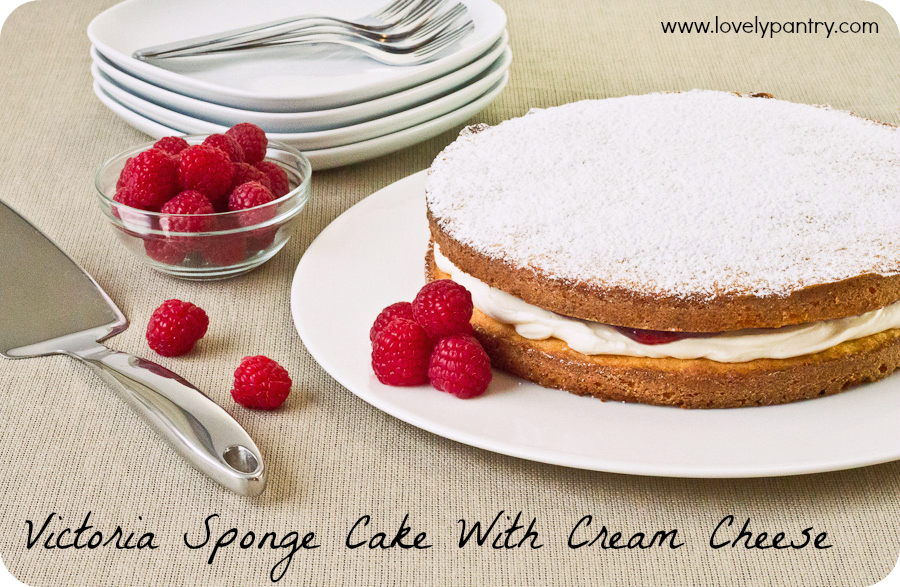
Victoria Sponge Cake With Cream Cheese_1

Victoria Sponge Cake With Cream Cheese for #SundaySupper

Ingredients

  • 1 Stick + 4 Tbsp Unsalted Butter
  • 3/4 Cup Granulated Sugar
  • 3 Eggs at room temperature
  • 1 Tsp Vanilla Extract
  • 1 1/4 Cup All-Purpose Flour, Unbleached
  • 1 Tsp Baking Powder
  • 1/2 Tsp Salt
  • 1/3 Cup Seedless Raspberry Jam
  • Cream Cheese Filling:
  • 1 X 8oz Package Light Cream Cheese, softened
  • 1 Cup Confectioners Sugar
  • 3 Tsp Cream or Milk
  • 1 Tsp Vanilla Extract

Instructions

  1. Preheat oven to 350F
  2. Grease 2 cake pans (I used 9 inch but this recipe needed 8 inch pans)
  3. In a medium bowl, add flour, salt and baking powder
  4. In a large bowl, cream the sugar and butter until fluffy
  5. Add eggs one at a time, mixing well in between each addition
  6. Add vanilla and mix until fully incorporated
  7. Gently fold in the flour until combined and smooth
  8. Divide batter evenly between pans and level off the batter with an offset spatula
  9. Bake for about 25 minutes until golden and springy to the touch. Do a toothpick test to ensure cake is cooked through
  10. Allow to cool in pans for about 10 minutes then transfer to wire racks to cool completely
  11. For the filling, mix the cream cheese, confectioners sugar, cream and vanilla until silky and light
  12. Transfer one of the cakes into your serving platter. Spread the cream cheese evenly to cover most of the surface using an offset spatula or the back of a spoon
  13. Spread the raspberry jam on top of the cream cheese as close to the edge as you would like
  14. Place the second cake on top to complete the "sandwich". Sprinkle with sifted confectioners sugar
  15. Serve and enjoy!
https://lovelypantry.com/2013/01/victoria-sponge-cake-with-cream-cheese-frosting-for-sundaysupper/

Victoria Sponge Cake With Cream Cheese Collage2


The first time I made this cake, it was a bit lop-sided so I was happy to try it again. This time around, it came out much better but I think I will do it again to see how else I can get my cake to be lighter and fluffier. There are so many variations of this recipe available. The recipe that I used came from a book called Illustrated Step By Step Baking.I opted to use something different from the suggested butter cream filling. I wanted to changed things up just a little bit so I used a simple cream cheese filling instead. I need to get smaller cake pans. My smallest is 9 inches and I needed 8 inch pans. I think I need to go shopping, don’t you agree?


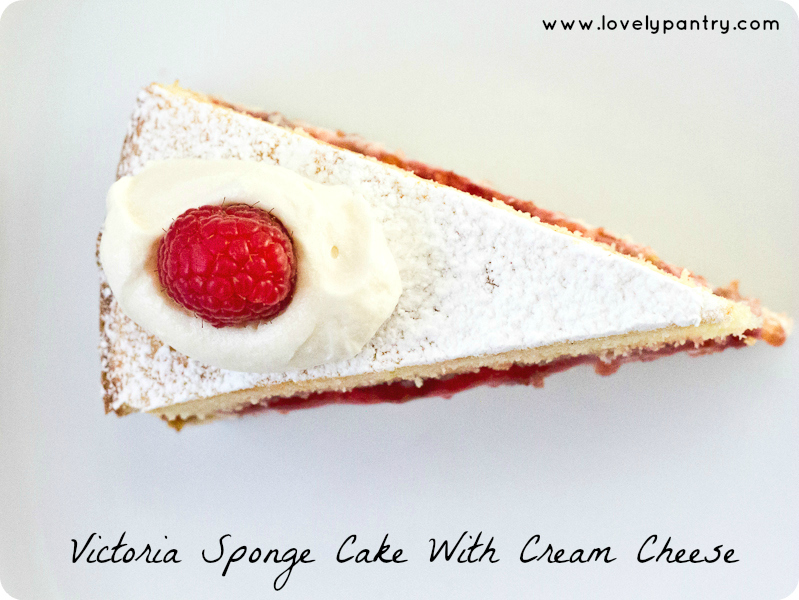
Victoria Sponge Cake With Cream Cheese Slice-1


Join us Around the Family Table this Sunday at 7pm Eastern Time and share your favorite Retro Food Memory with us!

The Sunday Supper family have so many wonderful retro and retro inspired dishes to share with you. Be sure to check out the recipes listed below.

Sunday Supper Retro Appetizers:

Sunday Supper Retro Salads:

Sunday Supper Retro Breads and Sandwiches:

SundaySupper Main Dishes:

Sunday Supper Retro Sides and Veggies:

Sunday Supper Retro Desserts and Cocktails:


Join the #SundaySupper conversation on twitter each Sunday. We tweet throughout the day and share recipes from all over the world. Our weekly chat starts at 7:00 pm ET and you do not want to miss out on the fun.

Follow the#SundaySupper hashtag and remember to include it in your tweets to join in the chat.

Check out our #SundaySupper Pinterest board for more fabulous recipes and food photos.

Would you like to join the Sunday Supper Movement? It’s easy. You can sign up by clicking here → Sunday Supper Movement.


Related Posts Plugin for WordPress, Blogger... read more
Post Popularity Graphing by Knowledge Ring