Roast Chicken With Orange Gremolata #WeekdaySupper

Feb 27, 2013 by

I love being in the kitchen. A while back, cooking used to be a leisurely hobby that I loved to do from the desire to nurture my family. On occasion, I will have the time to prepare wonderful meals that keep me in the kitchen and on my feet for a few hours. Being a stay at home Mother to my children allows me to support my family in a way that only I can, at the moment. As the kids get older and become more active and busy with life outside of the house, my cooking time gets cut down. Soon, I will have to start focusing on how I will prepare meals when I return to the working world. It’s okay if I cook on a Friday night now, but at some point – I’m pretty sure that will become history 🙂 I will need someone to cook for ME.
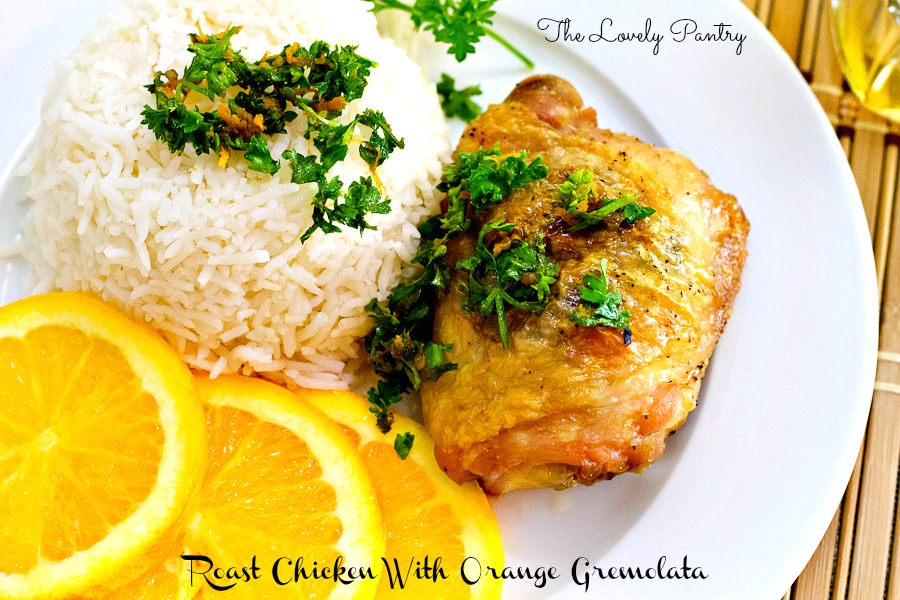
#SundaySupper is a movement that encourages families to eat together at least once a week, typically on a Sunday but this could be any day of the week based on a families scheduling. As an extension of #SundaySupper, we are pleased to share with you #WeekdaySupper! We will be sharing quick and easy meals every day of the week. How awesome is that? Today I am sharing with you a #WeekdaySupper that is super easy and flavourful with wonderful fresh ingredients ~ Roast Chicken with Orange Gremolata. I found this lovely recipe in the Weight Watchers New Complete Cookbook. I totally forgot I had it.

What I loved about this recipe the most, is that it used fresh ingredients to season and infuse flavour into the chicken. I didn’t change the ingredients, I just changed how I prepared it. The instructions required me to “grill” and turn each piece every 10 minutes until it was cooked through. Well, this is a mid-week supper. I could be doing something else while the chicken is in the oven. So, I roasted the chicken! Its my favourite way to prepare chicken these days anyhow.


Chicken with Orange Gremolata_2


WeekdaySupper

Roast Chicken With Orange Gremolata #WeekdaySupper

Prep Time: 20 minutes

Cook Time: 30 minutes

This recipe was slightly adapted from Weight Watchers, The New Complete Cookbook.

Ingredients

  • 8 Chicken Thighs, skin on
  • 1/2 Cup Chopped Fresh Parsley
  • Grated zest of an Orange
  • 3 Garlic Cloves, minced
  • 1 Tbsp Olive Oil + some to brush over chicken
  • 1 Tsp Cumin
  • 1 Tsp Salt
  • 1 Tsp Black Pepper
  • Additional Salt & Pepper

Instructions

  1. Preheat oven to 375C (Roast)
  2. Prepare Gremolata: In a small bowl, mix parsley, garlic, oil, parsley, cumin, salt and pepper. Reserve 3 tbsp for garnish
  3. Lightly brush chicken with olive oil. Season chicken thighs with salt and pepper
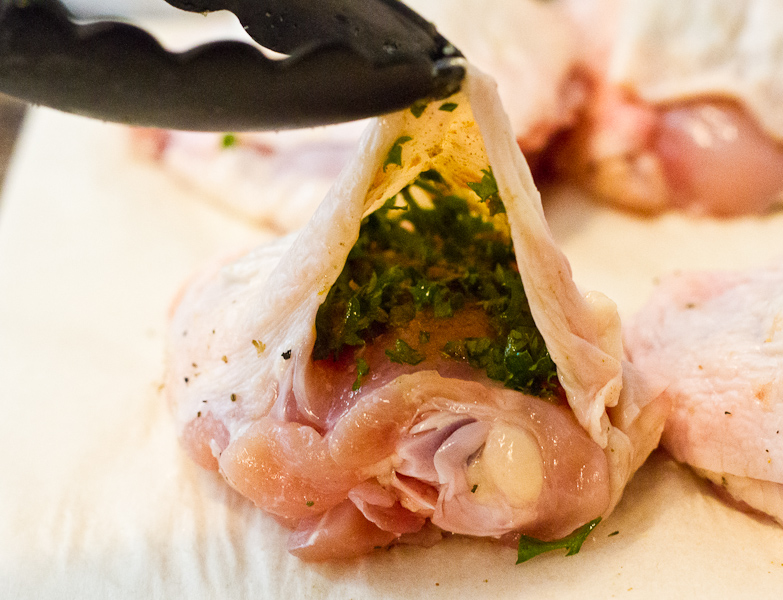
  4. Place about a teaspoon of the Gremolata under the skin of each chicken thigh.
  5. Roast chicken for about 30-40 minutes or until cooked through
  6. Serve with rice and garnish with fresh gremolata
https://lovelypantry.com/2013/02/roast-chicken-with-orange-gremolata-weekdaysupper/


The first question that came to mind when I saw this dish was “What is Gremolata?”. Gremolata is an Italian Condiment that typically consists of Parsley, Lemon Zest, Garlic and Oil. There are many variations, some substituting the parsley for herbs like rosemary, mint, sage or cilantro. Additions may include capers and chopped nuts. Gremolata can be served with pasta, most meats as well as fish. Lots of possibilities with this one. I’m sure I will be trying out some other recipes using Gremolata.


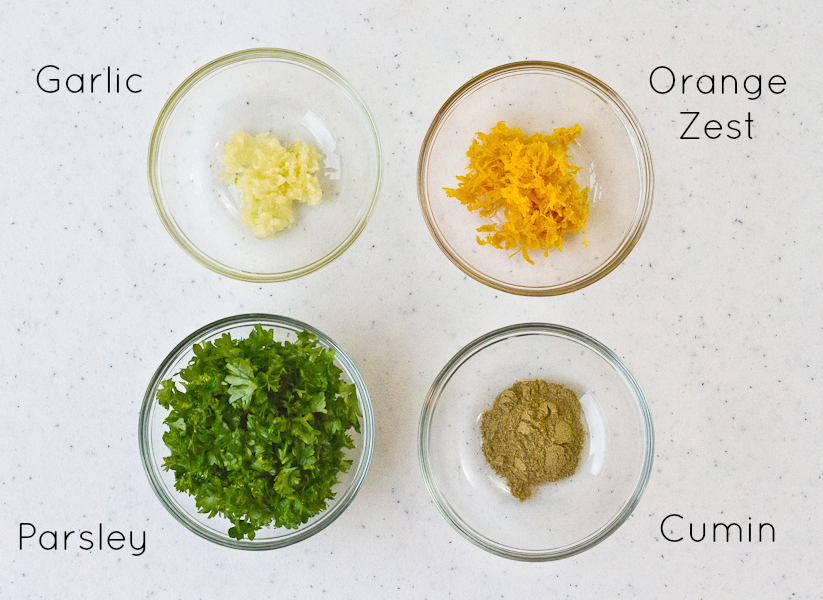
Orange Gremolata Ingredients


I was surprised how quickly this came together. So fresh and fragrant.


Orange Gremolata - ingredients

Orange Gremolata


A teaspoon of Gremolata goes a long way. I spread it evenly under the chicken skin.


Chicken with Orange Gremolata-3

Roast Chicken with Orange Gremolata


Dinner is served in no time. My husband found this meal to be different from what we normally have so I got a nod for choosing this recipe. I hope you enjoy it as much as we did.


Chicken with Orange Gremolata-4

Roast Chicken With Orange Gremolata


Dinner during the week can be easy, flavourful and healthy too. 😉 Enjoy!


This Week’s  #WeekdaySupper Recipes:

read more

Ital Carrot and Sweet Potato Soup for #SundaySupper

Feb 24, 2013 by

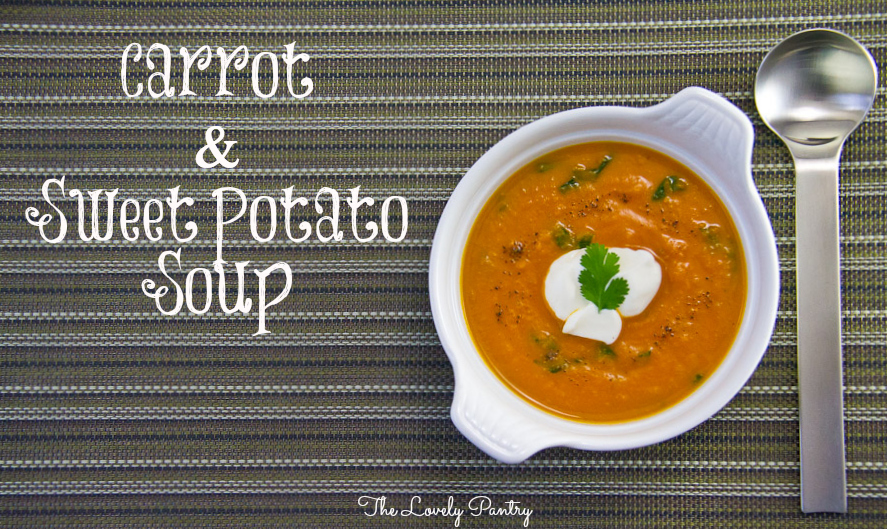
Winter is wonderful for many reasons. Sure it is cold, but you get to indulge just a little and have foods that you probably wouldn’t have in warmer weather. I love a good hearty thick soup with texture and things to chew on. But I’m not opposed to a rich flavourful broth filled with goodness. This our Souper #SundaySupper edition. You guessed it ~ its all about soups. We will be sharing soups that can be loved year round. Our lovely host this week is Pam from The Meltaways. Whatever your fancy, we will have a soup for your liking.

I am sharing a soup from a cookbook by Levi Roots called Caribbean Food Made Easy. I adore the soups in this book. The last one I made was Black Bean Soup with Hot Roast Pepper Cream and it was wonderfully delicious. This recipe, Ital Carrot and Sweet Potato Soup, is just as wonderful with a bright colour, rich in beta carotene, fibre and other nutrients. I chose to omit the scotch bonnet pepper this time though. I really wanted the kids to try it 🙂 A little heat will bring this soup to the next level.

 Ital Carrot and Sweet Potato Soup1


Oh, and for those who are unfamiliar with the term “Ital” it is a term mostly used by Rastafarians and means pure and natural (pertaining to food and lifestyle). Ital is a derivative of the word Vital.  Ital Food, is food that is produced from the earth. Ideally, this food is grown without pesticides or as we say in North America, Organic. But aside from that, it is basically a vegetarian way of life. Not all the ingredients in this recipe were organic, but I feel really good about it regardless 🙂


Ital2

Ital
Image created by Lyn of The Lovely Pantry


(I could totally live like this if only I didn’t like a little thing called bacon.)


Ital Carrot and Sweet Potato Soup for #SundaySupper

Prep Time: 10 minutes

Cook Time: 40 minutes

Total Time: 50 minutes

Yield: 4

Ingredients

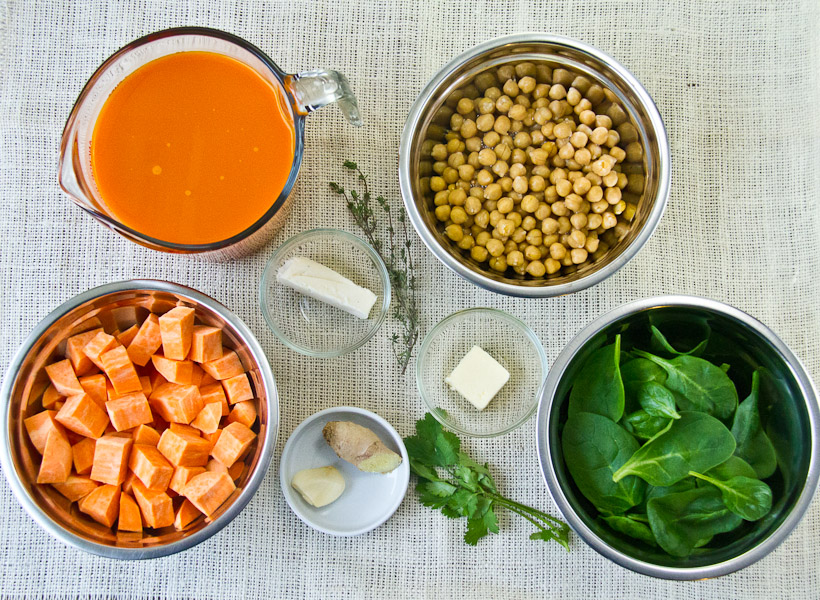
  • 4 Cups Pure Carrot Juice
  • 2 Sweet Potatoes, washed, peeled and cut into chunks
  • 1 540ml Can Salt Free Chickpeas, drained
  • 4 cm Chunk of creamed coconut (I used Grace brand Cream of Coconut)
  • 1 Inch Fresh Ginger, peeled and finely chopped
  • 1 Clove Garlic, finely minced
  • Leaves from 2 Springs Fresh Thyme (about a tsp)
  • 2 Cups Baby Spinach, washed and dried (cut into thin strips just before adding to the soup)
  • 1 Tbsp Unsalted Butter (optional)
  • A pinch of Black Pepper
  • Fat Free Sour Cream to serve (optional)

Instructions

  1. In a medium pot, bring carrot juice to a gentle boil. Remove any foam that develops with a spoon and discard.
  2. Add sweet potatoes, chickpeas, creamed coconut, ginger, garlic and thyme.
  3. Cover and allow to simmer for about 30 minutes
  4. Check to see that the sweet potato is soft enough to mash.
  5. Using an immersion blender (or potato masher) blend to your desired consistency
  6. Stir to combine. The soup will be thick. If it is too thick, adjust consistency to your liking by adding more carrot juice
  7. Cover and simmer for about 2 minutes
  8. Shred the spinach
  9. Stir the soup and add the spinach. Cover and simmer for about 5 more minutes.
  10. Add butter and stir before serving
  11. Season with black pepper
  12. Garnish with sour cream (optional)

Notes

Adapted from Caribbean Food Made Easy

https://lovelypantry.com/2013/02/ital-carrot-and-sweet-potato-soup-for-sundaysupper/


I used packaged cream of coconut, but if I were in the tropics I would (or perhaps get someone else to) crack open a coconut and get the milk from it!


Ital Carrot and Sweet Potato Soup-1

Ingredients to make Ital Carrot and Sweet Potato Soup


Not often do you hear of a broth being replaced by the juice of a vegetable. I loved that the carrot juice was the base of this soup. Thankfully Organic Carrot Juice is available for purchase. This soup was ready in under an hour. Imagine adding juicing time to that plus clean-up. This way is much better. You may have noticed that salt was not added to this soup. I was tempted to add it but I found that the flavour was great without it! Truly Ital!


Ital Carrot & Sweet Potato Prep

Ital Carrot and Sweet Potato Soup
Puree using an immersion blender to your desired texture and consistency. Add spinach after blending.


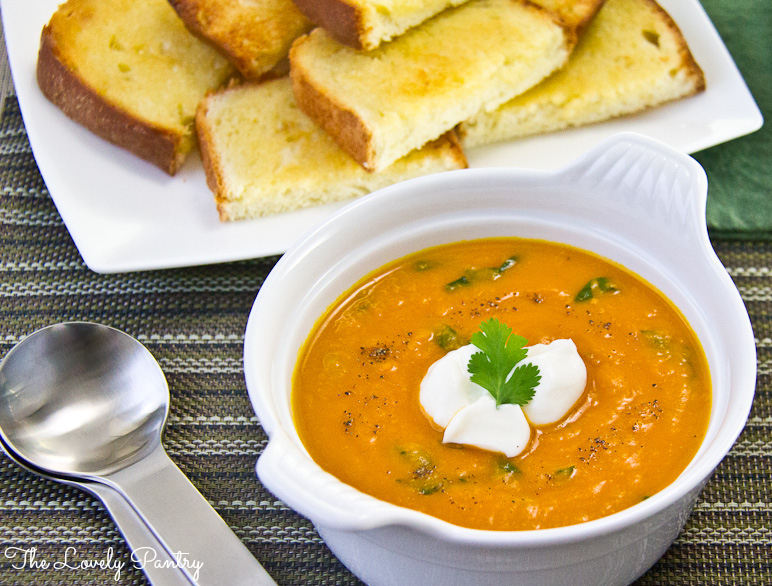
I chose to serve this wonderful soup with some homemade bread. I toasted it and added butter while the bread was still hot. Pure bliss! I’ll be sharing the recipe for this very, very special bread soon.


Ital Carrot and Sweet Potato Soup-7a

Ital Carrot and Sweet Potato Soup


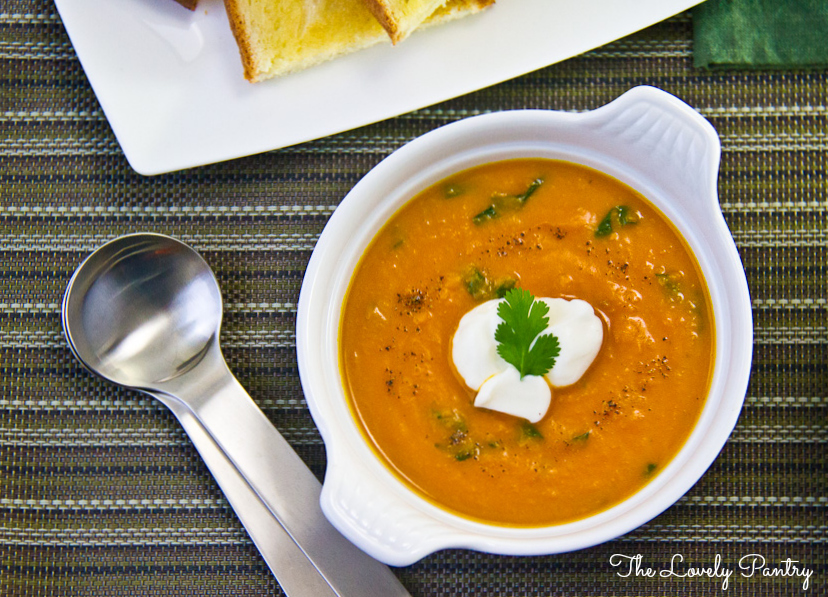
Although the sour cream was optional, I enjoyed it so much with this soup!! It was perfect on its own, but the tangy flavour with the natural sweetness of the soup was a great combination. This soup is hubby approved! He loved it and also loved that it was Ital 🙂


Ital Carrot and Sweet Potato Soup-8a

Ital Carrot and Sweet Potato Soup


The #SundaySupper team have some amazing soups to share with you. Please take your time and find inspiration from the recipe links below:

Chicken (or other poultry) Soups


Beef Soups


Pork (or Sausage) Soups


Seafood Soups


Vegetables Soups


Chilled Soups


***

Join the #SundaySupper conversation on twitter each Sunday. We tweet throughout the day and share recipes from all over the world.

Our weekly chat starts at 7:00 pm ET and you do not want to miss out on the fun.

Follow the #SundaySupper hash tag and remember to include it in your tweets to join in the chat.

Check out our #SundaySupper Pinterest board for more fabulous recipes and food photos.

Join us Around the Family Table this Sunday at 7pm Eastern Time and share your favorite healthy recipes with us!


read more

Cardamom Bread {No Knead} #TwelveLoaves

Feb 21, 2013 by

I realized that after the initial excitement, and few failures ( just that one time when I didn’t activate my yeast and my dough didn’t rise) in bread making thus far, the entire process has become quite relaxing. Therapeutic, if you will. The process of gathering the ingredients, weighing, measuring, proofing yeast… I could get used to this. With my new-found appreciation for bread making, I have found a few groups dedicated to the love and art of baking bread. As often as I can, I will be linking up my bread recipes and seeing what other food bloggers are creating in their ovens. Making bread is truly a beautiful thing.

Todays bread was quite interesting. We ate it happily. But it had a taste that I was not familiar with. I’ve had cardamom in recipes before, but this was just different. The process was easy since I’ve been using the Kindle eBook called Easy Fabulous Bread Making. Total success thus far. I’m sure if I made this bread again and had people try it, they would be clouded with mystery as to whats in it 🙂


Cardamom Bread


Cardamom Bread {No Knead} #TwelveLoaves

Prep Time: 30 minutes

Cook Time: 40 minutes

Ingredients

  • 1 Egg
  • 1/2 Cup Milk
  • 1/2 Cup Unsweetened Apple Sauce
  • 1/4 Cup Honey
  • 1 Tsp Salt
  • 1 1/2 Tsp ACtive Dry Yeast
  • 1 Tsp Cardamom
  • 2 1/2 Cups Flour

Instructions

  1. Proof your yeast
  2. In a large bowl, combine dry ingredients: flour, cardamom, and salt
  3. In a medium bowl, combine wet ingredients: milk, egg, apple sauce and honey
  4. Add the proofed yeast into the wet ingredients.
  5. Using a spoon or mixer, thoroughly combine the wet ingredients into the dry until incorporated
  6. Refrigerate in a bowl for 8 hours up to 5 days
  7. ***When ready to bake***
  8. Preheat oven to 350F
  9. On a well floured surface, place dough and fold under a few times. Shape into a loaf and place in a well oiled loaf pan. Cover and allow to rise for about 30 minutes or so.
  10. Bake for 40 minutes
  11. Allow to rest in the pan for 30 minutes and then transfer to a cooling rack. Cool completely before slicing

Notes

From The Kindle eBook "Easy Fabulous Bread Making. A collection of quick, no knead, homemade bread recipes"

https://lovelypantry.com/2013/02/cardamom-bread-no-knead-twelveloaves/


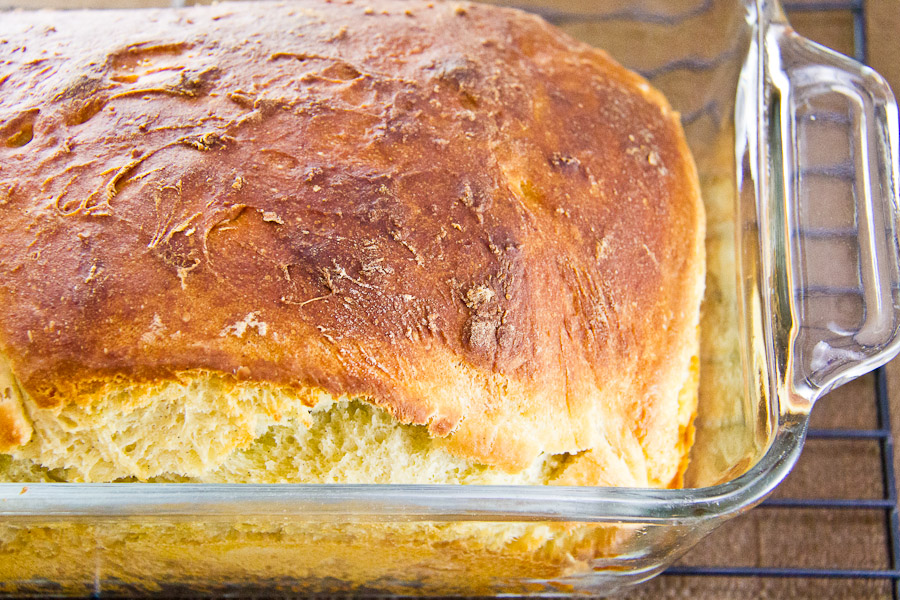
Working with this dough was tricky. The dough was quite sticky and I needed to have a floured surface in order to be able to manipulate it and form a loaf. It got quite messy in the process but its all a part of the deal, isn’t it. I deviated from the instructions just a bit so that I could really get my hands in there. I think I need an apron. And perhaps a bakers hat too.


Cardamom Bread Prep


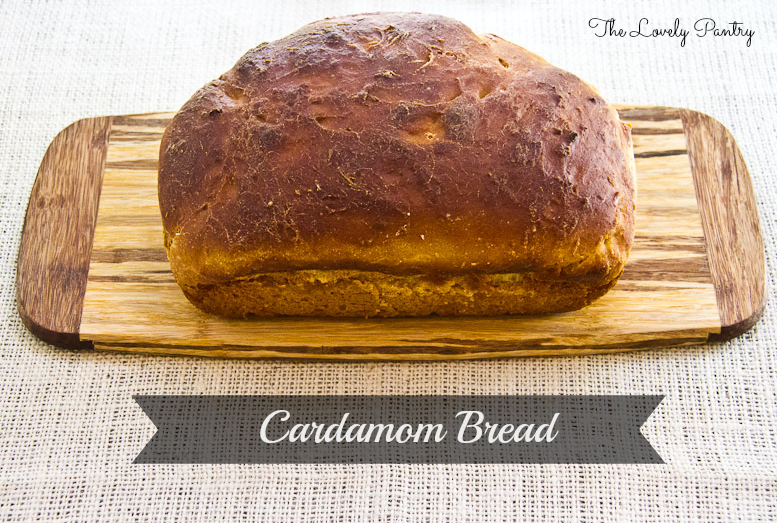
I was eager to get this bread out of the oven. I had to know what this bread tasted like. The smell was interesting enough – I wanted a slice!


Cardamom Bread-7

Cardamom Bread, fresh out the oven


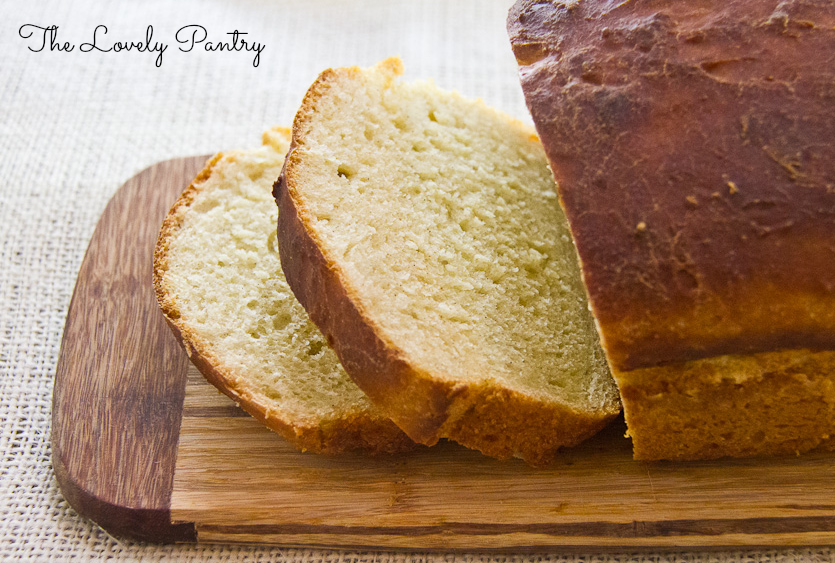
After the sticky dough, and the intense curiosity – the texture of this bread was awesome – soft and light. The aroma… like something I’ve never tried. Excellent with butter.


Cardamom Bread2

Cardamom Bread


This is my contribution to the February 2013 #TwelveLoaves challenge. Lora of Cake Duchess created this awesome group where the participants bake according to the theme for the month. This month’s theme is open, so members can bake whatever they like. What an awesome adventure. And what a great way to get baking! I can’t wait to go proof some yeast and bake something.


Would you like to join the #TwelveLoaves group? Here’s how!

1. When you post your Twelve Loaves bread on your blog, make sure that you mention the Twelve Loaves challenge in your blog post; this helps us to get more members as well as share everyone’s posts.
Please make sure that your Bread is inspired by the theme!
2. Please link your post to the linky tool at the bottom of my blog. It must be a bread baked to the Twelve Loaves theme. 
3. Have your Twelve Loaves bread that you baked this February, 2013 posted on your blog by February 28, 2013.


read more

Herb Roasted Salmon with Steamed Cabbage & Peas for #SundaySupper

Feb 17, 2013 by

We’ve been having so much for with our #SundaySupper  posts. We have delighted in so many wonderful themes since the start of the year. Some of which were indulgent and totally enjoyable. We are thinking about our waistline this week. This is the “Skinny” edition of #SundaySupper! Our wonderful host is Sunithi from Sue’s Nutrition Buzz. Sue is a Registered Dietician and knows all about good, healthy food! You may remember I made a salad that Sunithi made from a past #SundaySupper event to celebrate the first #SundaySupper anniversary. As always, I’m excited to see the line up. Perhaps feasting the recipes with my eyes will make my waistline appear smaller. We’ll see. 🙂

For today’s recipe, I didn’t use a book or online source. I drew inspiration from a breakfast dish my Dad used to make for me. Some Saturday mornings, he would make saltfish and cabbage with boiled dumplings and green banana. Totally delicious, satisfying and good for you. But since I’m doing a skinny dish, I decided to go easy on the carbs ~ for today. As for the salmon, I just used some simple ingredients and made a quick marinade. I’ve learned that salmon doesn’t need a lot of ingredients to make it taste good. A few herbs did the trick.


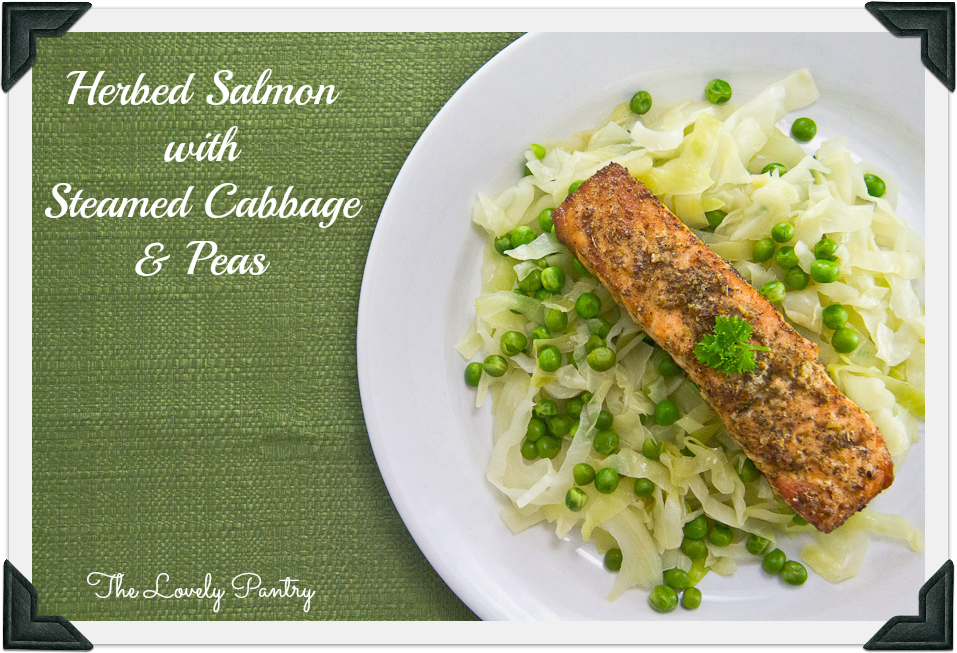
Herb Roasted Salmon Steamed Cabbage & Peas


Herb Roasted Salmon with Steamed Cabbage & Peas

Ingredients

  • 2 Salmon Steaks
  • 4 Tsp Olive Oil
  • 1 Tsp Dried Oregano
  • 1/2 Tsp Dried Thyme
  • 1/4 Tsp Salt
  • 1/4 Tsp Pepper
  • 1 Garlic clove, minced
  • ***
  • 1/2 Green Cabbage, core removed and cut into strips about half an inch thick
  • 1/2 Medium Onion, thinly sliced
  • 1 Tbsp Olive Oil
  • 1 Tbsp Butter
  • 1/4 Cup Unsalted Chicken Broth
  • 1 Cups Sweet Peas (I used frozen)
  • Salt & Pepper

Instructions

  1. Preheat oven to 425
  2. In a small bowl, add olive oil, oregano, thyme, salt, pepper and garlic
  3. Coat the salmon with the herb mixture
  4. Place salmon in an oven proof pan (or baking sheet) lined with foil
  5. Roast for 20 minutes or until cooked through
  6. ***
  7. In a large skillet, heat olive oil and butter. Mix to combine.
  8. Add onion and saute until softened, about 5 minutes
  9. Add the cabbage strips, a handful at a time
  10. Sprinkle a pinch of salt and pepper to taste
  11. Add broth and cover for about 10 minutes
  12. Toss the cabbage to ensure the top gets a chance to soften
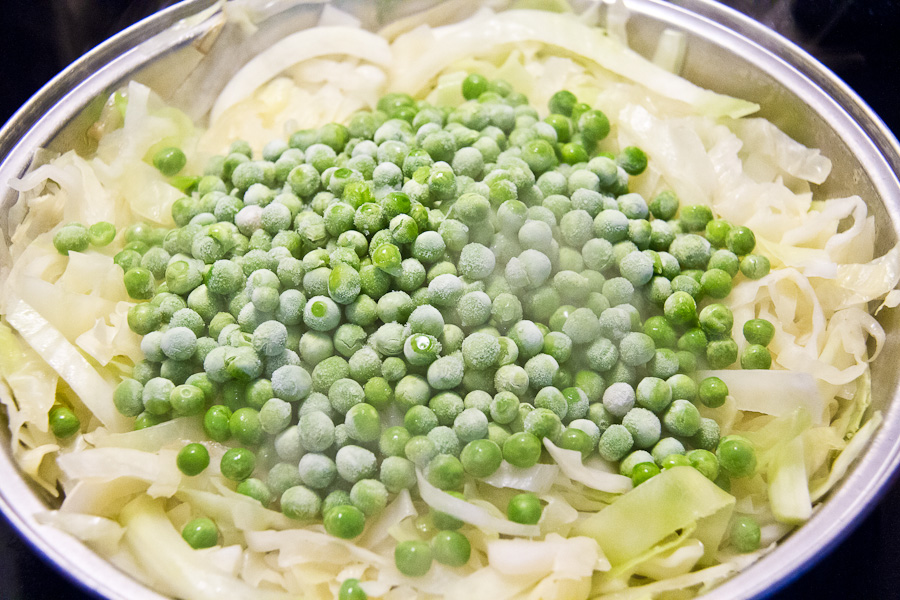
  13. Add peas to the centre of the skillet on top of the cabbage
  14. Cover for about 5 minutes, then stir to get the peas evenly distributed
  15. Add additional broth if needed/desired
  16. When cabbage is softened and peas warmed through, serve with salmon
https://lovelypantry.com/2013/02/herb-roasted-salmon-with-steamed-cabbage-peas-for-sundaysupper/


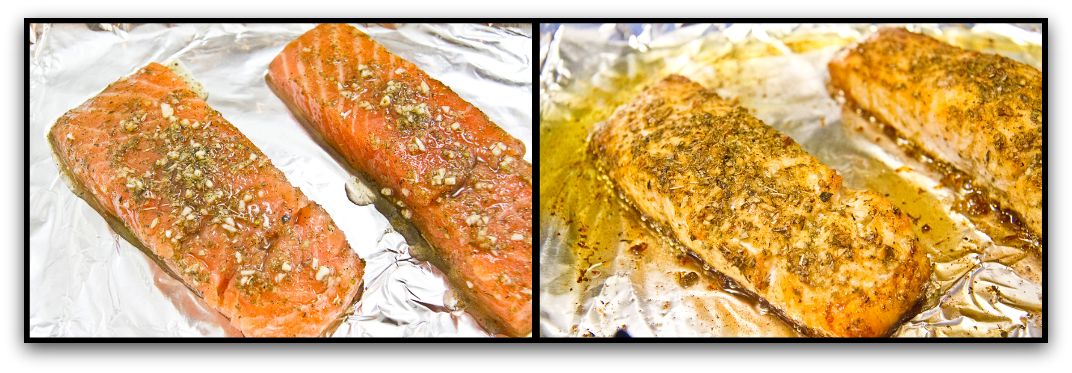
I absolutely adore salmon. Roasting it is so easy and wonderful. I like mine well done with just a little crispiness at the edges. Salmon is one of the best sources of Omega-3 Fatty Acids – a perfect brain food! It is also an excellent source of protein. Salmon has a wonderful flavour that is quite distinct. It can be prepared in so many ways. I’ve steamed it in parchment, baked it, pan seared it and of course, I’ve roasted it too.


Herb Roasted Salmon

Herb Roasted Salmon


When it comes to cabbage, I will admit that I do not have it enough. It is awesome if you are trying to lose or maintain weight. Its low in calories plus it is packed with nutrients! I used a whole head of cabbage for this dish, which I realized afterwards that I didn’t need that much. Half will do. I made the appropriate adjustments in the recipe.

I’ve always loved peas. It wasn’t my intention to add the peas but I bought a few bags of organic frozen peas on sale recently, so I figured I should use it up! If I have to buy preserved vegetables, I prefer the frozen kind. Green peas are rich in vitamins and aid in the metabolism of fats, carbs and protein. I think it’s a great tasting veggie and pairs wonderfully with the cabbage.


Steamed Cabbage with Green Peas

Steamed Cabbage with Green Peas


With a few simple ingredients, you can make a healthy, figure friendly meal in no time! I absolutely enjoyed this dish. In fact, I think I feel skinny already 😉


Herb Roasted Salmon Steamed Cabbage & Peas

Herb Roasted Salmon Steamed Cabbage & Peas


Be sure to check out the other “skinny” recipes being shared by the #SundaySupper team!

Sizzling Skinny Appetizers & Soups

 Healthy Skinny Mains & Sides

Guilt Free Skinny Desserts & Snacks

Wine Pairing Recommendations for Skinny Sunday Supper by ENOFYLZ Wine Blog

***

Join the #SundaySupper conversation on twitter each Sunday. We tweet throughout the day and share recipes from all over the world. This week we will be sharing out special skinnified recipes!

Our weekly chat starts at 7:00 pm ET and you do not want to miss out on the fun.

Follow the#SundaySupper hash tag and remember to include it in your tweets to join in the chat.

Check out our #SundaySupper Pinterest board for more fabulous recipes and food photos.

Join us Around the Family Table this Sunday at 7pm Eastern Time and share your favorite healthy recipes with us!

read more

Related Posts

Share This

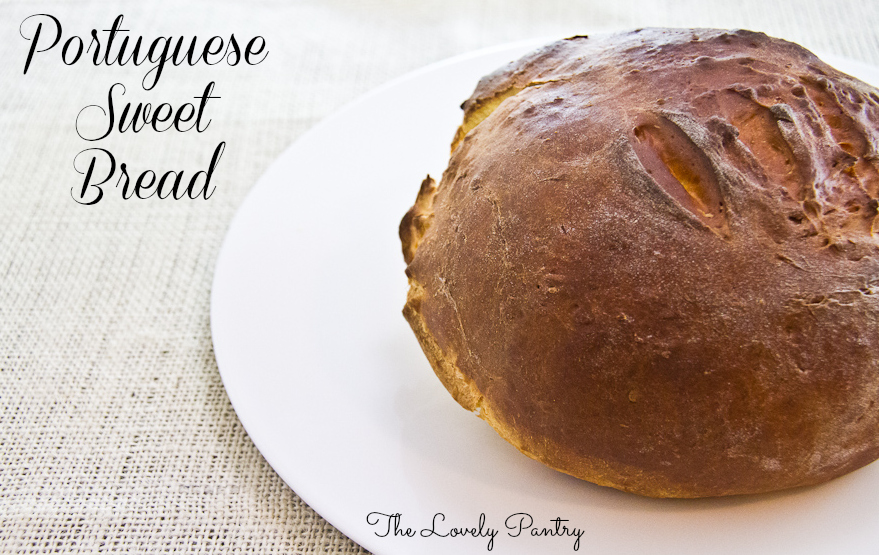
Portuguese Sweet Bread {No Knead}

Feb 13, 2013 by

I think I’ve been converted. As I told both my Brother and my Best Friend…we will never go hungry – Lyn knows how to make BREAD! Why is it that I did not take the plunge sooner? Every bread recipe that I see now, I take a second glance to see if its one that I can do. My husband has even started to request bread with specific ingredients. Well, ‘scuse me Mister! When did I become the bread lady? Ok fine…*taking notes* He knows I’ll try 🙂

I am a true lover of bread. Give me bread and butter and I’ll be okay. I grew up in a bread household. If there was anything that we always had – it was bread. And for that, I’m thankful. I’m also thankful for the Kindle book that I got from Amazon with all these wonderful bread recipes. Its called Easy Fabulous Bread Making. A Collection of quick, no knead, homemade bread recipes. I feel that it has helped me jump right into bread making, giving me the confidence as a beginner to make fresh bread at home! I like the technique, so when I’m good with this, I can move on providing that my wrists can take the pressure. Bring on the BREAD!

Today I’m sharing a bread that we fell in love with. The texture, the flavour – it was lovely. I forgive myself for the really thick slice that I cut for a late night snack. Portuguese Sweet Bread – I heart you!


Portuguese Sweet Bread


Portugese Sweet Bread {No Knead}

Ingredients

  • 1 Cup Milk (I used 2%)
  • 1 Egg
  • 2 Tbsp Unsalted Butter, Softened
  • 1/3 Cup Sugar
  • 1 Tsp Salt
  • 3 Cups All Purpose Flour, Unbleached
  • 1 Tsp Yeast (Active Dry)

Instructions

  1. Proof your yeast
  2. In a large bowl, mix butter, sugar and eggs until combined.
  3. Add milk, then mix.
  4. Add activated yeast mixture. Mix to combine.
  5. Gradually combine flour and salt until fully incorporated
  6. Transfer to a large bowl and cover loosely with saran wrap
  7. Store in the refrigerator for at least 8 hours up to 5 days
  8. When ready to bake
  9. Preheat oven to 375
  10. Remove from fridge and place on a well floured surface. The dough will be sticky.
  11. With well floured hands, stretch ends underneath a few times to create a boule. Place the boule seam side down on a well oiled baking sheet. Cover for about 30 minutes.
  12. Bake for 30-35 minutes
  13. Allow to cool for about 10 minutes before transferring to a cooling rack
  14. Allow to cool for 30 minutes before cutting
https://lovelypantry.com/2013/02/portuguese-sweet-bread-no-knead/


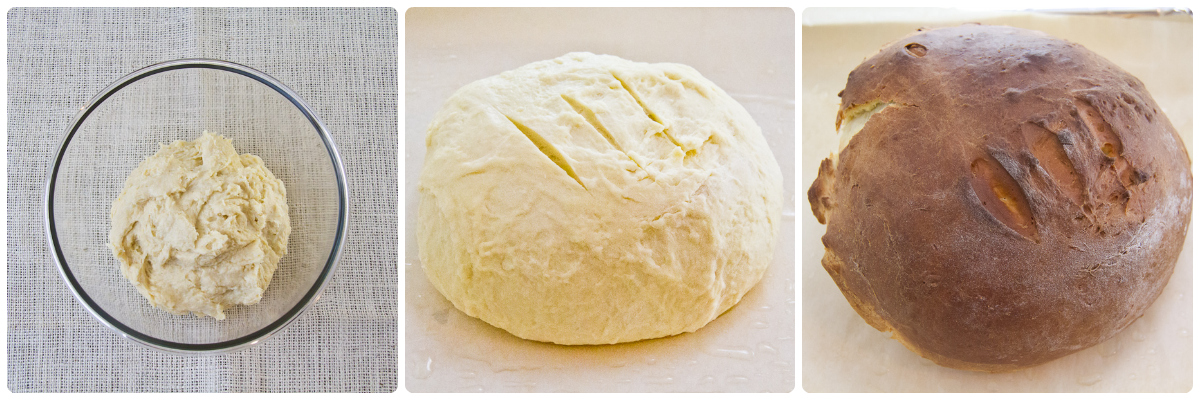
This bread seemed easy enough to just mix by spoon. But it was a breeze using my standing mixer. This dough takes no time to come together.


Portuguese Sweet Bread Collage


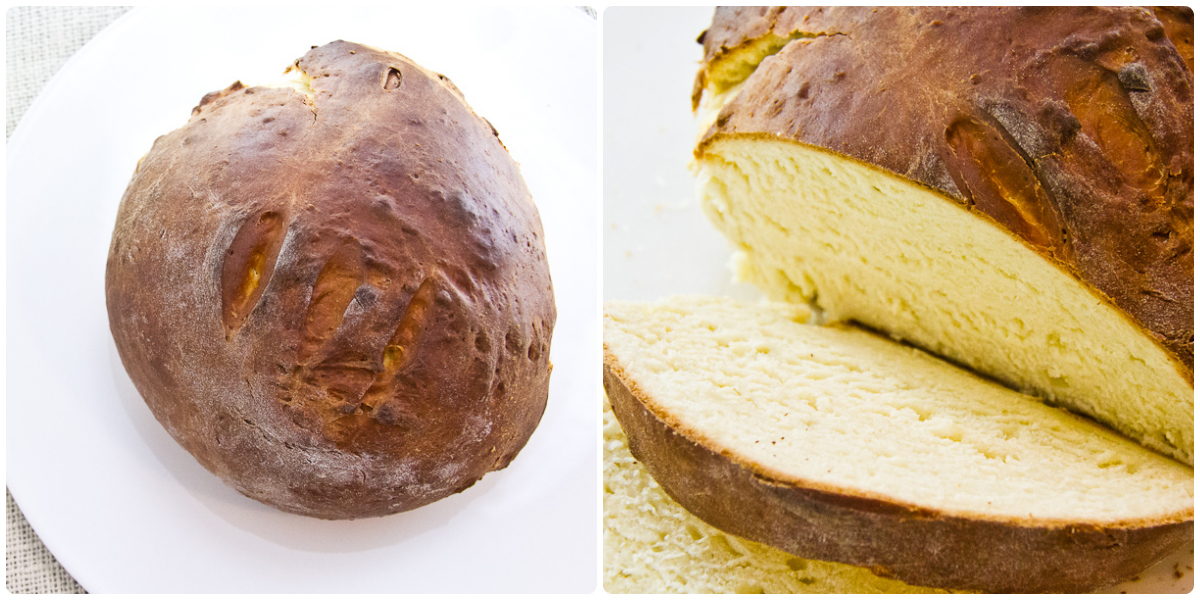
The exterior is crusty but not hard. The bread itself – soft, chewy, slightly sweet and an absolute delight to the palate. Perfect with butter or cream cheese.


Portuguese Sweet Bread Sliced


I love that I just popped a slice in the toaster and topped it with cheesy scrambled eggs. Breakfast has never been so satisfying. One centre slice goes a long way!


Toasted Portuguese Sweet Bread, Scrambled Eggs with Cheese, Bacon

Toasted Portuguese Sweet Bread, Scrambled Eggs with Cheese, Bacon


Funny how bacon seems to be making an appearance quite often these days…


read more

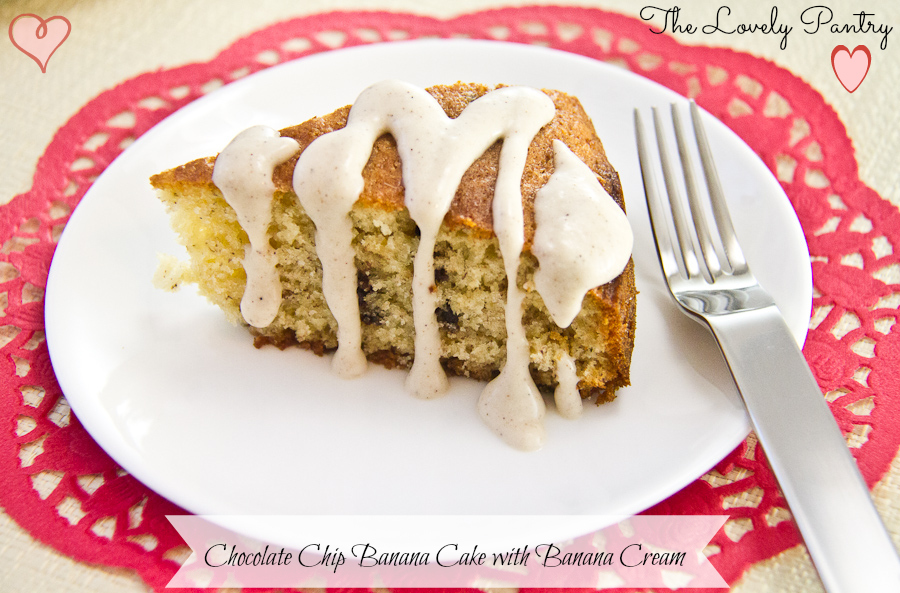
Chocolate Chip Banana Cake with Banana Cream for #SundaySupper

Feb 10, 2013 by

Welcome to the Valentine’s edition of #SundaySupper. Today we are sharing things we prepare for our loved ones. Our fabulous host is none other than Jen from Juanita’s Cocina! I’m looking forward to seeing all the wonderful main dishes, desserts and drinks being shared today!

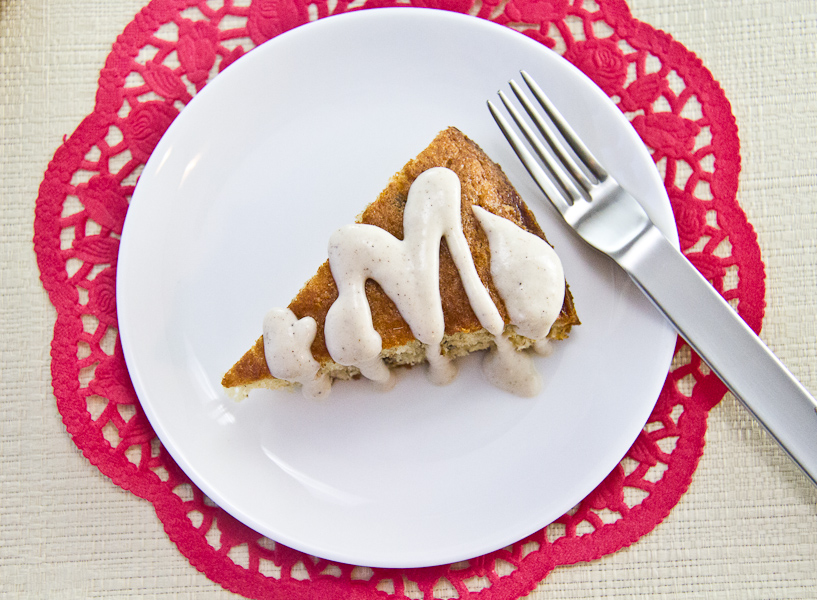
My family loves sweet treats. Because of this, I try to substitute and lighten things up a bit or just keep it really simple. I love cooking and baking for them. Its one sure way that I can express my love for them. I knew exactly what I was going to make for today’s #SundaySupper. My kids ask for this cake often enough ever since I made it for the first time a few weeks ago. My baby girl can probably list the ingredients because she has been right there beside me each time I have made it. I’ve even offered it as a gift to a gathering that we went to recently. Total win. Simplicity at its very best.

Originally I was planning to post Bailey’s Banana Cream but it didn’t taste the same as how I did it the first time. So since I clearly haven’t perfected it, I will stick with the Banana Cream. It is the perfect complement to the Banana Cake. This recipe is from my very special book, A Real Taste of Jamaica by Enid Donaldson. There is absolutely no way that bananas should ever go to waste. Not with recipes like this one.


Chocolate Chip Banana Cake With Banana Cream


Chocolate Chip Banana Cake with Banana Cream for #SundaySupper

Ingredients

  • 1 Cups All Purpose Flour, Unbleached
  • 1 Tsp Baking Powder
  • 1/4 Tsp Baking Soda
  • 1 Eggs
  • 1 1/4 Very ripe Bananas, mashed
  • 1/2 Stick of Unsalted Butter
  • 2/3 Sugar
  • 1 Tsp Vanilla
  • A pinch of Cardamom
  • 1/4 Cup Mini Chocolate Chips
  • **Banana Cream**
  • 1 Very Ripe Banana
  • 2 Tbsp Sugar
  • 1/4 Tsp Allspice
  • 3/4 Cup Whipping Cream

Instructions

  1. **Banana Cream**
  2. Do this before you make the cake so that it can be refrigerated for a while.
  3. Whip cream either using a whisk, mini blender or regular blender. I used my Magic Bullet.
  4. Mix in the banana, sugar and allspice.
  5. Store in a small container in the fridge until the cake is ready to be served
  6. ***
  7. Preheat Oven to 375F
  8. Grease an 8-inch pan and line the base with parchment paper.
  9. In a medium bowl, sift flour, baking powder, baking soda, cardamom and salt
  10. In a large mixing bowl, cream sugar and butter.
  11. Add egg and mix to combine
  12. Add mashed banana and vanilla, then mix to combine
  13. Add the flour mixture into the banana mixture and mix just until combined. Finish combining by hand with a spoon if needed.
  14. Fold in the chocolate chips
  15. Bake for 25 minutes or until an inserted toothpick comes out clean
  16. Remove from oven and transfer to a cooling rack.
  17. Allow to cool for about 30 minutes before slicing.
  18. Serve topped with Banana Cream
https://lovelypantry.com/2013/02/chocolate-chip-banana-cake-with-banana-cream-for-sundaysupper/


I didn’t change much when it came to the ingredients. I added a pinch of cardamom – just because. For the Banana Cream I replaced nutmeg with allspice. Nutmeg isn’t my favourite. I’ll use it when I have to but for this recipe, the allspice was a lovely addition.


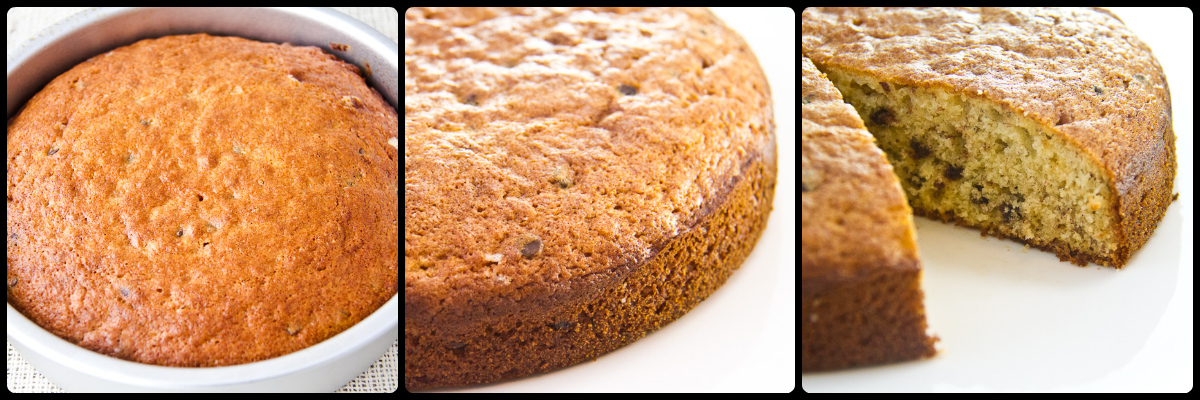
Chocolate Chip Banana Cake Collage


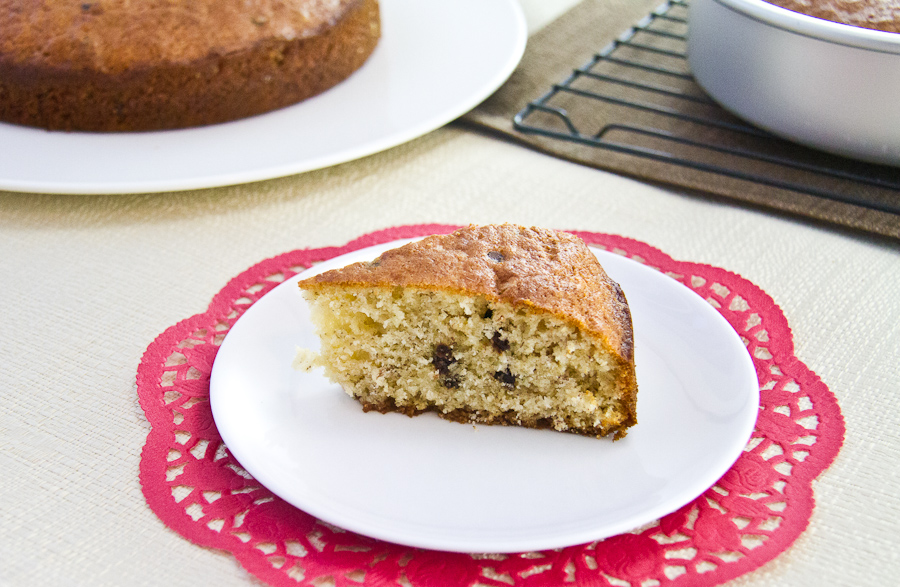
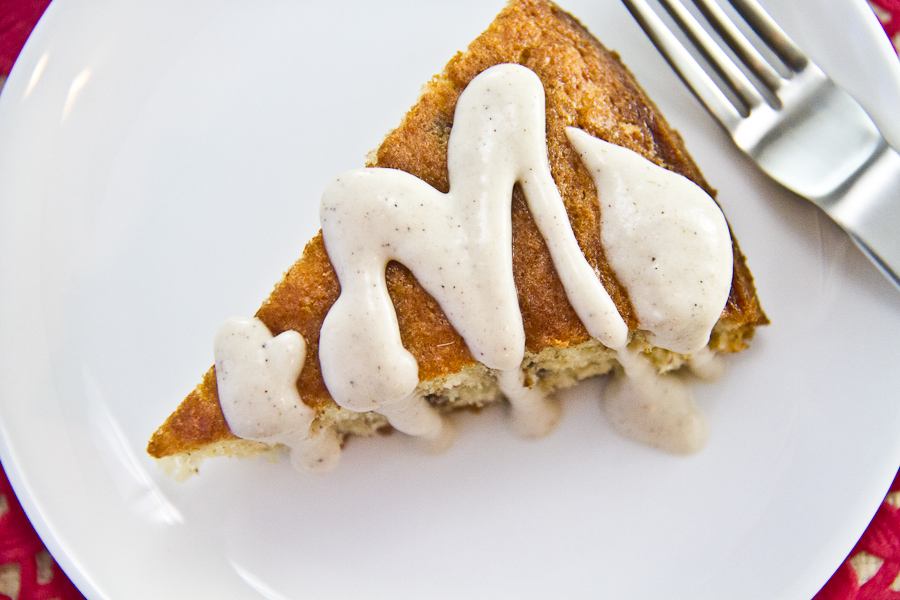
The chocolate chips are an additional treat for this recipe. By itself, it is simply wonderful. The aroma while it is baking is heavenly. Once baked, you’ll find yourself wanting more and more. I speak from personal experience. The banana adds such rich moisture to this cake.


Chocolate Chip Banana Cake With Banana Cream

Chocolate Chip Banana Cake


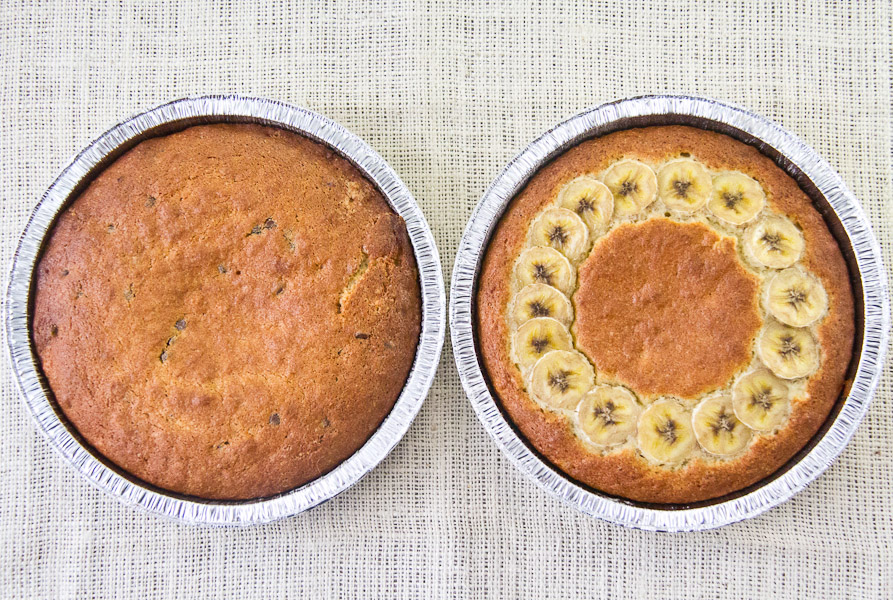
I was bringing desert over to a friend’s house recently. I wanted to dress up this sweet wonderful cake. I doubled the recipe and split the batter. Added chocolate chips to one half and left the other one plain. I decorated the plain cake with slices of banana. Oh, how I love a pretty cake. This cake goes well with Vanilla Ice Cream, of course.

Banana Cake as a gift

Banana Cake as a gift


The cream was really lovely. I wondered at first if Banana Cream with Banana Cake would be too much banana. Well, the answer was no. It wasn’t. It was awesome. My kids loved it and have grown to expect it whenever I make this cake. I think I will have to break them out of that expectation.

Chocolate Chip Banana Cake With Banana Cream

Chocolate Chip Banana Cake With Banana Cream


I just can’t get enough of this cream! I really should figure out the Bailey’s version. I must!!!


Chocolate Chip Banana Cake With Banana Cream

Chocolate Chip Banana Cake With Banana Cream


Please be sure to check out all the wonderful recipes brought to you by the #SundaySupper family!!

#SundaySupper Valentine’s Day Breakfasts, Apps & Main Dishes:

#SundaySupper Valentine’s Day Sweet Eats:

#SundaySupper Valentine’s Day Drinks:


#SundaySupper Valentine’s Day Tablescape:  A Romantic Table For Two Please from An Appealing Plan

***

Join the #SundaySupper conversation on Twitter on Sunday, February 10th to talk all about Valentine’s eats and treats!

We’ll tweet throughout the day and share recipes from all over the world.  Our weekly chat starts at 7:00 pm ET and you do not want to miss out on the fun.

Follow the#SundaySupper hashtag, and remember to include it in your tweets to join in the chat.

Check out our#SundaySupper Pinterest board for more fabulous recipes and food photos!


read more

Stamp and Go! {Jamaican Codfish Fritters} for #SundaySupper

Feb 3, 2013 by

Today is a BIG #SundaySupper. Its Superbowl Sunday and we have so many good dishes for this spectacular occasion. It’s spectacular for a few reasons. If you love American Football, then you’ve probably been eagerly anticipating this day. If you love food, well there will certainly no shortage of food today. If you’re like me, you’ll be looking forward to the Superbowl commercials and the half-time performance. Yes, that really is all that I’m looking forward to. Well that and these Jamaican Codfish Fritters! It’s a wonderful snack or side dish/appetizer and is one of my favourite Jamaican treats. My Grandmother used to make these fritters for me. I just loved them. The saltiness of the Codfish will always win me over. I made them for the first time and now I’m in fritter heaven!


Stamp & Go_Codfish Fritters_1


My recipe today was taken from my very special Jamaican cookbook by Enid Donaldson, “The Real Taste Of Jamaica”. This book has not failed me yet! I’m comforted knowing that it keeps me close to home for so many occasions including game time!


Stamp and Go! {Jamaican Codfish Fritters}

Prep Time: 30 minutes

Cook Time: 20 minutes

Ingredients

  • 1 Cup Salted (deboned) Codfish
  • 2 Cups All Purpose Flour, Unbleached
  • 2 Onions, Finely chopped
  • 2 Tomatoes, finely chopped, seeds removed
  • 2 Cloves Garlic, minced
  • 2 Stalks Escallion, finely sliced
  • 2 Tsp Black Pepper
  • 1/2 Scotch Bonnet Pepper, finely chopped (I omitted this ingredient)
  • 2 Tbsp Vegetable Oil + more for frying
  • 2 Tsp Baking Powder
  • 1 1/2 Cups Water, at room temperature

Instructions

  1. Soak codfish overnight in water or bring to a boil twice (for 12-15 minutes), draining and adding fresh water after each boil.
  2. Drain and rinse the codfish under running cold water
  3. Using a fork or your fingers, flake the codfish into small pieces, taking care to remove any remaining bones
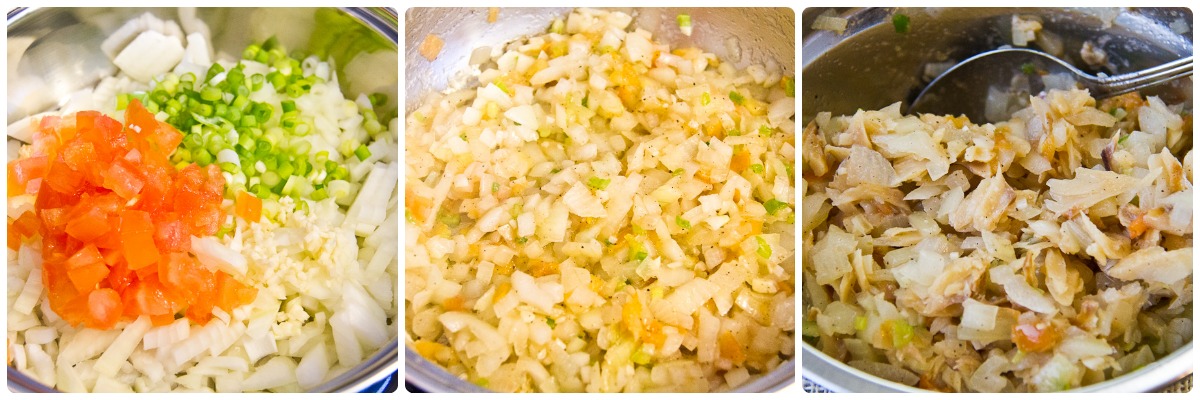
  4. To a small skillet, add oil and allow to get hot. Add onion, garlic, tomatoes and escallions. Sautee until soft about 5 minutes. Add black pepper then combine. Remove from heat and allow to cool
  5. Add codfish to the seasonings. Stir to combine
  6. In a medium bowl, add flour and baking powder. Stir to incorporate
  7. add codfish mixture to the flour and stir to combine.
  8. Add water gradually, mixing by hand until a firm but loose batter is achieved
  9. Add by about 3 tbsp at a time and fry in oil at medium heat on both sides (about 3-5 mins) until golden brown and cooked through
  10. Transfer to absorbent paper towels to get rid of any excess oil.
  11. Transfer to a platter and serve warm
https://lovelypantry.com/2013/02/stamp-and-go-jamaican-codfish-fritters-for-sundaysupper/


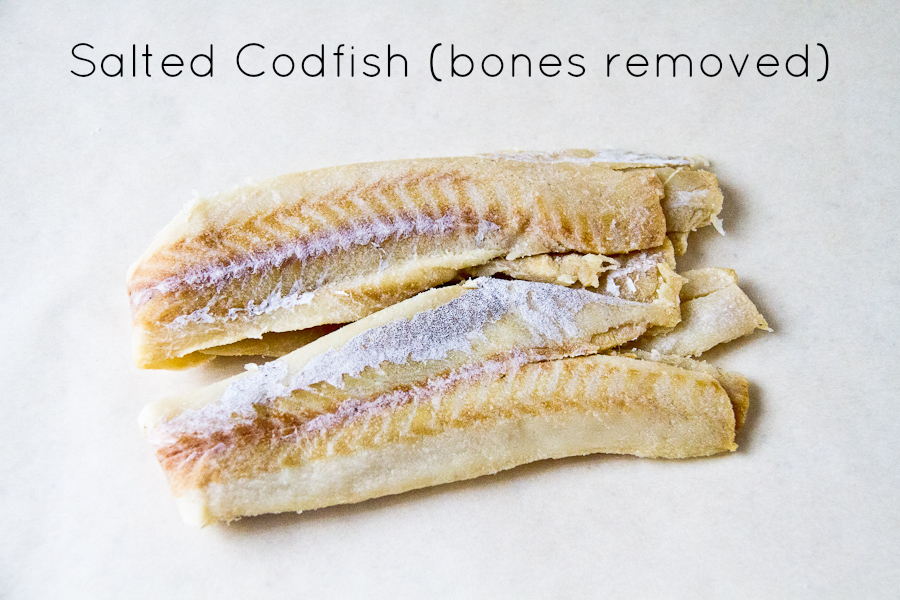
For those who are not familiar with Salted Cod/Cod Fish/Salt Fish – this is what it looks like straight out of the package. This looks pretty nice compared to what I grew up seeing. This is from an 11oz package. I used half of it to make this recipe. I got mine from the local West Indian Market but I have seen it in the regular supermarket also.


Stamp_and_Go_Salted Codfish

Salted Cod Fish direct from packaging


I remember having to flake codfish on a Saturday night in preparation for Ackee & Salt Fish on Sunday morning before church. The fish we had then wasn’t as refined and certainly was not de-boned. I had to use my fingers and flake while removing bones from the fish. Not a glamorous task at all. But I love Saltfish so it had to be done. I would flake the fish while my Mom would prepare the dumpling dough.

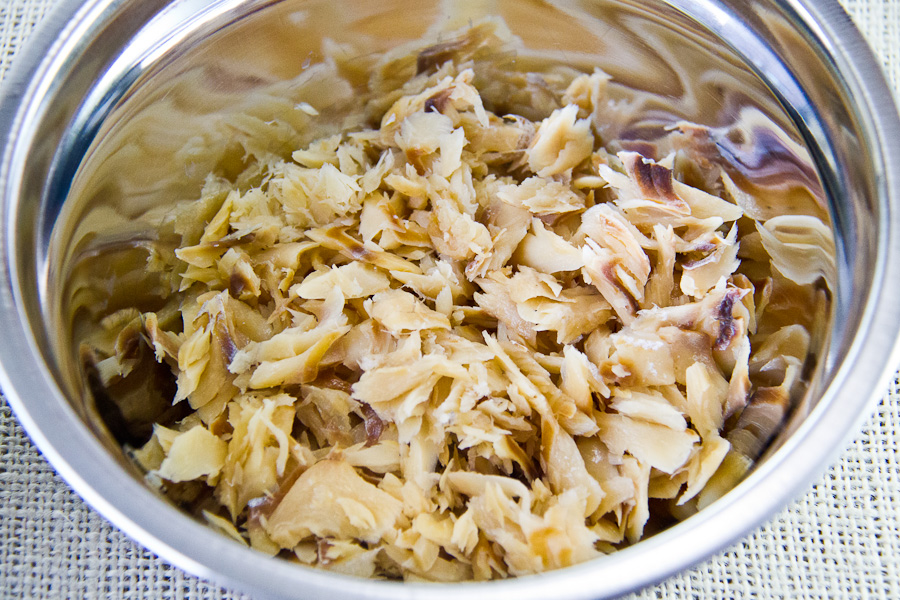
Once the fish has been boiled twice, taste the fish to see if it is to your liking. You don’t want to boil out all the salt. It should in fact still be salty. Keep in mind that it is going to be placed in a batter that will likely reduce the saltiness. Here is what the codfish looks like once cooled and flaked.


Stamp_and_Go_Codfish_Fritters-3

Flaked Cod Fish


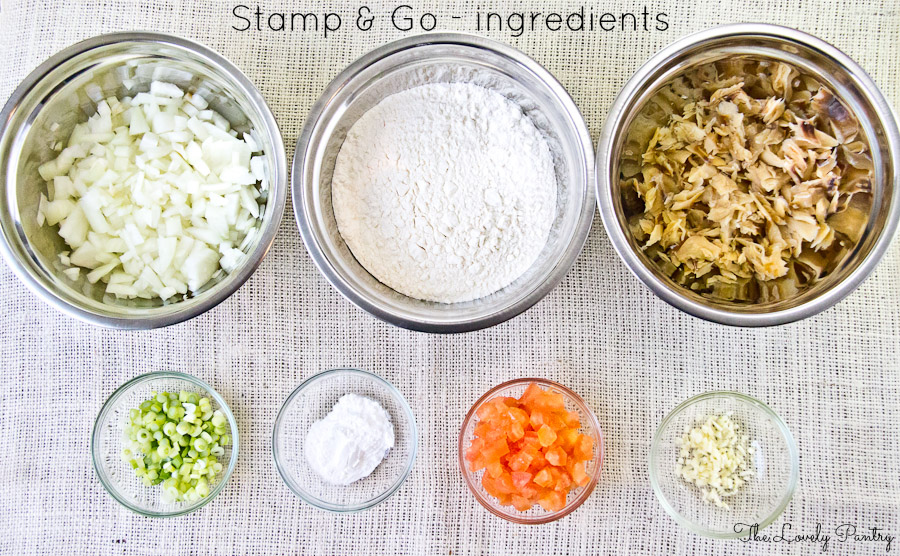
Stamp_and_Go_Codfish_Fritters_ingredients

Lets make Stamp & Go!


While sautéing the seasoning, you will notice the wonderful fragrance as they combine. I decided not to add Scotch Bonnet pepper this time but I’m sure I will the next time. I added black pepper instead.


Stamp & Go_ Seasoning + Fish

Sautee the onion, garlic, tomatoes and escallions. Combine with codfish.


Creating the batter was interesting. The recipe did not state how much water to use. I added 1/4 Cup of water at a time until I arrived at a nice consistency. I tested out a fritter to see how it came out after adding a cup of water to the batter. I only needed half a cup more to get it right. Fry these fritters at medium heat. And do not leave the skillet unattended while browning these fritters.


Stamp & Go_Prep


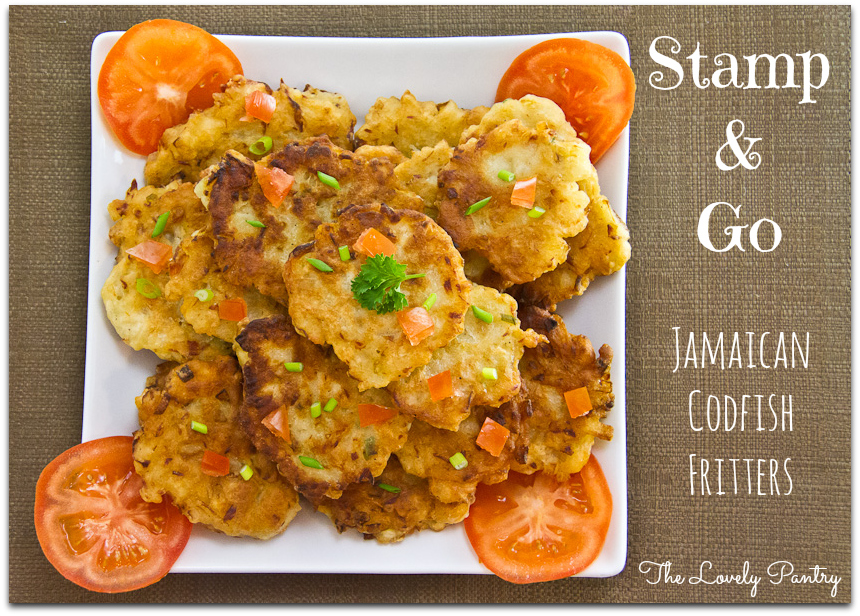
Wouldn’t you like to see these on your Superbowl party platter?  These are a definite crowd pleaser.


Stamp_and_Go_Codfish_Fritters_platter

Codfish Fritter Platter

Grab yourself a plate and dig in!


Stamp_and_Go_Codfish_Fritters_plate

Jamaican Cod Fish Fritters, also known as Stamp & Go


Be sure to visit the rest of the #SundaySupper team to see the amazing game day buffet items.

#SundaySupper Super Bowl Appetizers & Snacks:

#SundaySupper Super Bowl Main Dishes:

#SundaySupper Super Bowl Desserts:


#SundaySupper Super Bowl Tablescape:  10 Tips For A Winning Superbowl Buffet Table from An Appealing Plan

***

Join the #SundaySupper conversation on Twitter on Sunday, February 3rd to talk all about our Super Bowl Recipes!

We’ll tweet throughout the day and share recipes from all over the world.

Our weekly chat starts at 7:00 pm ET and you do not want to miss out on the fun.

Follow the #SundaySupperhashtag, and remember to include it in your tweets to join in the chat.

Check out our #SundaySupper Pinterest board for more fabulous recipes and food photos!


Related Posts Plugin for WordPress, Blogger... read more
Post Popularity Graphing by Knowledge Ring