Quinoa Pasta with Roasted Zucchini and Cheese

Mar 26, 2012 by

Last nights dinner was so very interesting to me. I knew I had to roast some zucchini that was begging to be eaten. I also wanted to try the Quinoa Pasta that I bought a few days ago. I had never seen it before and I wanted give it a try so I could see how it tasted and how the texture compared to regular pasta. And there’s the cheese. I’ve always had a thing for cheese. It’s not something that I will give up easily, so bear with me as you see cheese all over this recipe. I kept it subtle. Promise 🙂 …Although I purposely avoided measuring how much cheese I used…

It was tasty, meatless and certainly something I intend to have again. My hubby thought it was quite nice. I don’t think I could convince him to have this without some meat though. He is far from a part-time vegetarian, like what I’m on the path to becoming. Baby steps. As I read more about it and find recipes that suit my palate, I’m truly considering reducing my meat consumption.

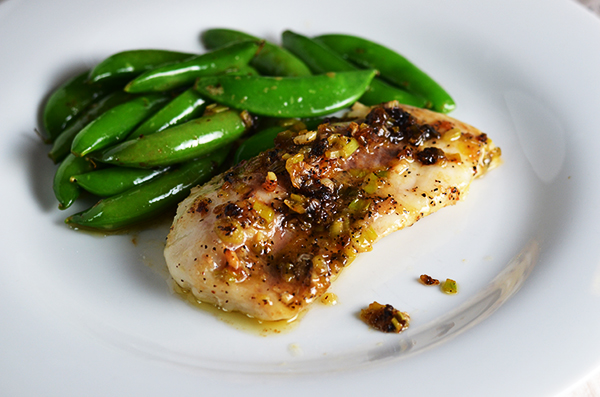
Here’s the finished result…another freestyle recipe 🙂


Quinoa Fusilli Pasta & Roasted Zucchini with Parmesan Flakes


As for the Quinoa Pasta, I realized that it takes a little longer to cook than regular pasta. The package suggested 13-15 minutes – spot on. Anything before that, it’s still rather firm. Also, you have to eat it right away. I decided to toss it in a cheese mixture in order to make it moist on the outside. I don’t do dry pasta very well. A cream sauce or olive oil is pretty much mandatory. The texture of quinoa pasta is just fine and I would not have noticed the difference at all. I will buy it again, if I come across it. Its Quinoa. I can’t go wrong. Right?


Quinoa Pasta - Gluten Free, Corn Free


5.0 from 3 reviews
Quinoa Pasta with Roasted Zucchini and Cheese
 
Prep time
Cook time
Total time
 
An easy meal perfect for any day of the week. Quinoa, Zucchini and Cheese.
Author:
Recipe type: Main
Serves: 4
Ingredients
  • 2 Medium Zucchini
  • Salt & Pepper
  • Olive Oil for bushing the Zucchini
  • Few Tbsp grated or shredded Parmesan Cheese
  • 8 oz Quinoa Pasta (or whatever pasta you prefer)
  • 1 Scallion, sliced thinly
  • 2 Tbsp Cream Cheese (I used reduced fat)
  • 2 Tbsp Chicken Broth
Instructions
  1. Preheat oven to 425F
  2. In a medium pot, bring about 4 cups of salted water to a boil
  3. Add quinoa pasta and cook according to package directions
  4. Cut ends off zucchini then slice each into 6 wedges
  5. Grease a rimmed baking tray with olive oil
  6. Place zucchini, skin side down on the greased baking tray
  7. Brush with olive oil then sprinkle with salt, pepper and parmesan
  8. Roast for 20 minutes, until the zucchini is golden brown
  9. In a medium pot, add cream cheese, chicken broth and parmesan
  10. On medium heat, still until melted and combined
  11. When pasta is ready, drain and add to cream cheese mixture
  12. Toss to lightly coat
  13. Add salt and pepper to taste
  14. Cut zucchini into chunks and stir in or serve on the side
  15. Garnish with Scallion and parmesan flakes
Notes
I used Quinoa Pasta but you can use any pasta for this recipe


I got my son to eat the zucchini. I had to basically emphasize that it had cheese on it. Not that there was too much, but he needs encouragement to eat “new” veggies. He has lettuce, green beans and broccoli under his belt. He needs to conquer zucchini so I can move on to another vegetable. Goodness rules in my house!


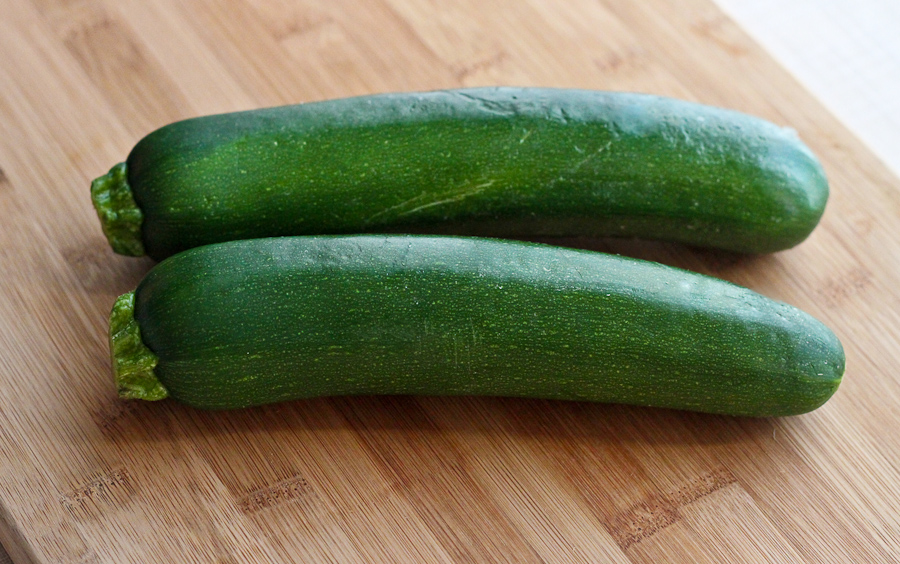
Zucchini


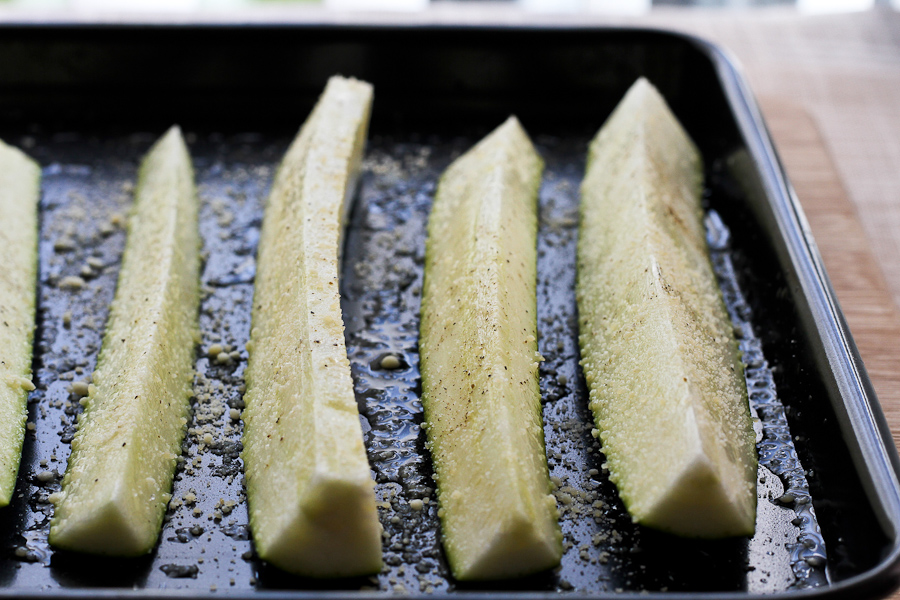
Zucchini, Sliced, oiled, sprinkled with salt, pepper and parmesan cheese


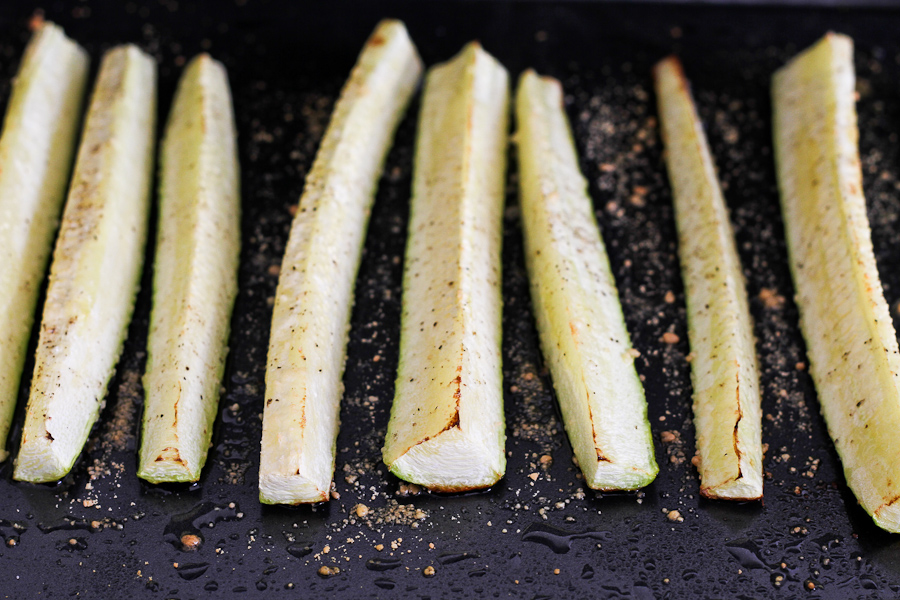
Roasted zucchini, fresh out the oven. So fragrant. Even the crispy parmesan stuck to the tray looked good to me.


Zucchini, roasted for 20 minutes


Roasted Zucchini with Parmesan Cheese


Zucchini never tasted so good.


Dinner is served - Quinoa Pasta & Parmesan Roasted Zucchini


What a way to start the week. Happy Monday friends!

~Lyn


read more

Polenta with Parmesan and Parsley, Mozzarella and Tomato

Mar 19, 2012 by

I  haven’t made polenta in some time now. A friend of mine recently asked me if I had a recipe – which I did. But because this friend is super special to me and one of my BIGGEST supporters, not only of The Lovely Pantry, but of me as a person… I wanted to do something nice and a little different. A delicate dish that was smooth, flavourful and good for the body. I think I’ve accomplished that with this recipe and presentation.

In Jamaica, the term “Polenta” is rarely used however, I believe Jamaicans are becoming more aware of the term. Polenta is quite like a dish we call Turn Cornmeal or “Tun Cornmeal” – which is a dish of a similar consistency but includes ingredients such as coconut milk, escallion, garlic, thyme and of course, scotch bonnet pepper. Just like Polenta, Turn cornmeal can be served in a variety of ways and with different meats or sauces. Personally, I don’t like my Polenta mushy. I prefer it crispy on the outside and soft but firm on the inside.

Todays dish is meat free and fabulous. I hope to make more dishes like this. I believe this could be a snack, a breakfast or an appetizer. What do you think?


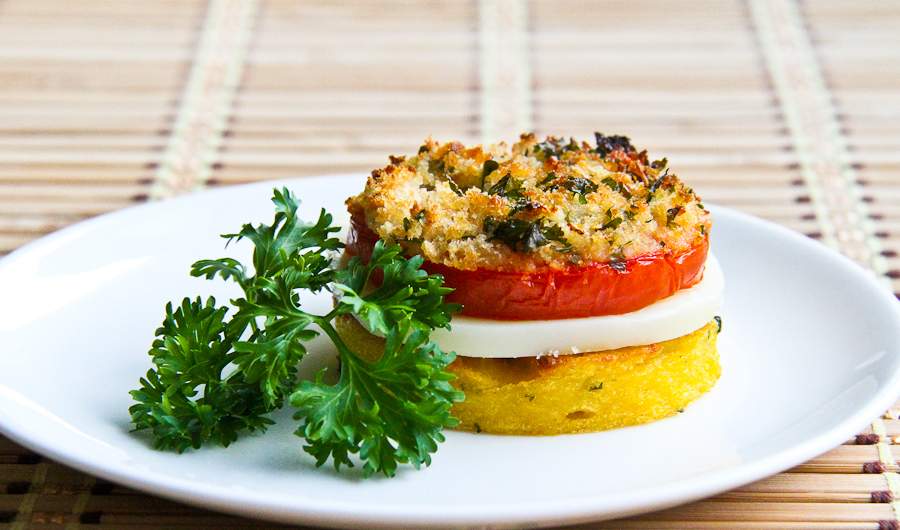
Parsley Polenta with Mozzarella & Tomato


This is basically how I make my polenta but you can certainly make variations. If you don’t have parsley, chop some spinach or kale. Add some sweet corn. Get creative! I have made polenta using water and I’ll never do that again – too bland. I will always add a broth because I find it to be more flavourful that way. I decided to dress up my polenta with mozzarella (more cheese, I know!!) and broiled tomato slices topped with a seasoned breadcrumb mixture.


Polenta with Parmesan and Parsley, Mozzarella and Tomato

Prep Time: 15 minutes

Cook Time: 40 minutes

Total Time: 53 minutes

Polenta, a dish so versatile it can be had in so many ways. Made with yellow cornmeal, chicken broth, parmesan cheese and parsley

Ingredients

  • 6 Cups Low Sodium Chicken Broth (or Vegetable Broth)
  • 1 3/4 Cup Yellow Cornmeal
  • 3 Tbsp Butter
  • 4 Slices Mozzarella Cheese
  • 1/2 Cup Grated Parmesan Cheese + 1 Tbsp
  • 1/2 Cup Parsley, finely chopped + 1 Tbsp
  • 1 Tomato, firm
  • 1/4 Cup Breadcrumbs
  • Salt and Pepper
  • Cooking spray
  • Olive Oil

Instructions

  1. In a large saucepan, bring chicken broth to a boil
  2. Gradually whisk in the cornmeal, removing any lumps that may form
  3. Reduce heat and cook until the mixture thickens, stirring often for about 15 minutes
  4. Add parmesan, stir to combine
  5. Add butter, stir to combine
  6. Finally, add parsley and stir to combine
  7. Pour into a shallow dish about an inch deep. Use a spatula to spread into the corners. Allow to rest and firm up
  8. In a small bowl, combine breadcrumbs, 1 Tbsp parsley, 1 Tbsp parmesan. Mix to combine.
  9. Remove the top and bottom from the tomato and cut into 4 slices
  10. Line a baking tray with parchment paper. Lightly grease with cooking spray
  11. Place tomatoes on the tray and sprinkle each slice with a pinch of salt and pepper and then the breadcrumb mixture
  12. Drizzle olive oil over the breadcrumbs on each tomato slice
  13. Place in broiler for about 5-8 minutes or until the breadcrumbs are golden brown. Set aside when done
  14. Using cookie cutters, cut out 4 circles about 2-3 inches in diameter from the cooled polenta
  15. In a hot skillet, spray with cooking spray, brown polenta about 3-4 minutes on each side, until crispy and golden brown. Set aside.
  16. When the polenta and tomato are cool to the touch, place a slice of mozzarella on each polenta disc then top with a slice of tomato
https://lovelypantry.com/2012/03/polenta-with-parmesan-and-parsley-mozzarella-and-tomato/

4.5 from 4 reviews
 

Looks a lot like cornmeal porridge here!


Yellow Cornmeal being cooked


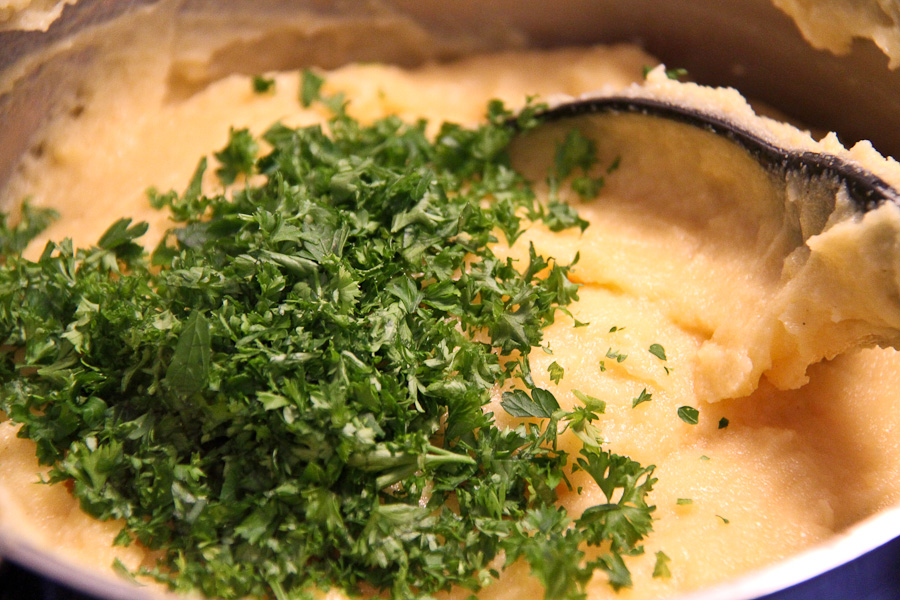
I love the splash colour that parsley adds.


Add the parsley to the cornmeal


Spread the polenta evenly into the baking tray as best you can. It is quite thick at this point and needs “encouragement” to get into the corners.


Spread the polenta in a rimmed baking tray


I used a cookie cutter only because I wanted to stack with other ingredients that were round. Otherwise I would have just used a sharp knife and cut square pieces.


Cookie Cutter


So here’s the thing. I don’t love tomatoes. But I’ll eat them like how I’ve prepared them here – with breadcrumbs. I know, I know. Weird. I’m trying to eat more though. So good for you.


Tomato Slices


I loved the smooth and creamy texture that the mozzarella added to this combination. You don’t need too much, since the flavour is very mild.


Parmesan Polenta, Mozzarella, Tomato with breadcrumbs


Picture perfect Polenta!


Polenta, Mozzarella, Tomato


And there you have it! A tasty way to make polenta.  Left over polenta is awesome pan-fried for breakfast with some maple syrup. Its like the breakfast of champions!

To my friend, Nicky – Thank you!


Happy Monday to you all!


read more

Related Posts

Tags

Share This

Chocolate Stout Cake

Mar 13, 2012 by

I tried to resist making this. I really did. But I had all the ingredients! I just had to.

I picked up a little recipe book called Irish Favourites and the recipes were interesting… as in, I’d make most of the recipes in the book! It was perfect timing seeing that St.Patrick’s day is right around the corner. The original recipe had a cream cheese frosting but I opted out. The chocolate cake is bad enough. And by bad, I mean good.


Chocolate Stout Cake


Chocolate Stout Cake
 
Prep time
Cook time
Total time
 
Chocolate Stout Cake, adapted from Irish Favourites Cookbook
Author:
Recipe type: Dessert
Serves: 12
Ingredients
  • 2 Cups All Purpose Flour, unbleached + more for dusting the pan
  • ¾ Cup unsweetened Cocoa
  • 1 Tsp Baking Soda
  • ¼ Tsp Salt
  • ¾ Cup (1½ Sticks) Unsalted Butter, softened
  • 1 Cup packed Light Brown Sugar
  • ½ Cup Granulated Sugar
  • 1 Tsp Vanilla
  • 3 Eggs
  • 1 Cup Stout, at room temperature (I used Jamaican Dragon Stout)
  • 1½ Cup Icing Sugar
  • 3-4 Tbsp Hot Water
  • 2 Tbsp Green Sprinkles
Instructions
  1. Preheat oven to 350F
  2. Spray a 10 inch Bundt Pan (a 13 X 9 inch baking pan) with cooking spray, then dust with flour
  3. Combine flour, cocoa and salt in a medium bowl. Set aside
  4. Beat butter, brown sugar and granulated sugar with a mixer at medium speed until light and fluffy
  5. Beat in vanilla
  6. Add eggs, one at a time, beating after each addition
  7. Add flour mixture alternately with stout, beating after each addition
  8. Pour batter evenly into prepared pan
  9. Bake for 35-40 minutes until a sharp knife or toothpick inserted into the centre comes out
  10. clean
  11. Allow to cool completely in the rack
  12. In a small measuring cup, sift in icing sugar. Add hot water and stir until smooth. Pour over the cake and add sprinkles for final touch


Look what I found – Jamaican Dragon Stout. The sweeter alternative to Guinness. My hubby had a stash and was nice enough to let me use one. I’m not a stout drinker myself, but I think I may like cooking with it.


Jamaican Dragon Stout


Dragon Stout - Close Up


The recipe called for a 13 X 9 inch baking pan but I thought it would be more interesting to use a Bundt pan. Okay, I just really wanted to use it. This is my first Bundt cake. Chocolate Stout Bundt Cake. Sounds good!


Chocolate Stout Cake Batter


Glazing was some messy fun! Me and my daughter had green fingers for a while…


Glaze and Sprinkles


Chocolate Stout Cake Slice


A rich but not too sweet chocolate cake, made with a Jamaican stout…just in time for St. Patrick’s Day.


Chocolate Stout Cake


About how long do I need to walk on the treadmill to fix this?

read more

Sweet & Sour Muffin Meatballs

Mar 12, 2012 by

I love when I find a good recipe. Better yet, I love when I find a good recipe that I can improve on 🙂 A while back, I wanted to make meatballs but not just regular plain meatballs – nothing boring. I came across Sweet & Sour Muffin Meat Loaves from myrecipes.com so I decided to try. The first time I made it, I wasn’t sure of the texture and it certainly did not have the colour I was hoping for. I tried again, taking notes on the changes I made and I never looked back. Instead of calling them meat loaves, I’ll say that these are awesome baked meatballs, full of flavour and a nice rich colour.

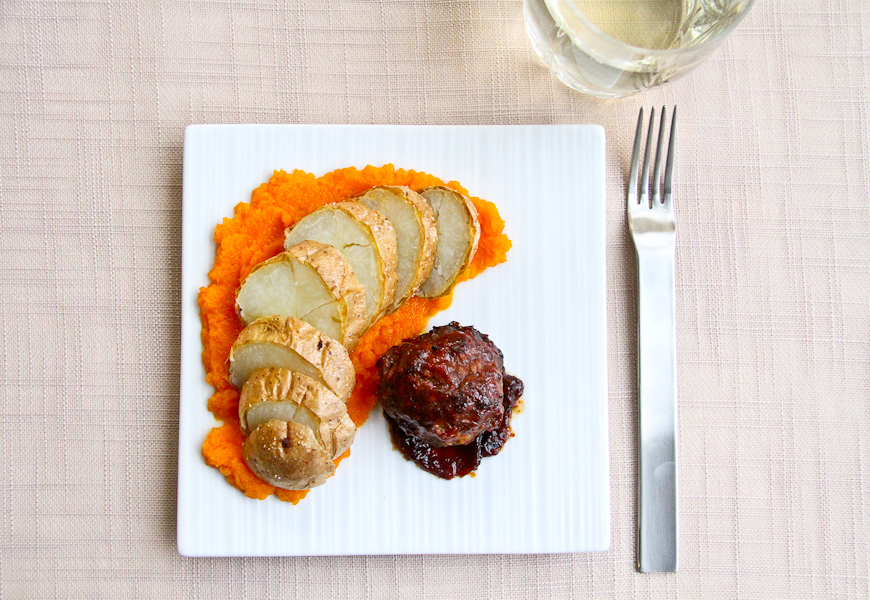
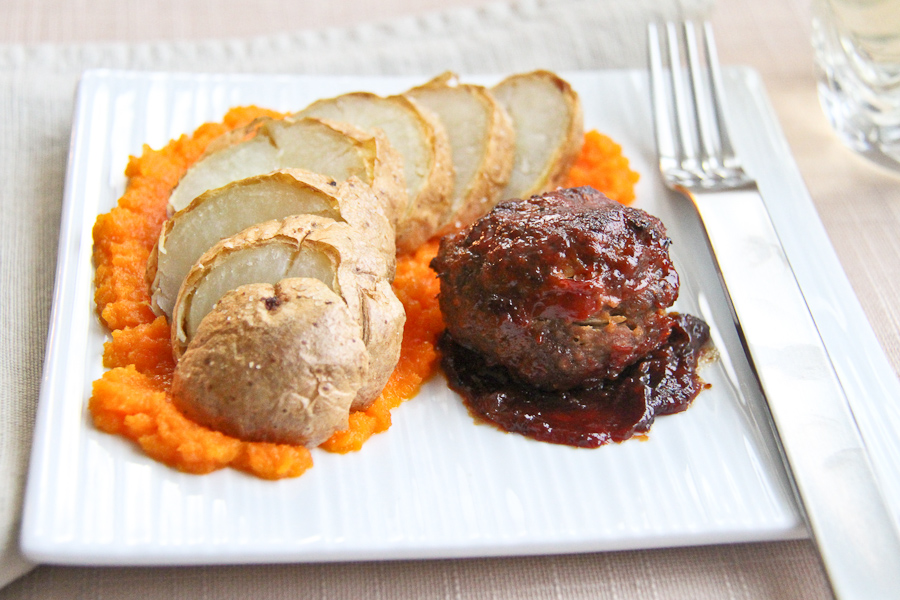
I wanted to serve it with mashed potatoes and steamed carrots but.. since the meatballs were super spectacular, I’d have to jazz up the company! This was such a great meal! It was different and comforting.


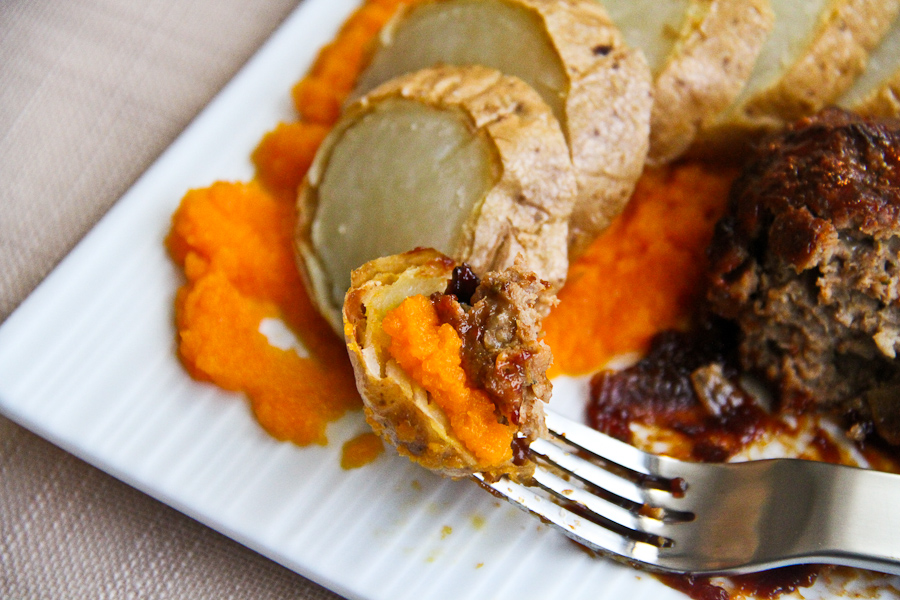
Sweet & Sour Muffin Meatballs, Carrots & Baked Potatoes


Sweet & Sour Muffin Meatballs
 
Prep time
Cook time
Total time
 
Baked meatballs with a sweet and sour sauce
Author:
Recipe type: Dinner
Serves: 4
Ingredients
  • 1½ lbs Ground Turkey
  • 1 Cup Ketchup, divided into 2½ cup portions
  • ¼ Cup brown sugar
  • 1 Tbsp White Vinegar
  • 1 Tbsp Apple Cider Vinegar
  • 2 Tbsp Low Sodium Soy Sauce
  • 1 Egg
  • 1 Onion, finely chopped
  • ½ Cup Breadcrumbs
  • 1 Tbsp Oregano
  • 2 Tsp All Purpose Seasoning
  • Salt & Pepper
  • 4 Large Carrots, cleaned and chopped into ½ inch pieces
  • 2 Tbsp Butter
  • 2 Tbsp Maple Syrup
  • 2 White Potatoes (or any kind you like suitable for baking)
  • Olive Oil for the potatoes
Instructions
  1. Preheat your oven to 450F
  2. In a saucepan, set carrots to boil about 20 minutes until soft. Drain and then mash with butter and maple syrup. Set aside.
  3. In an oven proof pan, grease the potatoes with olive oil, then sprinkle with salt and pepper.
  4. Pierce the potatoes with a sharp knife. Cook for 1 hr, until the skin is crispy and a knife goes through the skin with no resistance
  5. Grease a 12 Cup Muffin Pan
  6. In a 1 Cup measuring cup, mix ½ cup ketchup, brown sugar and vinegar
  7. In a medium bowl, combine ground turkey, egg, onion, breadcrumbs, soy sauce and remaining ketchup
  8. Add salt and pepper, combine well with a fork or better yet, your hands
  9. Add about a tablespoon of ketchup mixture to each muffin cup, reserving about half of the liquid
  10. Form the meat into 12 meatballs, as equal in size as possible
  11. Place in each muffin cup, pressing down to flatten the top slightly
  12. Bake for 30 minutes
  13. After 20 minutes, brush each muffin with the remaining ketchup mixture and continue baking until cooked through
  14. Remove from oven and allow to rest before carefully removing the meatballs.
  15. When the potato is cool to the touch, slice and serve
Notes
The muffins can be baked alongside the potatoes once the potatoes are half-cooked. I used tongs to remove the meatballs from the muffin pan Portions can be 2 meatballs per person, with meatballs left over for lunch the following day


And here’s the fun part!

Add ketchup mixture into each muffin cup


Add each meatball on top of the ketchup mixture


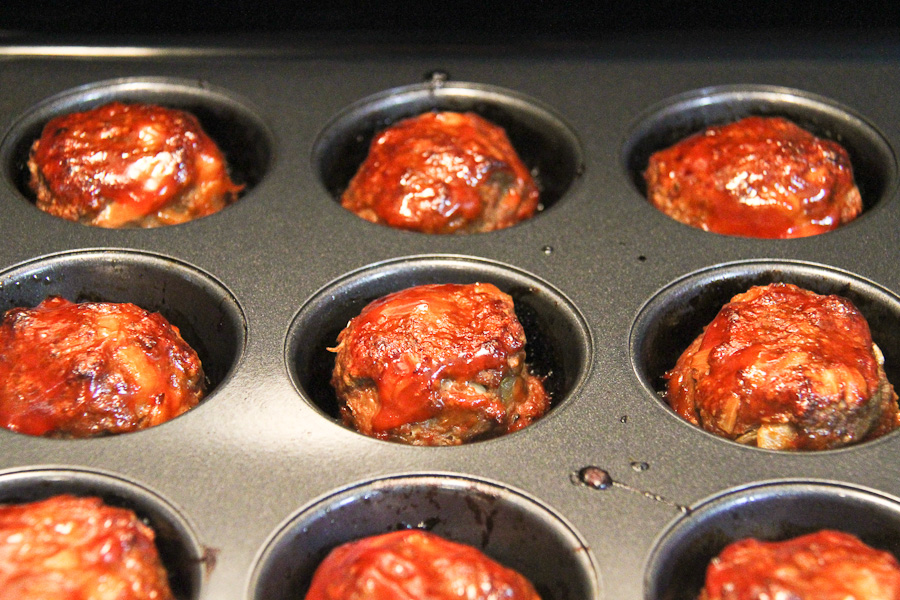
After about 20 minutes, the meatballs will look something like this


Partially cooked meatballs


Brush the meatballs with the remaining sweet and sour mixture


Meatballs brushed with sauce


Pop them back in the oven for about 10 minutes or so. Your kitchen will smell marvellous. Don’t let your meatballs burn! Watch them carefully. Cover with foil if needed.


Sweet and Sour Meatballs - cooked!


I especially love the dark, caramelized sweetness of the meatballs and the sweet and sour sauce. I found that it paired well with the carrots and potato. Each component complimented each other quite nicely.


Dinner is served!


Take a bite!


Meatballs, Carrots and Baked Potato - Stacked


Seriously. I’m hungry.


Happy Monday, friends! ~ Lyn


read more

Buttermilk Quick Bread

Mar 7, 2012 by

I’m quite fond of quick breads. I love how easy they are to make and the wide variety and variations of each recipe that I come across. I have yet to make a quick bread that I did not like. Granted, I scrutinize the ingredients very carefully before I decide to make it. Please allow me to formally introduce you to Buttermilk Quick Bread. A very simple bread that I have been making on the weekends if I have any buttermilk in the fridge. I found this recipe on one of my daily sources of inspiration: The Kitchn, and knew as soon as I saw it, that I was going to make it. I’ve made it 4 times already – twice plain, once with raisins and this past weekend, with blueberries. Versatile little quick bread, isn’t it? The original post, has a few other variations that look interesting to try too – like Pesto Loaf. (Are you imagining a green quick bread?)

I love that this plain bread is like a canvas. You can tweak it to your liking and chances are, it will turn out great.

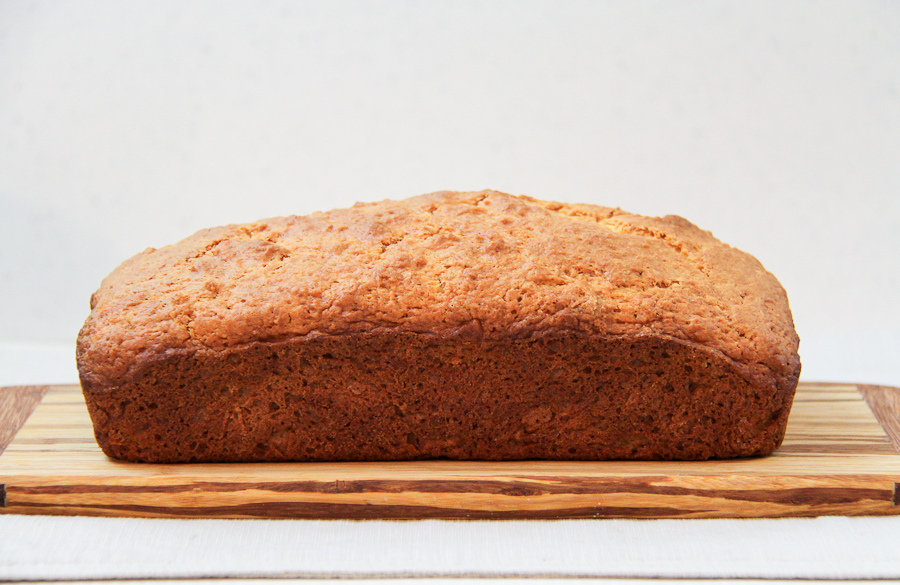
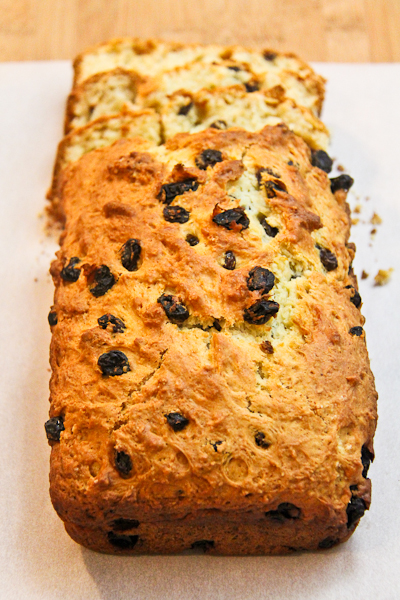
Buttermilk Quick Bread. Profile.


5.0 from 3 reviews
 

The consistency of the batter is quite thick, so you have to gently spread into the corners with a spatula.


Quick Bread Batter


Ah! Perfection!


Buttermilk Quick Bread – Out of the oven


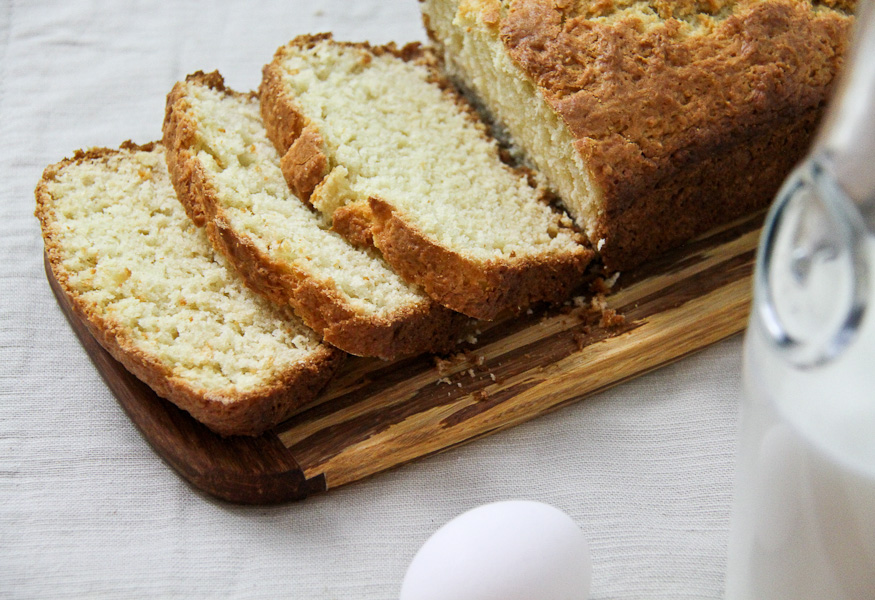
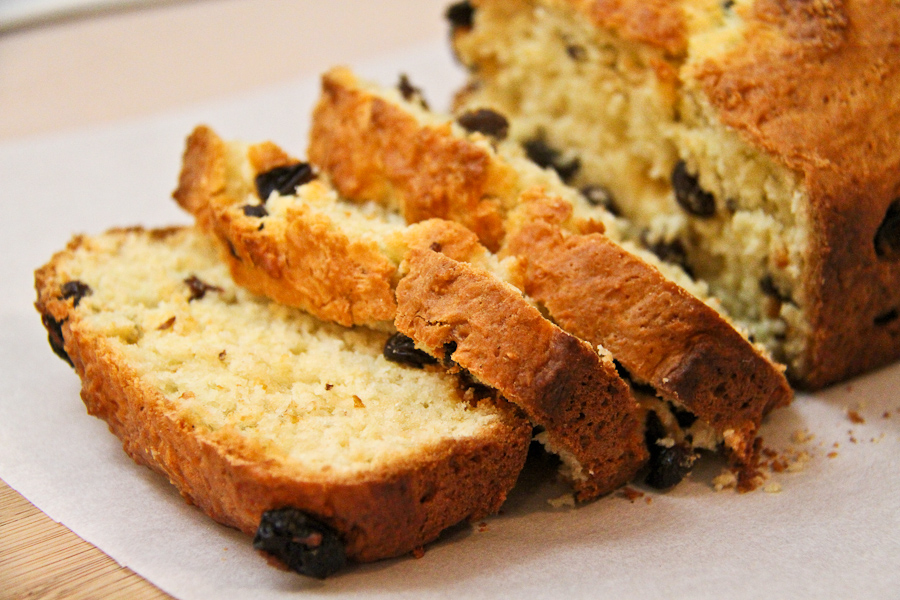
It’s best to use a serrated knife to cut this bread since it is a bit delicate.


Buttermilk Quick Bread – sliced


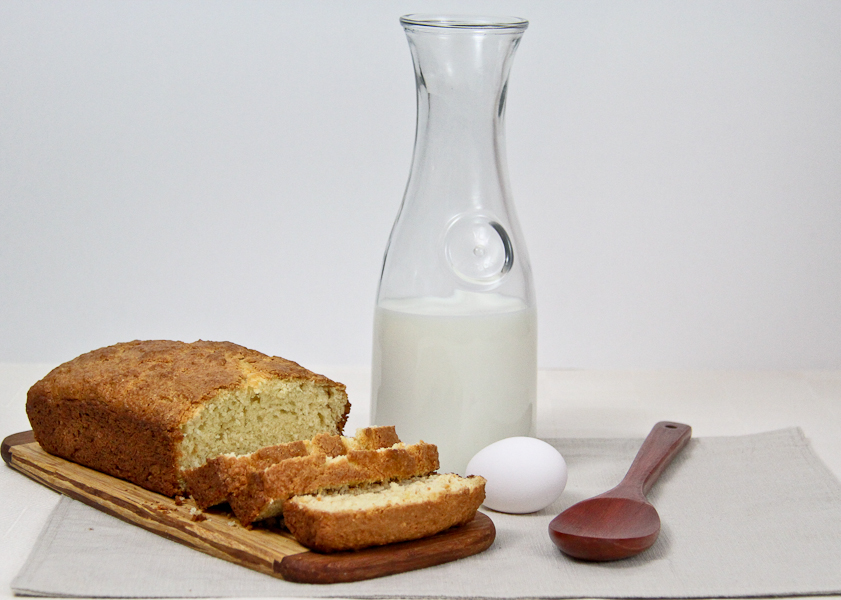
Buttermilk Bread


Buttermilk Quick Bread with Raisins


I like that because the batter was so thick, the raisins didn’t have the chance to sink to the bottom of the pan 🙂 For some recipes with a batter of thinner consistency, like the Ginger Carrot Bread, you have to toss the raisins (or small fruit like blueberries) in flour before folding them into the batter. So nice that I was able to skip that step.


Buttermilk Quick Bread With Raisins – sliced


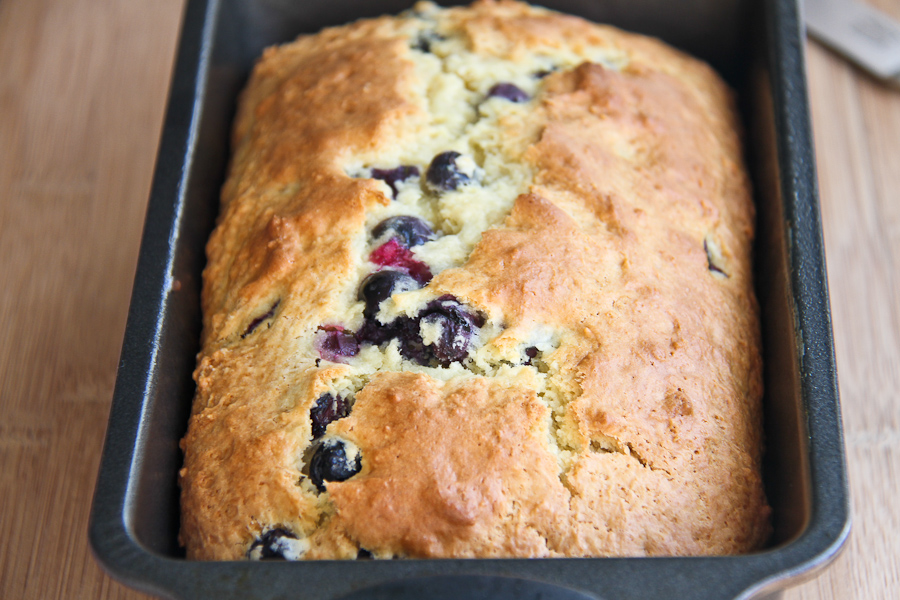
Finally, with Blueberries. I wanted to cut the loaf to take a quick photograph however, I was entertaining so I did not want to cut it before we were ready to eat it. Everyone loved it!


Buttermilk Quick Bread with Blueberries


Happy Wednesday! I hope the week has been off to an awesome start! I’ll be back soon.

Cheers for now.

Lyn


read more

Chicken, Linguine and Crimini

Mar 2, 2012 by

I’m getting to like this business of freestyle cooking (cooking without a recipe). It adds a little mystery to meals. It’s kinda cute when my husband asks “whats cooking?” and I say “Oh, you’ll see *bats eyelashes*” when what I really mean to say is “Honey, I have no idea!”. I’ve always been pleasantly surprised at how great the meals turn out. I LOVE it. One of my recent freestyle meals was Smoked Paprika Chipotle Chicken with Spirali Pasta and Kale Pesto. I had ingredients that I wanted to use and I ran with it.

My ingredient for today’s post is Crimini Mushrooms. I can’t say that I’m a big fan, however I wanted to be adventurous and incorporate it into a meal. It’s a great thing to challenge yourself. I knew I wanted pasta, and I knew I wanted it creamy. I just wanted a quick way of doing it, while utilizing items in my Pantry. So anyway, the idea was born on a recent trip to the grocery store. Crimini Mushrooms were on sale so I grabbed a pack and here is what I came up with.


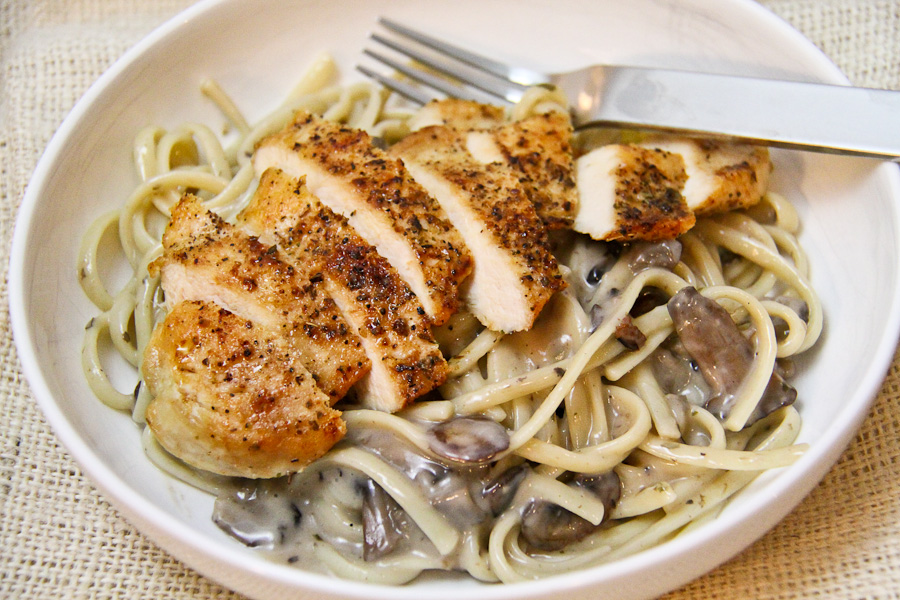
Chicken, Linguine, Crimini


I will say, that when I am preparing a freestyle meal, I get really focused and sometimes I don’t get to take photographs of the process. So I only have the finished result today. It tasted great and I got my little man to eat it! He only questioned the mushrooms half way through, but he ate everything in his plate. You should have seen him slurping the pasta. The things that bring mothers joy. *insert big smile here*


5.0 from 1 reviews
Chicken, Linguine and Crimini
 
Prep time
Cook time
Total time
 
A quick family meal using Crimini Mushrooms
Author:
Recipe type: Main
Serves: 3
Ingredients
  • Linguine Pasta
  • Grapeseed Oil to cook the chicken
  • 3 Chicken Breasts (Skinless, Boneless)
  • 2 Tsp All Purpose Seasoning
  • 1 Cup Sliced Crimini mushrooms
  • 1 Can Low Fat Cream of Chicken Soup (284 ml)
  • 1 Onion, chopped
  • 1 Tbsp Olive Oil
  • Salt & Pepper
  • ½ Cup Low Sodium Chicken Broth (or whatever you need)
Instructions
  1. Season chicken breasts with salt, pepper, all-purpose seasoning
  2. In a hot skillet, add grapeseed oil and cook chicken 6-8 mins on both sides over medium high heat until cooked through and juices run clear. Set aside
  3. Set pasta to boil, following the directions on the package (I used half a pack)
  4. In a warm skillet, add olive oil. Add onions and saute until translucent
  5. Add crimini, and saute until soft, about 5-7 minutes
  6. Season with salt and pepper
  7. Add can of cream of chicken soup
  8. Stir to incorporate
  9. If you find it too thick, add broth until you have reached your desired consistency
  10. When pasta is cooked, drain and add to the skillet with the mushrooms
  11. Toss to incorporate
  12. Plate immediately and serve with sliced chicken on top


Chicken Breast, Linguine Pasta and Crimini Mushrooms

Hows that for dinner in a jiffy?

Have a great weekend!!!


read more

Meatloaf & Smashed Potatoes

Feb 29, 2012 by

Have you ever had meatloaf before? It may sound strange to ask. But when I had meatloaf for the first time, I knew I was missing a great deal! I saw the recipe on Everyday Food and decided to give it a go. Of course, I made changes to their recipe. I generally do. Ha! I enjoyed preparing it but found that it’s really a lot of meat! I may have to find a way to prepare it differently or make mini meatloaves or something. All in all, it tasted great and the family enjoyed it. I chose to mix the meats to get the most flavour. Originally I was going to use the usual ground turkey but felt the flavour would not be rich enough. I’m sure there are many variations of meatloaf so if you’re a food blogger, and you happen to come across my version, please leave a comment and a link to your recipe. I’d love to see.

Oh, and as for the smashed mini potatoes – I saw Laura Calder do it and I thought it was hilarious! But after the first few times I did it, I found them to be cute little things. And I LOVE the taste of baked mini red potatoes. LOVE.

I have to tell you guys that my son ate his dinner with no fuss. Knowing that he would not eat meat for so long, and finally he’s eating like a “big boy” really makes me happy. My daughter is now going through this meatless phase, so I’m being patient with her but I look forward to when she can eat just like her brother. She might even start asking for broccoli or string beans with her dinner, just like her big brother! It’s a daily task, offering her different veggies, and foods, but she’s just 2 and still trying to figure it all out. I’m here to help and show her by example. A mother’s work is truly never done.

I’m proud of my first attempt at meatloaf. Here’s the recipe and photographs.


Meatloaf, Smashed Mini Potatoes, Steamed Broccoli


5.0 from 2 reviews
Meatloaf & Smashed Potatoes
 
Prep time
Cook time
Total time
 
A family favourite - Meatloaf & Potatoes
Author:
Recipe type: Dinner, Main
Serves: 6
Ingredients
  • 12 Baby Red Potatoes, washed and dried
  • ¼ Cup Milk
  • 3 Slices Whole Wheat Bread
  • 1 Small Onion, coarsely chopped
  • 3 Cloves Garlic, finely chopped
  • ½ Cup chopped spinach
  • 1 Egg lightly whisked
  • 1 Tsp Dried Thyme
  • 1 Tsp Dried Oregano
  • Salt & Pepper
  • ½ Cup Tomato Sauce + ¼ Cup for garnish
  • 1 lbs Ground Veal
  • 1 lbs Ground Beef
Instructions
  1. Preheat oven to 375F
  2. Boil the potatoes until it can be easily pierced with a fork, about 15 minutes
  3. Tear bread and place in a small bowl
  4. Pour ¼ cup milk over the bread and allow to absorb
  5. In a large bowl, combine bread, beef, veal, onion, garlic, spinach egg, thyme, oregano, salt, pepper, ½ cup tomato sauce
  6. Combine to make a loaf (I used my hands) and place into a 9" X 5" bread pan
  7. Bake for 30 minutes
  8. Take the mini potatoes and toss in olive oil and season with salt and pepper
  9. place them onto a rimmed baking tray
  10. using the bottom of a saucepan, smash the potatoes in order to flatten them a little bit, not completely
  11. After 30 minutes, remove the meat loaf and spread remaining tomato sauce on top
  12. Continue baking for another 30 minutes
  13. At this time, add the tray of smashed mini potatoes and bake alongside the meatloaf for about 30-40 minutes
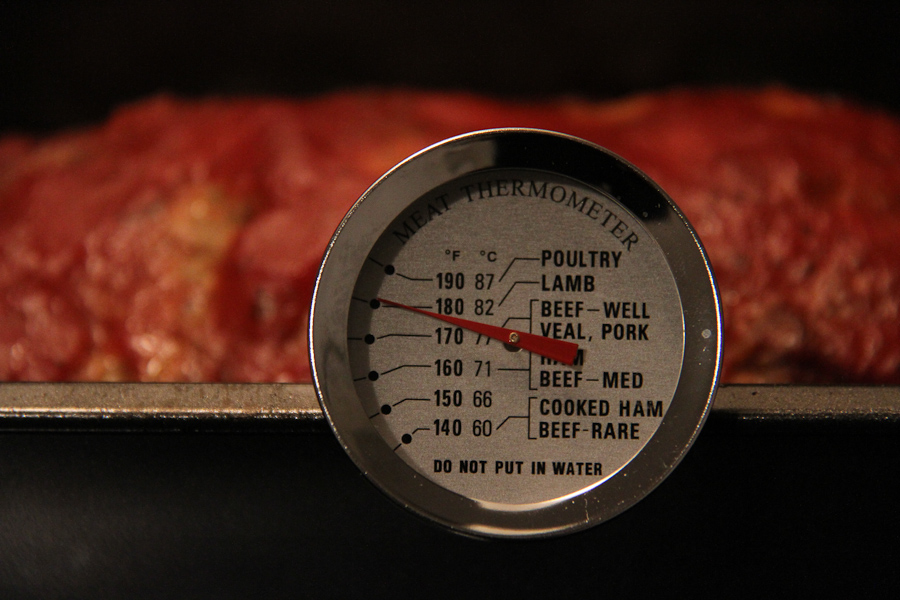
  14. Test meat loaf for an internal temperature of 180F
  15. Remove from oven and allow to rest for about 10 minutes
  16. Removed from pan, and serve in slices
  17. Remove the potatoes when the skin is crispy


While taking into consideration the fact that some ovens are hotter than others, I wanted to ensure that the loaf was cooked through. You can never be too sure.


Internal temperature


It looked great, and smelled wonderful. I couldn’t wait to cut it into slices.


Meatloaf


The tomato sauce was so sweet… a perfect combination.


Meatloaf slices


When will you be making meatloaf for your family?


Meatloaf, Smashed Mini Potatoes, Steamed Broccoli


Take care folks! See you again soon 🙂


Related Posts Plugin for WordPress, Blogger... read more
Post Popularity Graphing by Knowledge Ring