#GlutenFree Chickpea Fritters for #SundaySupper

Jun 9, 2013 by

I’ve had to look into so many things with regards to how we eat our food today. With all the various food sensitivities out there, it is so important to pay attention to foods that can cause illness to you or your loved ones. I have had to learn about  Gluten from a friend of mine who is sensitive to wheat products. I was not aware of Celiac Disease/Gluten Sensitivity before my friend shared her situation with me. I was more familiar with common food allergies/sensitivities like dairy, nuts and shellfish. Today’s #SundaySupper theme is all about meals prepared for either health or dietary restrictions. So whether it be Gluten Free, Dairy Free, Sugar Free, Nut Free – we will have something to share with you today.

Our host this week is Bea from Not So Cheesy Kitchen. Bea’s blog is dedicated to sharing meals and information about a rare metabolic disorder called Classic Galactosemia. This particular disorder prevents the body from processing sugar galactose properly. Bea has been able to allow her family to thrive by preparing special meals that are free from galactose, with guidance from her metabolic clinic. Bea is a true champion! Having a restricted diet has its many challenges, but Bea manages it well and shares her recipes and experiences with us on her blog. Thank you , Bea! And Thank you for hosting this theme that is so close to your heart.

Today I am sharing with you a Gluten Free Fritter using Chickpeas, Scallions, and tomatoes. I really like fritters. There is something about them that I find so comforting. Perhaps it’s because my grandma used to make saltfish fritters for me, I’m not sure. They are so easy to make and such a practical snack. Everyone should be able to enjoy fritters of some kind. They can be served as a side dish or as a snack.


Chickpea Fritters #GlutenFree


#GlutenFree Chickpea Fritters for #SundaySupper

Prep Time: 15 minutes

Cook Time: 15 minutes

Total Time: 30 minutes

Yield: 4

Ingredients

  • 1/2 Cup Gluten Free All Purpose Flour
  • 1/2 Cup Quinoa Flour
  • 1 1/2 Tsp Gluten Free Baking Powder
  • 1/2 Tsp Salt
  • 1 Egg, lightly beaten
  • 3/4 Cup Unsweetened Almond Milk
  • 3 Large Scallions
  • 4 Campari Tomatoes
  • 1 2/3 Cups Chickpeas (Garbanzo Beans), rinsed and drained
  • 1/4 Cups Chopped Spinach
  • Sunflower Oil or Olive Oil for frying

Instructions

  1. In a medium bowl, sift flours, baking powder and salt. Add milk and eggs, whisk to make a smooth batter.
  2. Fold in the scallions, chickpeas, tomatoes and spinach. Add salt and pepper to taste.
  3. In a large skillet, bring oil to medium high heat. Using a ladle, add about 3 tablespoons of the batter and cook in batches for about 3-5 minutes, then flipping until browned on the other side.
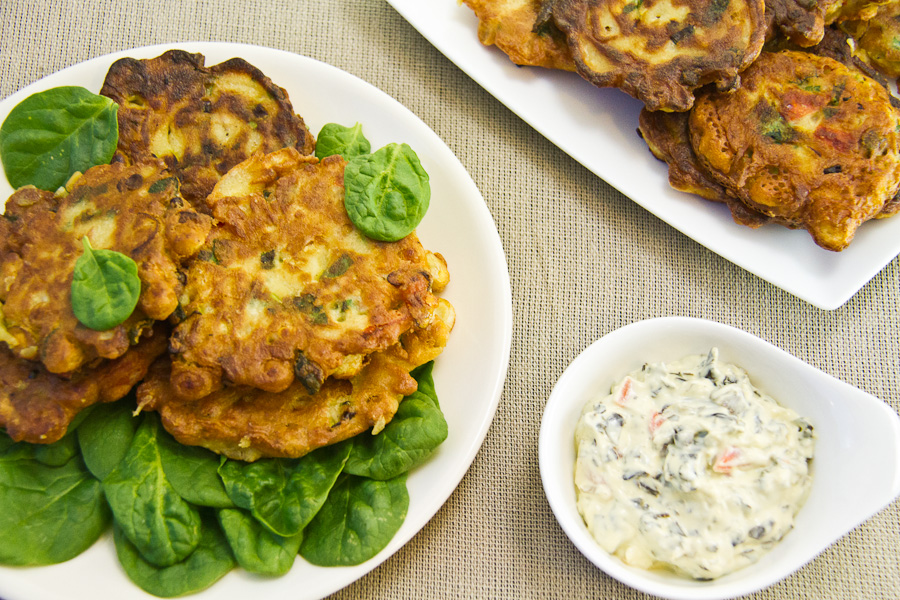
  4. Serve warmed on a bed of spinach (optional) with any creamy Gluten Free dip of choice.
https://lovelypantry.com/2013/06/glutenfree-chickpea-fritters-for-sundaysupper/


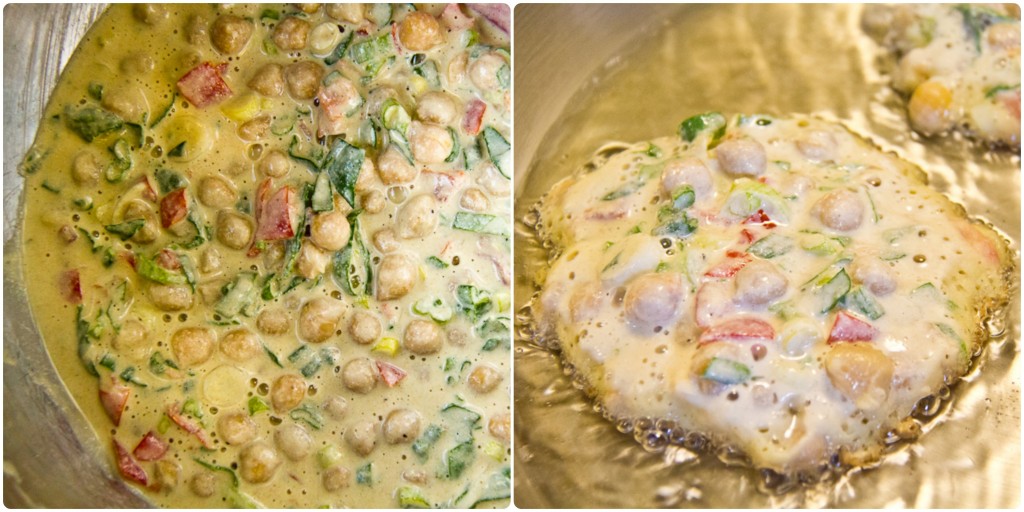
I really enjoyed these chickpea fritters. It’s always great to know you can create more than just hummus with a can of chickpeas. Scallions bring a lovely flavour to the fritters and pair nicely with the Tomatoes. Any tomato will do, as long as you remove the seeds first. You only need about a cup of diced tomatoes.


Scallions, Tomatoes, Chickpeas


Chickpea Fritter Batter

#GlutenFree Chickpea Fritter Batter


I used this opportunity to use the Gluten-Free Flour that I had in my pantry. Instead of using a full cup the GF flour for this recipe, I went half and half with Quinoa Flour – another Gluten Free flour.


Chickpea Fritters #GlutenFree-9

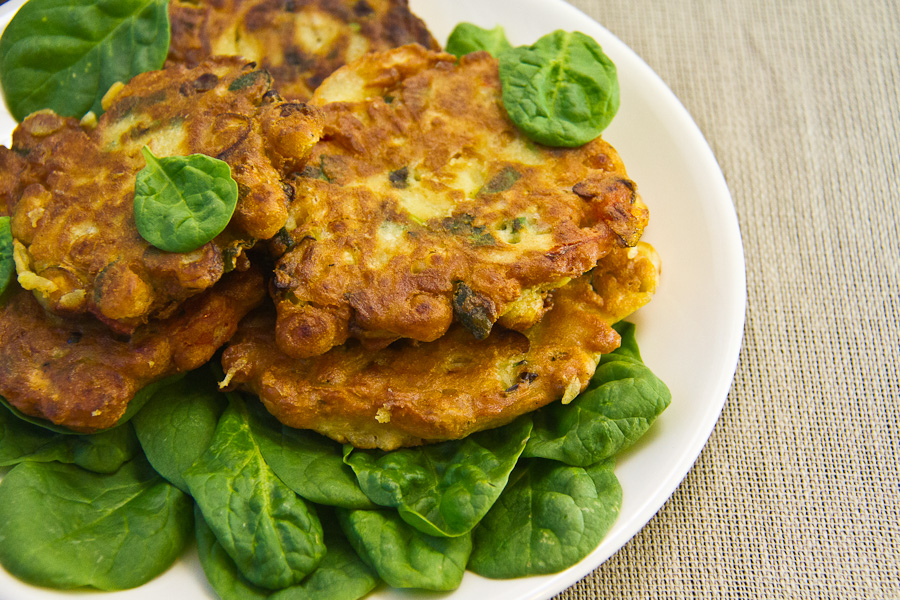
Chickpea Fritters #GlutenFree

I also shredded a handful of spinach to give the fritters some added nutrition as well as a beautiful hint of green!

Chickpea Fritters #GlutenFree-10

#Gluten-Free Chickpea Fritters


Chickpea Fritters #GlutenFree-13

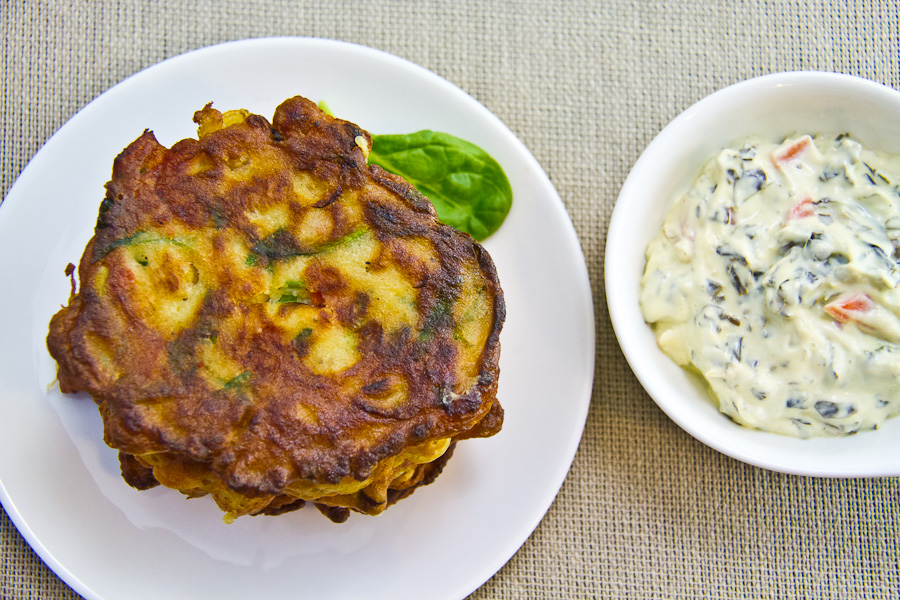
#Gluten-Free Chickpea Fritters


I’m very happy to have made a #GlutenFree dish for today’s #SundaySupper. Although I do not have a Gluten sensitivity, I will always try to make a variety of recipes that can assist other readers with special diets. Hope you enjoyed my recipe today. As always, check out the list of Recipes from the #SundaySupper group. Feel free to PIN and share your favourites on Facebook or Twitter!


Breakfast

  • Dairy, Egg, Gluten, Nut & Soy Free Brown Rice Breakfast Pudding bygirlichef
  • Dairy & Nut and Sugar Free Blueberry Tangerine Muffins by Vintage Kitchen
  • Dairy, Egg, Gluten, Nut, and Soy Free Homemade Mango Jam Recipe byMasala Herb

Main Courses

Sides
Breads

Treats

Drinks


***

sunday supper Sneak Peek: 45+ Fabulous Summer Berry Recipes for #SundaySupper

Join the #SundaySupper conversation on twitter on Sunday, April 14th to talk all about movies that have inspired us to head into the kitchen – and the food that comes from that inspiration (7pm EST)!

We’ll tweet throughout the day and share recipes from all over the world.   Follow the#SundaySupper hashtag, and include it in your tweets to join in the chat.

Check out our #SundaySupper Pinterest board for more delicious recipes and food photos.

read more

Stamp and Go! {Jamaican Codfish Fritters} for #SundaySupper

Feb 3, 2013 by

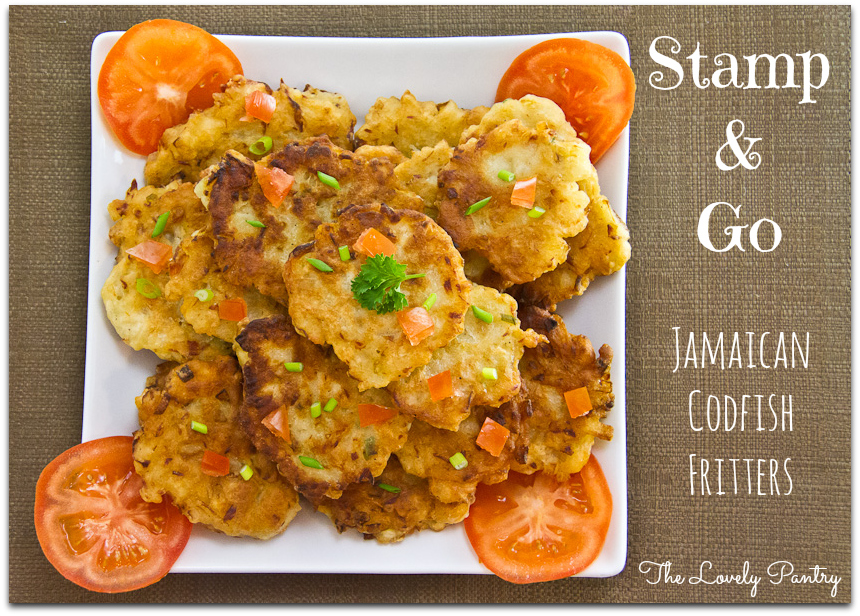
Today is a BIG #SundaySupper. Its Superbowl Sunday and we have so many good dishes for this spectacular occasion. It’s spectacular for a few reasons. If you love American Football, then you’ve probably been eagerly anticipating this day. If you love food, well there will certainly no shortage of food today. If you’re like me, you’ll be looking forward to the Superbowl commercials and the half-time performance. Yes, that really is all that I’m looking forward to. Well that and these Jamaican Codfish Fritters! It’s a wonderful snack or side dish/appetizer and is one of my favourite Jamaican treats. My Grandmother used to make these fritters for me. I just loved them. The saltiness of the Codfish will always win me over. I made them for the first time and now I’m in fritter heaven!


Stamp & Go_Codfish Fritters_1


My recipe today was taken from my very special Jamaican cookbook by Enid Donaldson, “The Real Taste Of Jamaica”. This book has not failed me yet! I’m comforted knowing that it keeps me close to home for so many occasions including game time!


Stamp and Go! {Jamaican Codfish Fritters}

Prep Time: 30 minutes

Cook Time: 20 minutes

Ingredients

  • 1 Cup Salted (deboned) Codfish
  • 2 Cups All Purpose Flour, Unbleached
  • 2 Onions, Finely chopped
  • 2 Tomatoes, finely chopped, seeds removed
  • 2 Cloves Garlic, minced
  • 2 Stalks Escallion, finely sliced
  • 2 Tsp Black Pepper
  • 1/2 Scotch Bonnet Pepper, finely chopped (I omitted this ingredient)
  • 2 Tbsp Vegetable Oil + more for frying
  • 2 Tsp Baking Powder
  • 1 1/2 Cups Water, at room temperature

Instructions

  1. Soak codfish overnight in water or bring to a boil twice (for 12-15 minutes), draining and adding fresh water after each boil.
  2. Drain and rinse the codfish under running cold water
  3. Using a fork or your fingers, flake the codfish into small pieces, taking care to remove any remaining bones
  4. To a small skillet, add oil and allow to get hot. Add onion, garlic, tomatoes and escallions. Sautee until soft about 5 minutes. Add black pepper then combine. Remove from heat and allow to cool
  5. Add codfish to the seasonings. Stir to combine
  6. In a medium bowl, add flour and baking powder. Stir to incorporate
  7. add codfish mixture to the flour and stir to combine.
  8. Add water gradually, mixing by hand until a firm but loose batter is achieved
  9. Add by about 3 tbsp at a time and fry in oil at medium heat on both sides (about 3-5 mins) until golden brown and cooked through
  10. Transfer to absorbent paper towels to get rid of any excess oil.
  11. Transfer to a platter and serve warm
https://lovelypantry.com/2013/02/stamp-and-go-jamaican-codfish-fritters-for-sundaysupper/


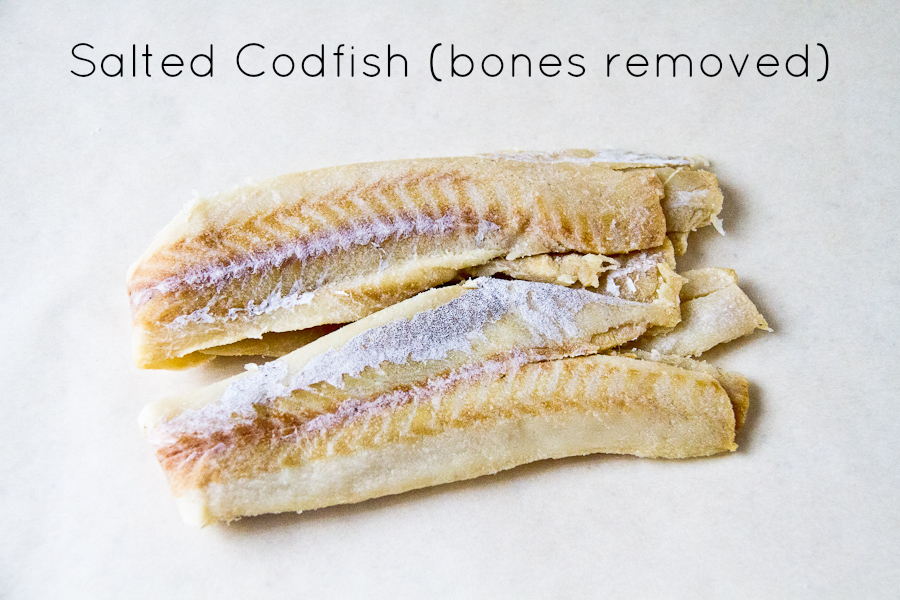
For those who are not familiar with Salted Cod/Cod Fish/Salt Fish – this is what it looks like straight out of the package. This looks pretty nice compared to what I grew up seeing. This is from an 11oz package. I used half of it to make this recipe. I got mine from the local West Indian Market but I have seen it in the regular supermarket also.


Stamp_and_Go_Salted Codfish

Salted Cod Fish direct from packaging


I remember having to flake codfish on a Saturday night in preparation for Ackee & Salt Fish on Sunday morning before church. The fish we had then wasn’t as refined and certainly was not de-boned. I had to use my fingers and flake while removing bones from the fish. Not a glamorous task at all. But I love Saltfish so it had to be done. I would flake the fish while my Mom would prepare the dumpling dough.

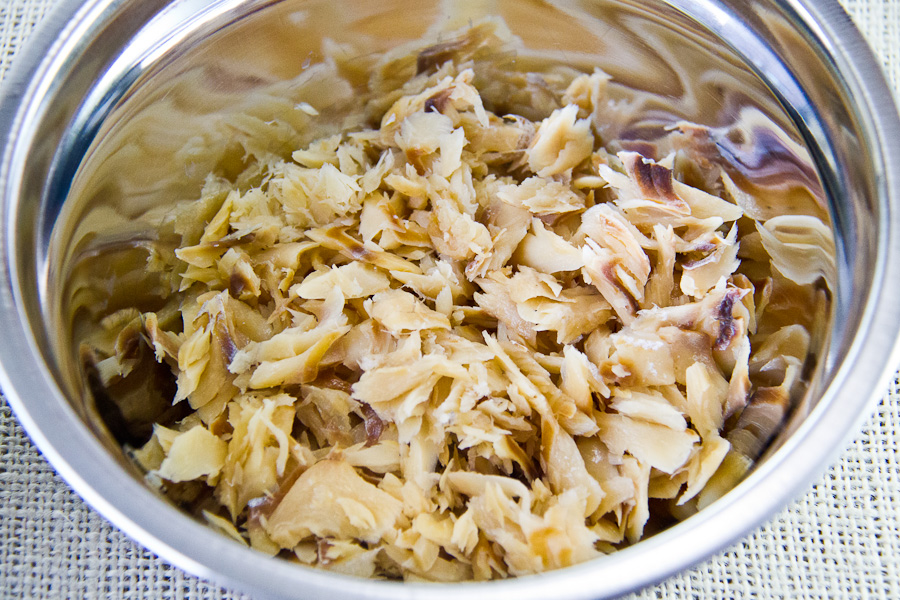
Once the fish has been boiled twice, taste the fish to see if it is to your liking. You don’t want to boil out all the salt. It should in fact still be salty. Keep in mind that it is going to be placed in a batter that will likely reduce the saltiness. Here is what the codfish looks like once cooled and flaked.


Stamp_and_Go_Codfish_Fritters-3

Flaked Cod Fish


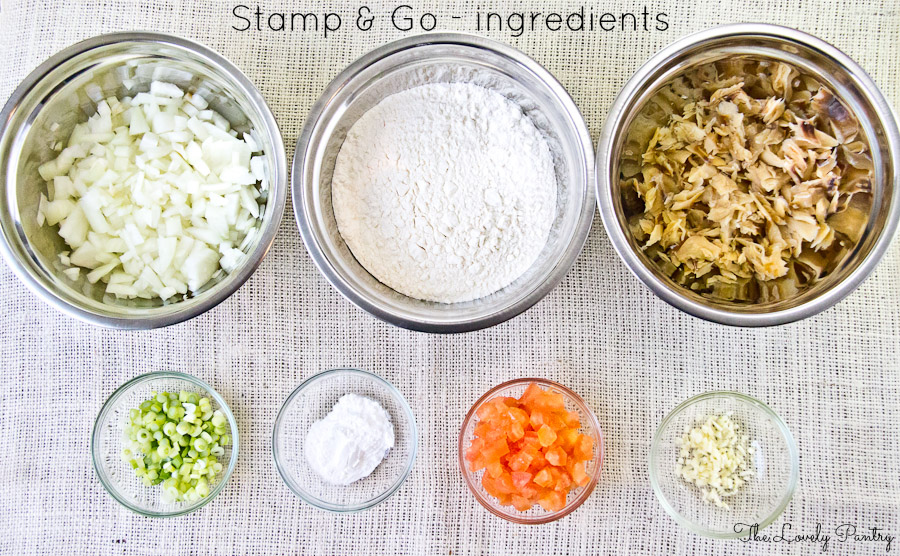
Stamp_and_Go_Codfish_Fritters_ingredients

Lets make Stamp & Go!


While sautéing the seasoning, you will notice the wonderful fragrance as they combine. I decided not to add Scotch Bonnet pepper this time but I’m sure I will the next time. I added black pepper instead.


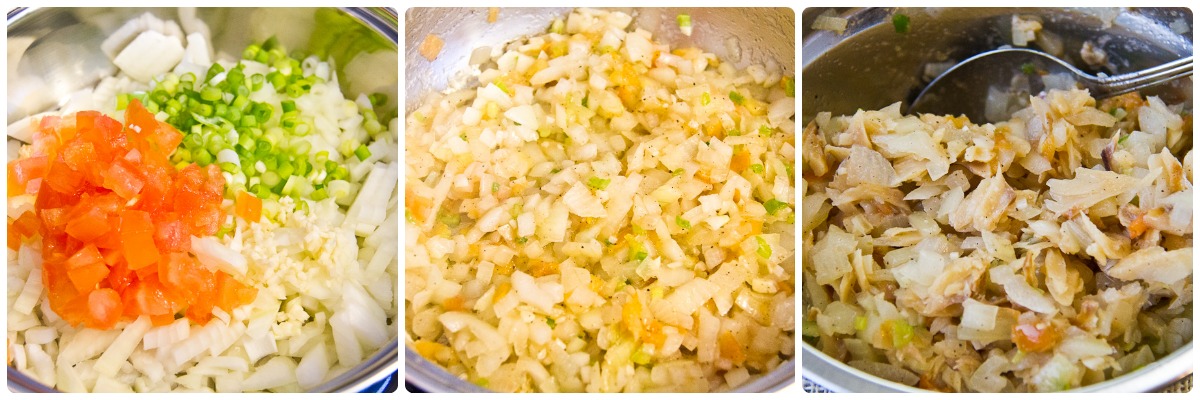
Stamp & Go_ Seasoning + Fish

Sautee the onion, garlic, tomatoes and escallions. Combine with codfish.


Creating the batter was interesting. The recipe did not state how much water to use. I added 1/4 Cup of water at a time until I arrived at a nice consistency. I tested out a fritter to see how it came out after adding a cup of water to the batter. I only needed half a cup more to get it right. Fry these fritters at medium heat. And do not leave the skillet unattended while browning these fritters.


Stamp & Go_Prep


Wouldn’t you like to see these on your Superbowl party platter?  These are a definite crowd pleaser.


Stamp_and_Go_Codfish_Fritters_platter

Codfish Fritter Platter

Grab yourself a plate and dig in!


Stamp_and_Go_Codfish_Fritters_plate

Jamaican Cod Fish Fritters, also known as Stamp & Go


Be sure to visit the rest of the #SundaySupper team to see the amazing game day buffet items.

#SundaySupper Super Bowl Appetizers & Snacks:

#SundaySupper Super Bowl Main Dishes:

#SundaySupper Super Bowl Desserts:


#SundaySupper Super Bowl Tablescape:  10 Tips For A Winning Superbowl Buffet Table from An Appealing Plan

***

Join the #SundaySupper conversation on Twitter on Sunday, February 3rd to talk all about our Super Bowl Recipes!

We’ll tweet throughout the day and share recipes from all over the world.

Our weekly chat starts at 7:00 pm ET and you do not want to miss out on the fun.

Follow the #SundaySupperhashtag, and remember to include it in your tweets to join in the chat.

Check out our #SundaySupper Pinterest board for more fabulous recipes and food photos!


read more

Skillet Corn and Edamame with Spinach and Bacon for #SundaySupper

Jan 13, 2013 by

Today is a very special day for #SundaySupper. We are celebrating our very first birthday! For one year, #SundaySupper has been inspiring families with home cooked meals every Sunday. Most Sundays, you will read my accolades about the #SundaySupper family and the camaraderie we share. The internet is a huge place, and I feel quite privileged to have found a very special group with whom I can break bread with and get to know through their weekly posts. I remember my very first #SundaySupper post. I joined in April 2012. The theme was Budget Friendly Meals and I made Baked Butternut Squash & Asparagus Risotto. I loved that recipe. And I still bake my Risotto to this day. There were about 12 of us participating that day. Who knew that #SundaySupper would become such an integral part of my blogging experience. We get to learn about cuisine from all over the world. We learn about family history and traditions.

We are celebrating this week’s birthday event by choosing recipes from contributors that have inspired us during the past year. Honestly, it took me a few days to decide on a recipe from past #SundaySupper events. I finally decided on a very colourful and healthy salad that was part of the event titled  “100 recipes every mom should have”  by  Katie Workman. This event was held in July so I was unable to participate since I was on vacation. But I felt like I didn’t skip a beat. Every recipe for our #SundaySupper events is listed on the Family Foodie website for ongoing inspiration.

I was inspired by a post from Sunithi, from Sue’s Nutrition Buzz. Her post was titled “Skillet Spinach Corn with Edamame and Bacon Bits“. Absolutely delightful! This recipe totally fit in with my current mindset which is to eat healthy! The ingredients are items that I generally have on hand and the combination of colours is just absolutely visually appealing. Sue always posts healthy recipes which I have always appreciated. I know you will love and appreciate this recipe from our #SundaySupper archives.

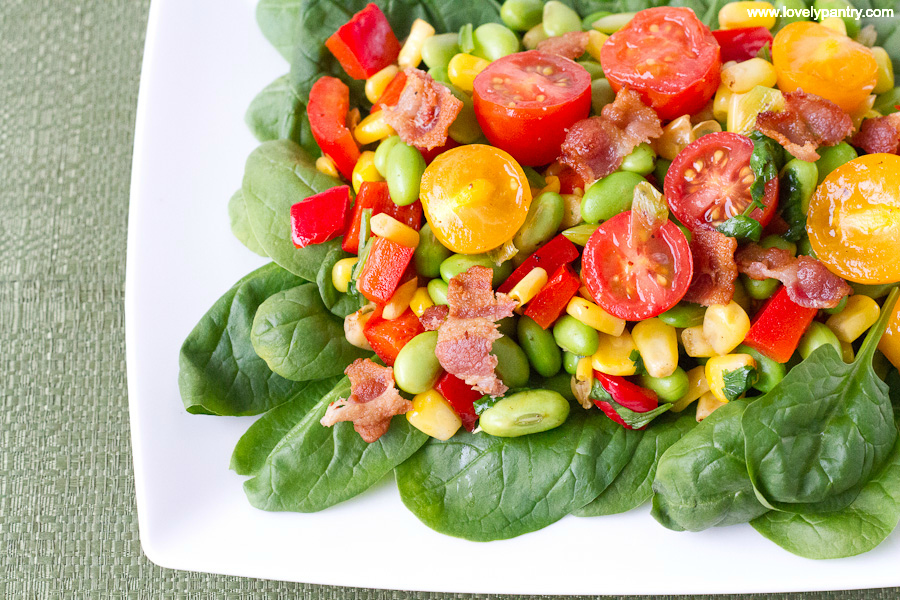
Skillet Corn Edamame with Spinach and Bacon

Skillet Corn Edamame with Spinach and Bacon


Prep time
Cook time
Total time
 
Ingredients
  • 1 Cup Sweet Corn
  • 1 Cup Edamame
  • 2 Heaping handfuls of baby Spinach
  • 2 scallions, chopped
  • ½ Red Sweet Pepper, slice and diced
  • ¼ Cup Cilantro, chopped
  • ½ Cup Red and Orange Cherry Tomatoes
  • 2 Slices Bacon
  • ½ Tsp Salt
  • 1 Tsp Ground Black Pepper
  • ½ Tsp Cumin
Instructions
  1. In a serving dish, place spinach to cover most of the dish.
  2. In a skillet, cook bacon until crispy. Transfer to a dish lined with paper towels to absorb the oil. Break up into bits.
  3. Drain the skillet of most of the oil, reserving about a tablespoon
  4. Add scallions to the hot skillet and sautee for about a minute
  5. Add corn, edamame, sweet pepper, salt & pepper and cumin to the skillet. Sautee for about 4 minutes
  6. Add cilantro and fold in gently
  7. Add tomatoes and fold in and allow to warm through for about a minute
  8. Using a large spoon, transfer the contents of the skillet to the bed of spinach.
  9. The heat from the salad will cause the spinach to soften nicely
  10. Top the salad with the bacon bits. Serve warm and enjoy


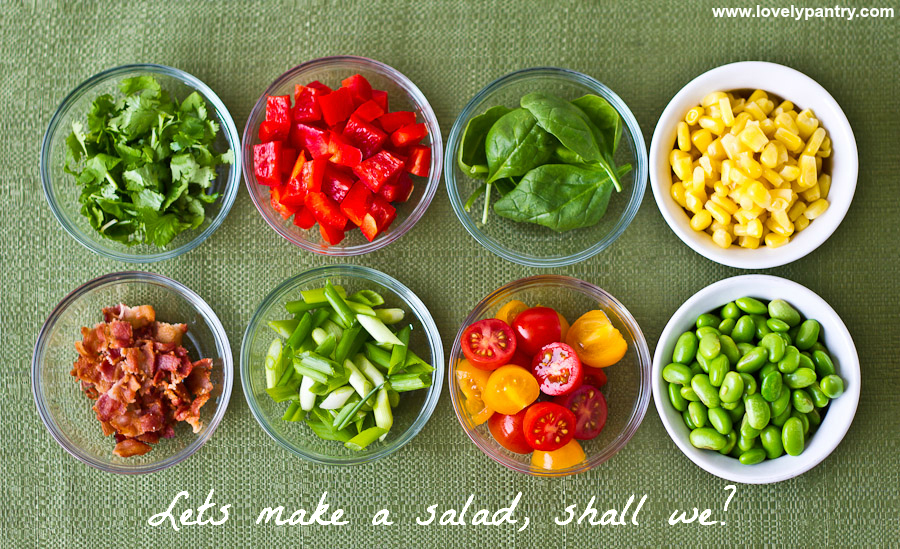
Skillet Corn Edamame with Spinach and Bacon - main ingredents

Skillet Corn Edamame with Spinach and Bacon – main ingredients


The main change to the original recipe – I did not add the spinach to the skillet. It will soften when the corn and edamame are placed on top. I also changed the title just a bit because of this change. I also did not use any oils. I just used some of the fat rendered from the bacon. It gave the salad such flavour!

I can see this salad being served with most meats as a side dish. I had it myself as a main dish and it certainly hit the spot. The salty bacon, the creamy edamame, the cilantro, the sweet corn, the tomatoes, sweet pepper..they all combined very well together.


Skillet Corn Edamame with Spinach and Bacon-7a

Skillet Corn Edamame with Spinach and Bacon


Here are the recipes from the #SundaySupper family. They all look wonderful! This must have been a big task! After all, How do you choose just one recipe from 52 weeks of fabulous Sunday Supper Recipes?

Sunday Supper Appetizers:

 Sunday Supper Soups and Breads:

 Sunday Supper Main Dishes: 

Sunday Supper Veggies: 

Sunday Supper Desserts and Snacks: 

 Sunday Supper Breakfast Faves:

Sunday Supper Wine Pairings by ENOFYLZ Wine Blog


Announcing a New Addition:  Tablescape by An Appealing Plan, Anniversay Dinner featuring Cheesecake with Fresh Berries orginally posted by The Messy Baker Blog

Join the #SundaySupper conversation on twitter each Sunday. We tweet throughout the day and share recipes from all over the world. Our weekly chat starts at 7:00 pm ET and you do not want to miss out on the fun. Follow the#SundaySupper hashtag and remember to include it in your tweets to join in the chat.

Check out our #SundaySupper Pinterest board for more fabulous recipes and food photos.

Would you like to join the Sunday Supper Movement? It’s easy. You can sign up by clicking here → Sunday Supper Movement.


read more
Hot Sweet Potato Wedges with Jerk Butter

Jan 4, 2013 by

Happy first Friday of 2013! I hope everyone is off to a great start and is recovering from the holiday festivities and food fest. I’m gearing up and getting ready for the routine which no doubt will kick in on Sunday. Sunday is cooking day. For years now, unless something comes up and I have to shuffle things around, Sunday is the day that I cook a few items for the first part of the week. I like that I can eat some now, and freeze the rest for later if necessary. This works best for things like meat and rice dishes. Another reason why I cook multiple dishes, is because I need a different item that my husband can take to lunch. It’s no fun eating the same thing for lunch as you did for dinner. So I make sure he has options.

The one thing I like doing, and really don’t do enough, is side dishes. This could be a salad, or a bread, or just something nice to compliment a meal. Let’s start doing more sides shall we? Today is as good as any. So why not. I will keep it as figure friendly as possible. After all, I’m sure I’m not the only one that has to do damage control after December 🙂


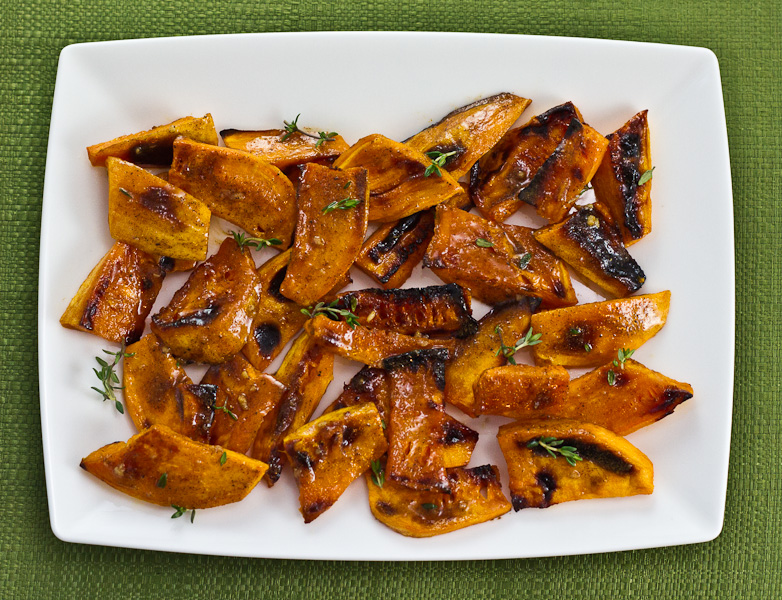
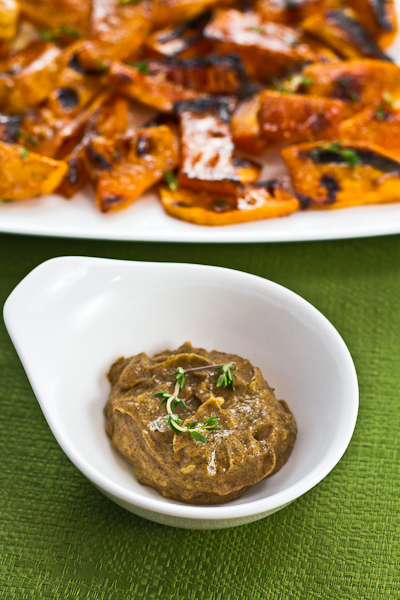
Hot Sweet Potato Wedges with Jerk Butter

Hot Sweet Potato Wedges with Jerk Butter


Ingredients
  • 2 large Sweet Potatoes (peeled, cut into wedges about 2 inches in length, ½ inch in width)
  • 5 Tbsp Sunflower Oil
  • 3 Tbsp Soft Brown Sugar
  • The juice from 2 limes
  • ***
  • Jerk Butter:
  • 4 Tbsp Butter, softened
  • 1½ Tsp Allspice
  • ½ Tsp Ginger
  • ½ Tsp Cayenne
  • 1½ Tsp Black Pepper
  • ½ Tsp Cinnamon
  • Leaves from 2 sprigs of Thyme
  • 2 Garlic Cloves, finely chopped
  • 2 Tsp Brown Sugar
  • A Pinch of Salt
  • Juice from ½ a lime
Instructions
  1. Preheat oven to 400F (Roast)
  2. In a small bowl, combine sunflower oil, brown sugar, and lime juice. Sprinkle a little salt and pepper (to taste).
  3. Add sweet potato, tossing to coat them in the mixture
  4. Place the sweet potatoes on a foil lined baking sheet, ensuring that the slices do not overlap
  5. Roast until tender about 20 minutes, turning them over half way through
  6. For the Jerk Butter:
  7. Combine all the ingredients. When the sweet potatoes are ready and warm, toss in a little of the jerk butter. Serve as a dip at room temperature


I thought this was going to be really spicy. But it wasn’t. It was quite pleasant. I loved how the sugar and lime complimented the sweetness of the potatoes. It was something quite delicious… I can see myself having this with a simple roast chicken and a salad. The chicken could even be, roasting along side the sweet potatoes. How easy is that for dinner in an hour?


Hot Sweet Potato Wedges with Jerk Butter

Hot Sweet Potato Wedges with Jerk Butter


As you can see, it’s not a lot of butter. So it can easily  be shared as a dip.


Hot Sweet Potato Wedges with Jerk Butter

Hot Sweet Potato Wedges with Jerk Butter


I’m thinking I’ll be doing some more sweet potato dishes since I love it so much.

Happy Friday, friends!


~Lyn


read more

Roast Pumpkin and Ricotta Crostini

Dec 19, 2012 by

I’ve been fluttering in my cookbooks again. It’s a wonderful way to spend a few borrowed minutes, just to browse and find your next victory. The problem is, there are so many recipes I want to try, and very little time to try them all. I will continue to compete with my family’s schedule and create wonderfully tasting food – even if it’s just for me 🙂 Today, that’s not the case. This dish is great for a light snack  or even as an appetizer. You decide! It’s always a good idea to serve vegetables in a nice way, especially during the holiday season.

I love bread. Usually most breads will appeal to me if its crusty on the outside, light and fluffy on the inside. Toasted with butter and some other condiment will also do the trick. I have fond memories of having French Bread as a child growing up in England. It was something that we enjoyed served with a soup or just whenever we felt like having it.

This recipe was adapted from “Cooking Season by Season” – I basically cut the recipe in half to suit my household.


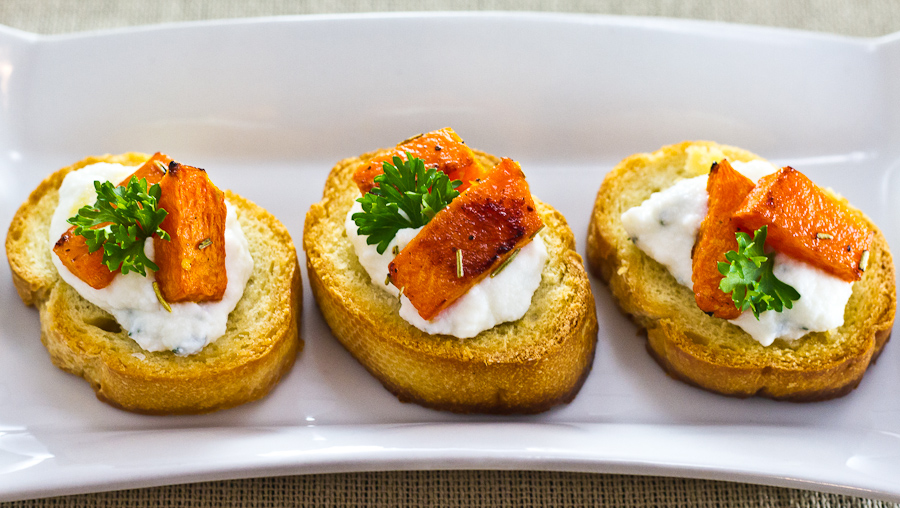
Roasted Pumpkin & Ricotta Crostini


Prep time
Cook time
Total time
 
Ingredients
  • 8 oz Pumpkin, peeled seeded and cut into chunks
  • 1 Tbsp Olive Oil
  • 1 Clove Garlic, minced
  • 2 Tbsp freshly squeezed lemon juice + the zest of ½ a lemon
  • 7 Tbsp Light Ricotta Cheese
  • 1 Tsp Dried Rosemary
  • 1 Tsp Fresh Thyme Leaves
  • Crostini:
  • 8 Slices Crusty Baguette
  • 1 Tbsp Olive Oil
  • Salt + Pepper
Instructions
  1. Preheat oven to 400F
  2. Brush a foil lined baking sheet with olive oil.
  3. Lay baguette slices on the foil and then brush the top with olive oil
  4. lightly sprinkle with salt and pepper
  5. Bake for 10 minutes until golden brown
  6. Remove from oven and allow to cool on a wire rack
  7. In a bowl, toss the pumpkin chunks with oil, garlic, lemon zest and rosemary
  8. Season with salt and pepper then roast for 35 minutes until tender and golden
  9. Remove from oven and allow to cool
  10. In a small bowl, combine ricotta, thyme and lemon juice
  11. Add about a tablespoonful of ricotta on each crostini and top with a few chunks of roasted pumpkin, pressing down a little into the ricotta
  12. Serve and enjoy


How do you dress up your fall/winter vegetables? I love roasting root veggies. It keeps it simple and tasty.


Roasted Pumpkin & Ricotta Crostini-2

Roasted Pumpkin & Ricotta Crostini


Enjoy!

~Lyn


read more

Related Posts

Share This

Grilled Polenta Cakes for #SundaySupper

Sep 30, 2012 by

Here we are again, another #SundaySupper. Can you believe that September is over already? Where does the time go!? Soon enough, we’ll be Thanksgiving, Trick-Or-Treat-ing, Tree decorating then Mistletoe-ing 🙂 I really do enjoy the fall season ~ the beautiful colours, the food, and the change in fashion. There’s just so much to appreciate.

Back in May, I shared a recipe by Cristina Ferrare for #SundaySupper. The recipe was called Fall Off The Bone Chicken and my family enjoyed every bite. The theme for that Sunday, was to prepare a recipe from Cristina’s cookbook called Big Bowl Of Love. I really enjoy her recipes and there were a few that I wanted to try. This recipe fits very well with todays #SundaySupper theme which is “Meals with five ingredients or less”. Our fabulous host is Amber of Mama’s Blissful Bites! We will be sharing recipes all day, but please do join us during our #SundaySupper Twitter chat at 7pm EST. Join the fun and share your favourite recipes and get meal ideas and inspiration while you’re at it! Whether you’re on a budget, want to use up some pantry items, or just need to whip up something quickly~ you’ll have a wonderful list of ideas to consider from our lineup this week!


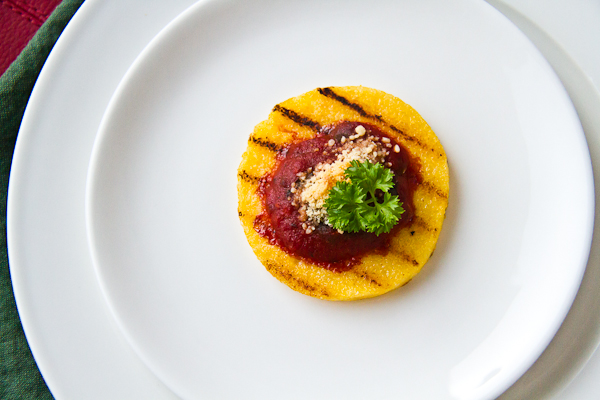
Grilled Polenta Cakes


5.0 from 2 reviews
Grilled Polenta Cakes
 
Prep time
Cook time
Total time
 
Polenta, Tomato Sauce & Spinach!
Author:
Recipe type: Starter, Appetizer, Snack
Serves: 4-6
Ingredients
  • 1 tube polenta, removed from casing, cut into ½-inch slices, and patted dry with paper towels
  • Approximately ¼ cup extra-virgin olive oil
  • Cooking spray
  • 1 cup Garlic & Herb Tomato Sauce (Or a tomato sauce of your choice)
  • ½ cup grated Parmesan cheese
  • Pinch of salt
  • 1 cup baby spinach (a generous handful)
Instructions
  1. Brush both sides of the polenta cakes with the olive oil, and set aside.
  2. On a hot griddle pan, place the polenta slices in one layer on the pan
  3. Grill for 10-12 minutes on each side or until both sides are golden and have grill marks
  4. Remove the slices from the grill and let cool on a baking rack
  5. In a small saucepan, add tomato sauce and bring to a gentle boil
  6. Add the spinach and stir until combined and warmed through
  7. Just before you are ready to serve, preheat the oven to 350°F
  8. Spray a baking sheet with cooking spray
  9. Arrange the grilled polenta cakes on the baking sheet
  10. Place a heaping tablespoon of the tomato sauce with spinach on each slice, then add a pinch of parmesan cheese on top
  11. Bake for about 15 minutes
  12. Garnish with fresh parsley, salt & pepper to taste
  13. Serve and enjoy
Notes
Adapted from - Page(s): 55-55, Cristina Ferrare's Big Bowl of Love (Delight Family and Friends with More than 150 Simple, Fabulous Recipes) by Cristina Ferrare


This recipe is really simple and easy – my favourite kind. I was interested in this recipe because I have always made polenta from scratch. This would be the first time that I would be buying ready-made polenta. It certainly was easier! I won’t make this a habit but at least I’ll be able to compare and know the difference. All I really needed was polenta, tomato sauce, spinach and parmesan cheese. I think this makes a great appetizer, side dish or a very tasty snack!


Grilled Polenta Cakes


Grilled Polenta Cakes – Grilled Polenta, Tomato Sauce with Spinach & Parmesan Cheese


Here’s the lineup for todays #SundaySupper:

Breakfast, Starters, Butters and Jams:

Main Dishes:

Desserts:

Beverages:


Related Posts Plugin for WordPress, Blogger... read more
Post Popularity Graphing by Knowledge Ring