Dark Chocolate Chip Granola Bars

May 4, 2012 by

I’ve been wanting to make granola bars in what seems like forever! But I finally found a recipe that I liked and wanted to try. I really have to look at the ingredients in order for me to decide if I’m going to make it. I’m not crazy about nuts (I prefer them on their own) and it’s not uncommon to see many granola recipes with a variety of nuts included. I wanted something that the kids would enjoy and not find things to pick out or require too much effort on their part. When I came across this awesome recipe from a lovely little blog called Lauren’s Latest, I knew I had found “it”. Lauren’s recipe was adapted from Rachel Ray, and I adapted her version with what I had available.

I decided to make these after I lost my natural light, but I knew there would be nothing left after they were ready, so I went ahead and took photographs anyway. I’ve made these granola bars twice and only a few make it to daylight.

Chocolate Chip Granola Bar - No bake


5.0 from 2 reviews
Dark Chocolate Chip Granola Bars, No-Bake
 
Prep time
Total time
 
An easy granola bar recipe that can be made within minutes!
Author:
Recipe type: Treat, Snack
Serves: 8
Ingredients
  • 3 Tbsp Butter
  • 3 Tbsp Cinnamon Creamed Honey (Or plain honey)
  • 1 Tbsp Agave Nectar
  • ⅓ Cup Brown Sugar
  • 2 Cups Quick Oats
  • 1 Cup Puffed Rice Cereal (like Rice Krispies)
  • 1 Tsp Vanilla
  • ½ Cup Dark Chocolate Chips (or milk chocolate)
Instructions
  1. In a medium bowl, add cereal and oats. Stir to combine and set aside.
  2. In a small saucepan, melt butter, honey, agave, and sugar over medium heat just to a boil. Stir to combine. Reduce heat and remove after about 2-3 minutes.
  3. Add vanilla and stir
  4. Pour into cereal and oats, mix well to incorporate
  5. Transfer into a rimmed tray (12X8 inch and about an inch deep)
  6. Press firmly in order for the oats to cover the entire surface evenly
  7. Sprinkle with chocolate chips and gently, press down
  8. Allow to cool for a few minutes in the fridge (or an hour at room temperature)
  9. When firm, cut into bars.
Notes
Press firmly into the tray to prevent the bars from falling apart. Try to achieve about ¾ inch thickness. I put mine in the fridge for about 20 minutes before serving.


Rice Krispies and Quick Oats. These two ingredients were united for the first time in my house. I never had to buy Rice Krispies prior to this recipe. I even allowed my son to listen to them “snap, crackle and pop” like the commercials I used to see as a child. Embrace the Rice Krispie experience!


Rice Krispies and Quick Oats


I chose to use the Cinnamon Creamed Honey that I bought from the Farmer’s Market over the plain honey. The jar was unopened. How could  that be!!!??? When I tasted it at the market, it was splendid! I envisioned myself having it on toast with a cup of tea! I suppose I also wanted to add a very special flavour to the granola bars too. It worked out very well!


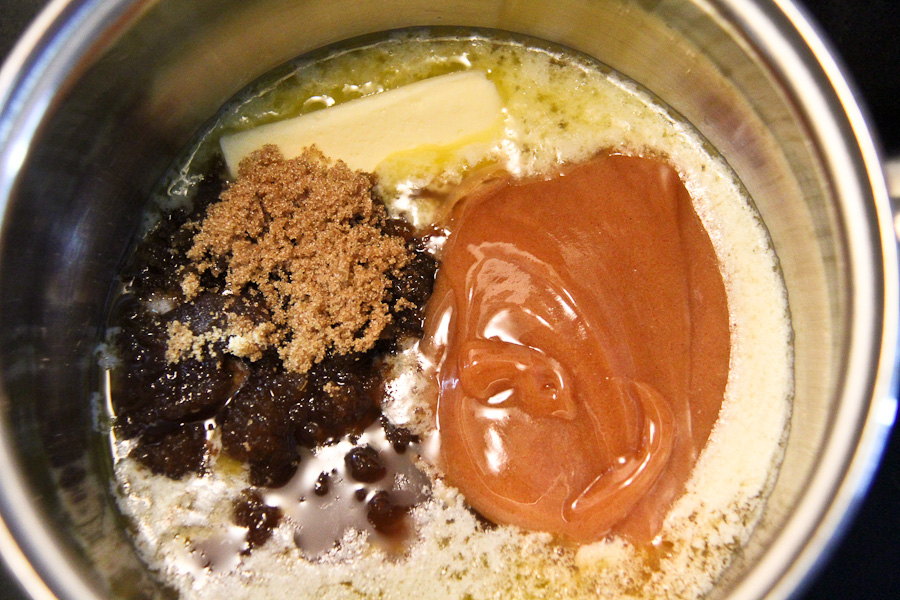
Cinnamon Creamed Honey, Butter, Agave Nectar, Brown Sugar


I didn’t allow it to remain at a boil, I just wanted to make sure everything was combined well before I removed it from the heat.


Mixture just to a boil, and combined


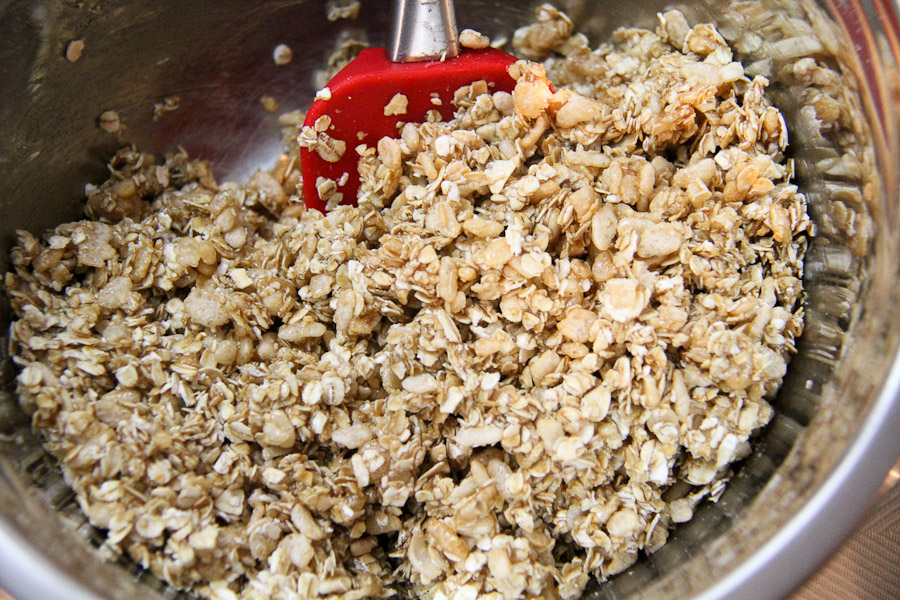
Muscle up for this part. The liquid firms up rather quickly and you have to make sure that everything is thoroughly combined.


Combining the honey mixture with the oats and cereal


Press firmly to ensure the mixture is packed tightly.  This helps to keep the bars from crumbling. I waited for it to cool for about 10 minutes (you should probably wait a little bit longer – an hour or so)


Press down *firmly* to flatten


I flipped everything onto a parchment lined cutting board. I sprinkled the chocolate chips then pressed them down. Whats funny is – they started to melt 🙂 I then used a pizza wheel (genius) and a knife to separate into bars. The kids were by my feet almost the entire time just waiting to get their hands on a piece. They had some crumbled bits, but got the real deal after it came out of the fridge for about 20 minutes or so. You know, to a child that’s like “forever”.


Granola Bars in the making!


My kids loved these little bars! Okay, so did I. We all had them with a glass of milk. A sweet treat to bring the family together.


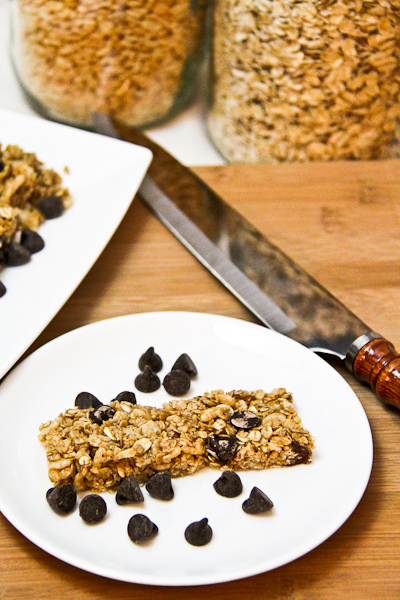
My first granola bar!


Picky eater APPROVED!


Dark Chocolate Chip Granola Bar


Happy Friday!!!

read more

Orange and Almond Muffins

Apr 23, 2012 by

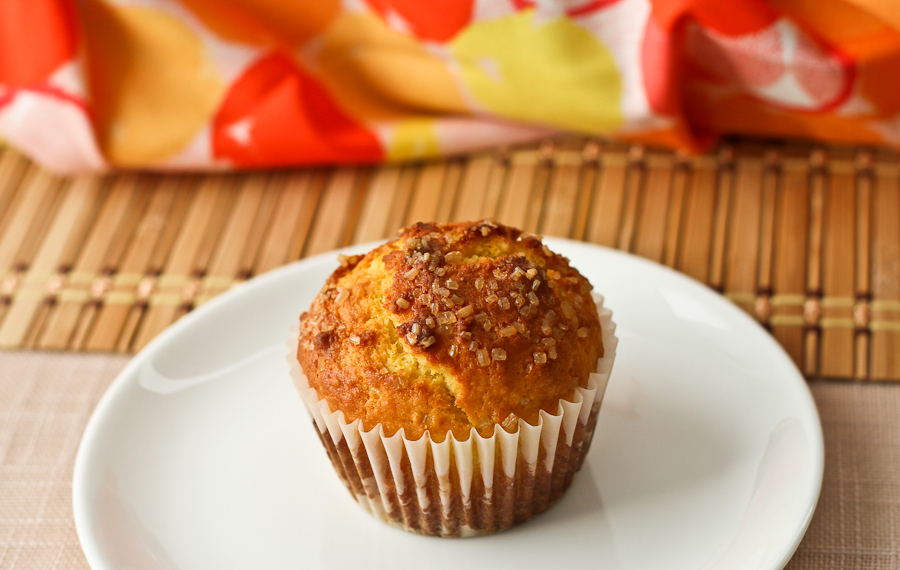
Muffins are so simple, and tasty to make. I mean, who doesn’t love a good muffin, right? I pulled out my little muffin recipe book called “100 Muffins from 1 Easy Recipe” and found another nice recipe. The last muffins I made from this book were the Easter Muffins and they were great. These were just as light and just as simple. They could easily be a quick breakfast on the go, or a snack. What I love is that there’s not too much sugar but it has a lovely citrus flavour. Really nice! The kids loved them, but they started to slow down once they hit the middle. I guess there’s no sugar in the middle! They also asked where the frosting was….


Orange and Almond Muffins


5.0 from 2 reviews
Orange and Almond Muffins
 
Prep time
Cook time
Total time
 
A light, citrus infused muffin
Author:
Recipe type: Muffin
Ingredients
  • 2 Oranges
  • ½ Cup Milk
  • 1½ Cups All Purpose Flour, Unbleached
  • 1 Tbsp Baking Powder
  • ⅛ Tsp Salt
  • ½ Cup Superfine Sugar
  • ½ Cup Ground Almonds
  • 2 Eggs
  • 6 Tbsp Sunflower Oil (or melted cooled butter)
  • ½ Tsp Almond Extract
  • 3 Tbsp Turbinado Sugar (Raw Sugar)
Instructions
  1. Preheat oven to 400F
  2. Grease a 12-cup muffin pan, or use 12 paper liners
  3. Finely grate the rind from both oranges and extract the juice into a measuring cup
  4. To the measuring cup with juice, add milk to make a full up and add rind
  5. In a large bowl, sift together flour, baking powder, and salt
  6. Stir in sugar and ground almonds
  7. In a large bowl, lightly whisk eggs, then beat in the orange/milk mixture, oil and almond extract
  8. Make a well in the dry ingredients and pour in the liquid mixture
  9. Stir until just combined. Take care not to over mix
  10. Spoon the batter into the prepared muffin pan
  11. Sprinkle Turbinado Sugar over the top of the muffins
  12. Bake for 20 minutes until well risen, golden brown and firm to the touch
  13. Allow muffins to cool in the pan for about 5 minutes before serving
Notes
Slightly adapted from "100 Muffins From 1 Easy Recipe", Page 60


Even before it is baked, it smells really good!


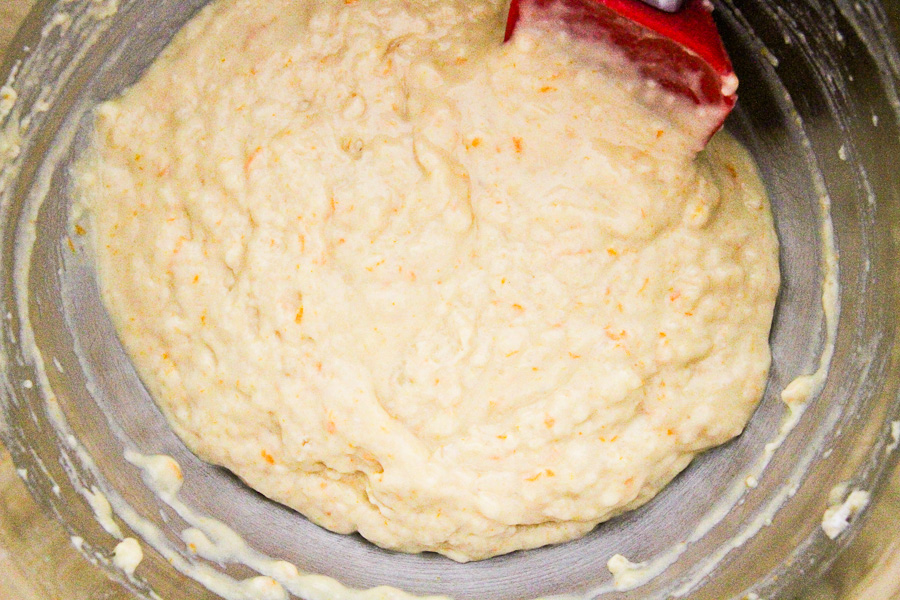
Zesty Batter


I like the coarse grittiness of the Turbinado Sugar. It gives a nice crunch at the end.


Muffin liners filled with batter and topped with Turbinado Sugar


The house smells great right about now!


Orange & Almond Muffins fresh out the oven!


I used Navel Oranges for this recipe. I find them to be sweet and very juicy.


Orange & Almond Muffin


Such a great little muffin. Bake, grab, go!


Orange & Almond Muffins


Happy Monday my dear friends! Have an awesome week!

~Lyn

read more

Red Velvet Cupcakes with Cream Cheese Frosting

Feb 14, 2012 by

Today is Valentine’s Day and although I don’t celebrate it, I thought it would be awesome if I made something I’ve been wanting to make for a while now. A friend of mine made it and it was really nice and ever since, I keep seeing the recipe everywhere. It was a sign! So I did it. And it was FABULOUS. I swear, I ate my cupcakes in moderation.  I will not swear the same for the frosting! My daughter ate the frosting and half a cupcake. She then refused to eat any other cupcake without frosting. Major meltdown if her frosting had no sprinkles.  MAJOR.


Red Velvet Cupcake with Cream Cheese Frosting


Red Velvet Cupcake with Cream Cheese Frosting


I’ll say this now – I will likely make these Red Velvet darlings once per year. Or maybe on a REALLY special occasion. No more than that. Perhaps this will be my Valentine’s Day treat for the family. I guess it’s better than nothing 🙂 It tastes great but oh my, could we use a bit more oil? Sugar? Please? I’m sure there’s a “light” version out there somewhere in cyberland. I’ll come across it eventually.

A general warning…don’t wear white or a light coloured shirt while making this recipe. Don’t say I didn’t tell you. I really ought to invest in an apron 🙂


Here’s the recipe and a few photographs. Cupcakes are awesome models.


5.0 from 2 reviews
Red Velvet Cupcakes with Cream Cheese Frosting
 
Prep time
Cook time
Total time
 
Red Velvet Cupcakes with Cream Cheese Frosting - a treat for any special occasion
Author:
Recipe type: Dessert
Ingredients
  • 2½ Cups Cake Flour
  • 1½ Cups Sugar
  • 1 Tsp Baking Soda
  • 1 Tbsp Cocoa Powder
  • 1 Tsp Salt
  • 2 Large Eggs
  • 1½ Cups Vegetable Oil
  • 1 Cup Buttermilk (I used 1%)
  • 2 Tbsp Liquid Red Food Coloring
  • 1 Tsp Vanilla Extract
  • 1 Tsp White Vinegar
  • Cream Cheese Frosting:
  • 8 oz Cream Cheese (low-fat)
  • 5 Tbsp Unsalted Butter, at room temperature
  • 2 Tsp Vanilla Extract
  • 2 Cups Confectioners Sugar
  • 2 Tsp Lemon Juice, freshly squeezed
Instructions
  1. Preheat oven to 350F
  2. Prepare cupcake liners (Paper or Silicone)
  3. In a medium bowl, add flour, sugar, baking soda, cocoa powder and salt. Combine with a whisk.
  4. In a large bowl, add eggs, vegetable oil, buttermilk, red food coloring, sugar and vanilla. Combine with a hand-held mixer (or standing mixer if you have one)
  5. Gradually add dry ingredients into the wet, mix until smooth consistency is achieved
  6. Add batter into prepared cupcake liners
  7. Bake for 18 minutes, rotating half way through
  8. If a toothpick or sharp knife comes out clean after insertion, allow cupcakes to cool
  9. For the frosting, combine cream cheese and butter with a mixer until smooth
  10. Add Vanilla Extract, mix to combine
  11. Gradually add the confectioners' sugar and mix until combined and smooth.
  12. Lastly, add the lemon juice and give it one last mix to combine
  13. Put frosting in the refrigerator for about 10 minutes
  14. When cupcakes are completely cooled, add frosting
Notes
This recipe yields 24 cupcakes

This recipe was adapted from Annie’s Eats.


Silicone Hearts


Filling the Silicone Hearts


Cupcakes are ready!


These are ready too...


Red Velvet Heart Shaped Cupcakes with Cream Cheese Frosting


Red Velvet Cupcakes with Cream Cheese Frosting


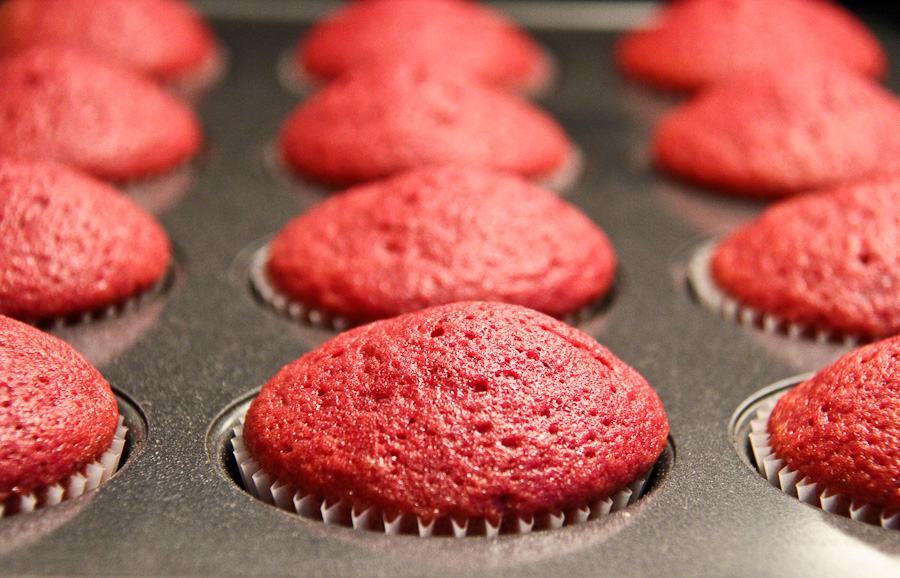
Naked Red Velvet Cupcake


Uber moist Red Velvet Cupcake


So anyway, I had a great time photographing my cupcakes. Like my silicone hearts? Beats the reusable cupcake liners! There were only 12 in a pack so I used 12 paper liners also. Fact: The cream cheese frosting was the star of the show. It’s just so GOOD!


The GOODNESS of Cream Cheese Frosting


I won’t be doing much romancing today – no more than the usual (wink). But I’m sure I’ll be watching some romantic comedy or the other on television tonight with the husband. If you celebrate Valentine’s Day, have a good one. If you don’t celebrate, have a good one!


~Lyn

read more

Peanut Butter Chocolate Cookies

Jan 18, 2012 by

I wanted to post the recipe for these cookies for a few days now but alas, I’m slightly behind in my posting. I’m so happy to share this with you though, as these are my husband’s favourite cookies. I kinda love them too. I promised him I’d make a batch this week so me posting is great timing. I love the simplicity, and also that I’m using  low-fat peanut butter, less sugar than what the original recipe called for plus I used dark chocolate chips. Sounds like some good stuff right? You can substitute peanut butter for the organic kind. I plan to use vegan dark chocolate peanut butter to see how it comes out. I may omit the chocolate chips to avoid overkill. We’ll see!

This recipe is adapted from Everyday Food.


Peanut Butter Chocolate Chip Cookie


Peanut Butter Chocolate Cookies

Prep Time: 20 minutes

Cook Time: 14 minutes

Total Time: 31 minutes

Yield: 32 Cookies

Ingredients

  • 1 Cup Low-Fat Peanut Butter
  • 1/2 Cup Granulated Sugar
  • 1 Egg
  • 1/2 Tsp Baking Soda
  • 1/4 Tsp Salt
  • 3/4 Cup Dark Chocolate Chips

Instructions

  1. In a medium bowl, combine peanut butter, sugar, egg, baking soda and salt
  2. Once combined, mix in chocolate chips
  3. Using a cookie-scoop, take walnut sized portions and with moistened hands, roll into balls
  4. Place on a parchment lined cookie sheet, leaving 2 inches between each ball
  5. Bake for 12-14 minutes in a 350F oven
  6. Allow to cool on the baking tray for about 10 minutes before transferring to a cooling rack
https://lovelypantry.com/2012/01/peanut-butter-chocolate-cookies/

5.0 from 1 reviews


Peanut Butter Chocolate Chip Cookie – Ready to eat!


Don’t you just want to dive in? Seriously.


Peanut Butter Chocolate Chip Cookie


Take good care guys! ~ Lyn


read more
Lyn’s Banana Bread

Jan 6, 2012 by

I’ve been making this banana bread for a few years now. It somehow never fails. Everybody loves it and I’m so happy to be sharing it with you. It’s definitely “lighter” than most recipes which is great because I really don’t care for the guilt that comes along with loaded baked goods. So this recipe satisfies me. I found this recipe on Food Network Canada and I’ve made my changes to get it to where I like it.

Bananas should never EVER go to waste. I learned a few years back that over-ripe bananas can be stored in the freezer for baking. That advice was like gold to me. I now use frozen bananas for porridge, smoothies and banana bread.

I love Banana Bread. Even more so with dark chocolate chips.

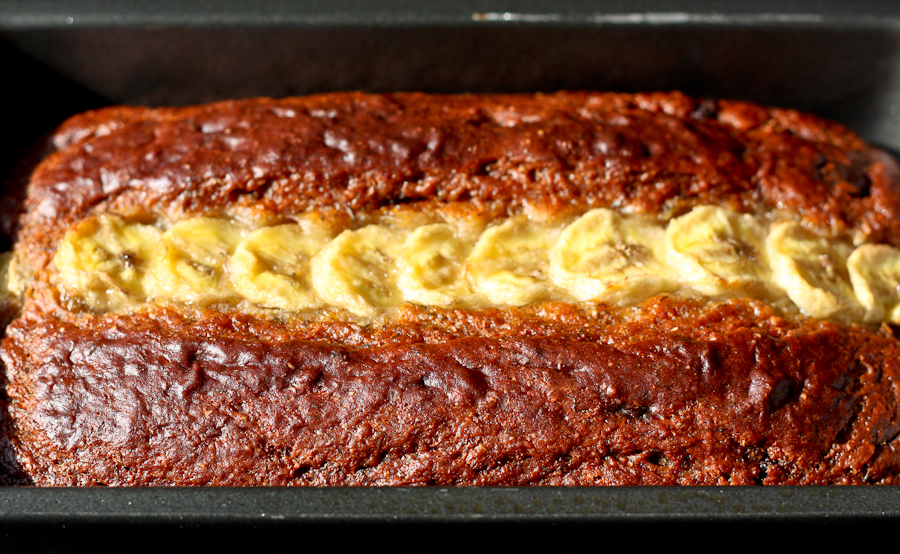
I use 2 bananas because I found using 3 made the bread overly moist, which wasn’t so nice for me. I love that yogurt is used as the binding agent instead of eggs. Notice too, that butter is absent. The garnish on top is optional too, it’s really there to make the cake look even prettier. The cake on its own is delicious. Yes, even without the chocolate chips.


Chocolate Chip Banana Bread – Ready for the oven


Banana Bread


Lyn's Banana Bread
 
Prep time
Cook time
Total time
 
A lighter version of a wonderful family favourite - Banana Bread
Author:
Recipe type: Bread
Serves: 10
Ingredients
  • 2 very ripe bananas
  • ¼ cup honey
  • 1 tsp vanilla
  • ¼ cup granulated sugar
  • 1 cup fat free vanilla yogurt
  • 2 tbsp vegetable oil
  • 1 cup all purpose, unbleached flour
  • ½ cup whole wheat flour
  • 2 tsp baking soda
  • ½ teaspoon salt
  • ½ tsp Allspice
  • 1 ripe banana, sliced, to bake on top of bread as a garnish (optional)
  • ¼ cup dark chocolate chips (optional)
Instructions
  1. Preheat oven to 350 F.
  2. Lightly grease a 4-inch X 8-inch loaf pan.
  3. In a large bowl, mash bananas. Add the honey, vanilla, sugar, yogurt and oil. Mix to combine.
  4. In a medium bowl, sift flour, baking soda, salt and allspice.
  5. Gently fold the dry ingredients into the banana mixture until just combined.
  6. Pour batter into prepared loaf pan.
  7. Arrange banana slices decoratively on top of the batter, if desired.
  8. Bake 40 to 50 minutes, until golden and a knife inserted comes out clean. Let cool in the pan for 30 minutes before cutting into slices.
Notes
Adapted from http://www.foodnetwork.ca/recipes/Fruit/recipe.html?dishid=5918


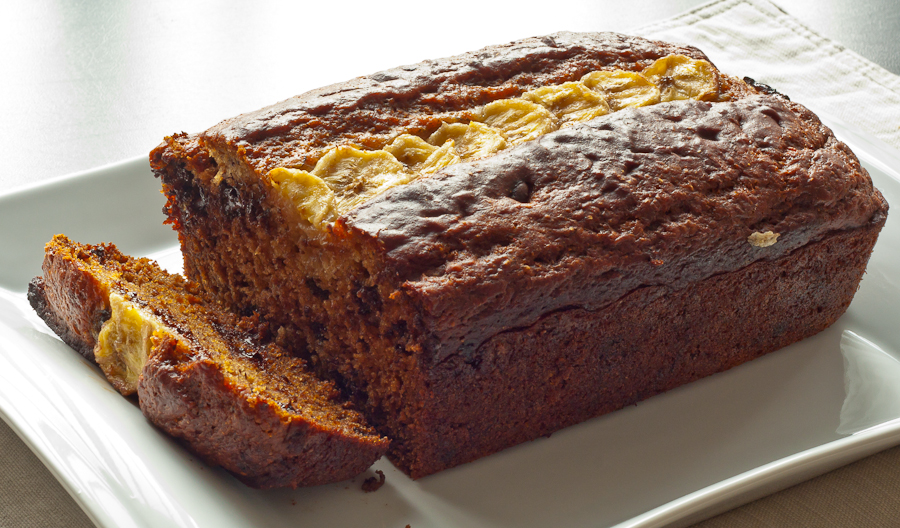
Chocolate Chip Banana Bread


Chocolate Chip Banana Bread


If you ever get around to making this bread, please do think of me. Imagine me with a big smile on my face, whispering sweetly…”I told you so”

Have an amazing weekend!


~Lyn   XoXo


Related Posts Plugin for WordPress, Blogger... read more
Post Popularity Graphing by Knowledge Ring