Roast Pumpkin and Ricotta Crostini

Dec 19, 2012 by

I’ve been fluttering in my cookbooks again. It’s a wonderful way to spend a few borrowed minutes, just to browse and find your next victory. The problem is, there are so many recipes I want to try, and very little time to try them all. I will continue to compete with my family’s schedule and create wonderfully tasting food – even if it’s just for me 🙂 Today, that’s not the case. This dish is great for a light snack  or even as an appetizer. You decide! It’s always a good idea to serve vegetables in a nice way, especially during the holiday season.

I love bread. Usually most breads will appeal to me if its crusty on the outside, light and fluffy on the inside. Toasted with butter and some other condiment will also do the trick. I have fond memories of having French Bread as a child growing up in England. It was something that we enjoyed served with a soup or just whenever we felt like having it.

This recipe was adapted from “Cooking Season by Season” – I basically cut the recipe in half to suit my household.


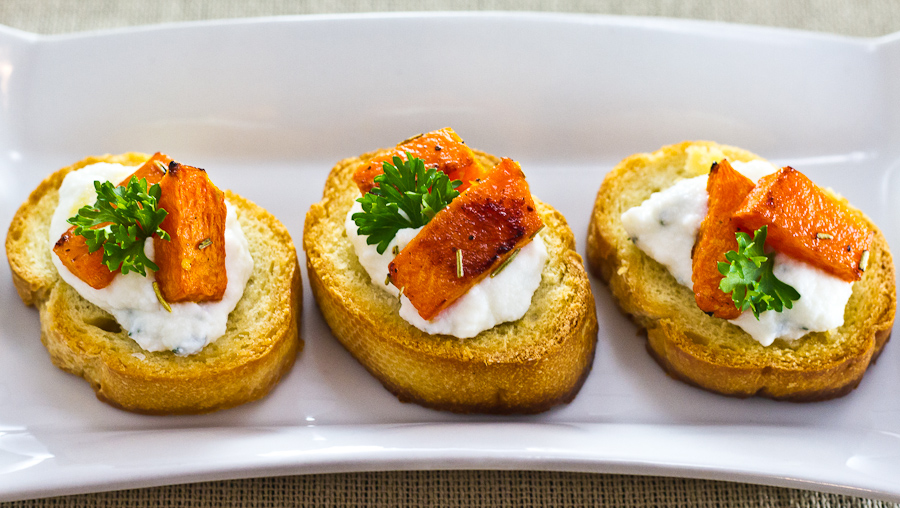
Roasted Pumpkin & Ricotta Crostini


Prep time
Cook time
Total time
 
Ingredients
  • 8 oz Pumpkin, peeled seeded and cut into chunks
  • 1 Tbsp Olive Oil
  • 1 Clove Garlic, minced
  • 2 Tbsp freshly squeezed lemon juice + the zest of ½ a lemon
  • 7 Tbsp Light Ricotta Cheese
  • 1 Tsp Dried Rosemary
  • 1 Tsp Fresh Thyme Leaves
  • Crostini:
  • 8 Slices Crusty Baguette
  • 1 Tbsp Olive Oil
  • Salt + Pepper
Instructions
  1. Preheat oven to 400F
  2. Brush a foil lined baking sheet with olive oil.
  3. Lay baguette slices on the foil and then brush the top with olive oil
  4. lightly sprinkle with salt and pepper
  5. Bake for 10 minutes until golden brown
  6. Remove from oven and allow to cool on a wire rack
  7. In a bowl, toss the pumpkin chunks with oil, garlic, lemon zest and rosemary
  8. Season with salt and pepper then roast for 35 minutes until tender and golden
  9. Remove from oven and allow to cool
  10. In a small bowl, combine ricotta, thyme and lemon juice
  11. Add about a tablespoonful of ricotta on each crostini and top with a few chunks of roasted pumpkin, pressing down a little into the ricotta
  12. Serve and enjoy


How do you dress up your fall/winter vegetables? I love roasting root veggies. It keeps it simple and tasty.


Roasted Pumpkin & Ricotta Crostini-2

Roasted Pumpkin & Ricotta Crostini


Enjoy!

~Lyn


read more
Related Posts

Share This

Dark Chocolate Chip Granola Bars

May 4, 2012 by

I’ve been wanting to make granola bars in what seems like forever! But I finally found a recipe that I liked and wanted to try. I really have to look at the ingredients in order for me to decide if I’m going to make it. I’m not crazy about nuts (I prefer them on their own) and it’s not uncommon to see many granola recipes with a variety of nuts included. I wanted something that the kids would enjoy and not find things to pick out or require too much effort on their part. When I came across this awesome recipe from a lovely little blog called Lauren’s Latest, I knew I had found “it”. Lauren’s recipe was adapted from Rachel Ray, and I adapted her version with what I had available.

I decided to make these after I lost my natural light, but I knew there would be nothing left after they were ready, so I went ahead and took photographs anyway. I’ve made these granola bars twice and only a few make it to daylight.

Chocolate Chip Granola Bar - No bake


5.0 from 2 reviews
Dark Chocolate Chip Granola Bars, No-Bake
 
Prep time
Total time
 
An easy granola bar recipe that can be made within minutes!
Author:
Recipe type: Treat, Snack
Serves: 8
Ingredients
  • 3 Tbsp Butter
  • 3 Tbsp Cinnamon Creamed Honey (Or plain honey)
  • 1 Tbsp Agave Nectar
  • ⅓ Cup Brown Sugar
  • 2 Cups Quick Oats
  • 1 Cup Puffed Rice Cereal (like Rice Krispies)
  • 1 Tsp Vanilla
  • ½ Cup Dark Chocolate Chips (or milk chocolate)
Instructions
  1. In a medium bowl, add cereal and oats. Stir to combine and set aside.
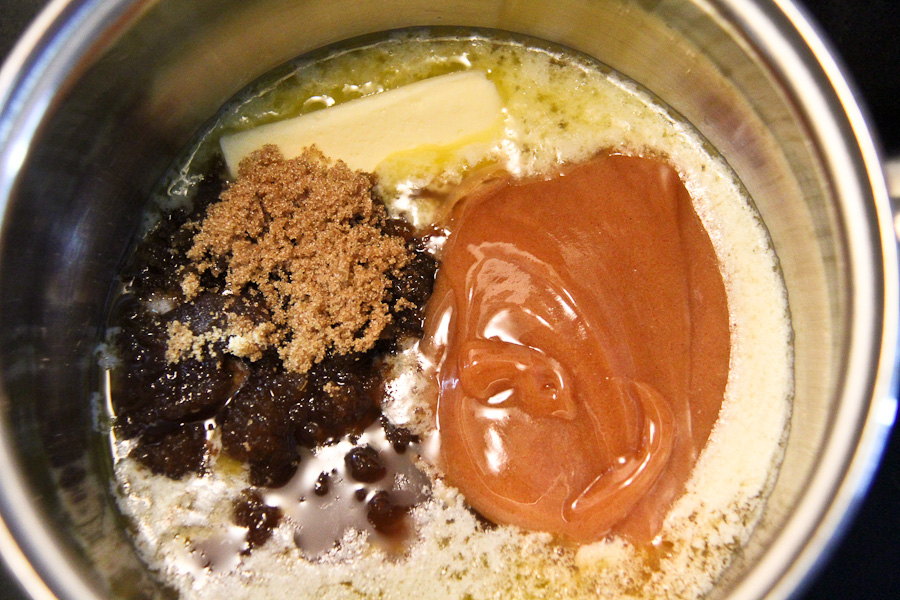
  2. In a small saucepan, melt butter, honey, agave, and sugar over medium heat just to a boil. Stir to combine. Reduce heat and remove after about 2-3 minutes.
  3. Add vanilla and stir
  4. Pour into cereal and oats, mix well to incorporate
  5. Transfer into a rimmed tray (12X8 inch and about an inch deep)
  6. Press firmly in order for the oats to cover the entire surface evenly
  7. Sprinkle with chocolate chips and gently, press down
  8. Allow to cool for a few minutes in the fridge (or an hour at room temperature)
  9. When firm, cut into bars.
Notes
Press firmly into the tray to prevent the bars from falling apart. Try to achieve about ¾ inch thickness. I put mine in the fridge for about 20 minutes before serving.


Rice Krispies and Quick Oats. These two ingredients were united for the first time in my house. I never had to buy Rice Krispies prior to this recipe. I even allowed my son to listen to them “snap, crackle and pop” like the commercials I used to see as a child. Embrace the Rice Krispie experience!


Rice Krispies and Quick Oats


I chose to use the Cinnamon Creamed Honey that I bought from the Farmer’s Market over the plain honey. The jar was unopened. How could  that be!!!??? When I tasted it at the market, it was splendid! I envisioned myself having it on toast with a cup of tea! I suppose I also wanted to add a very special flavour to the granola bars too. It worked out very well!


Cinnamon Creamed Honey, Butter, Agave Nectar, Brown Sugar


I didn’t allow it to remain at a boil, I just wanted to make sure everything was combined well before I removed it from the heat.


Mixture just to a boil, and combined


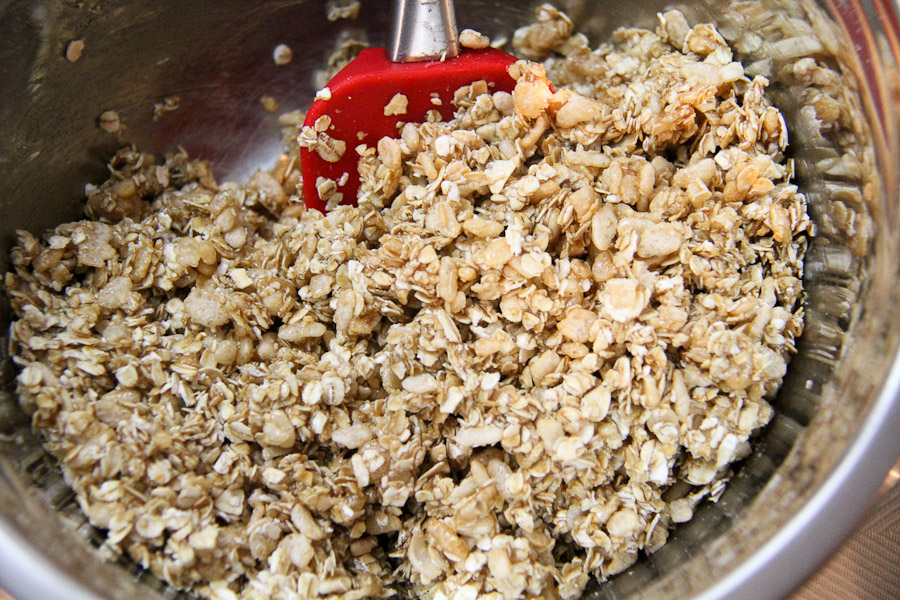
Muscle up for this part. The liquid firms up rather quickly and you have to make sure that everything is thoroughly combined.


Combining the honey mixture with the oats and cereal


Press firmly to ensure the mixture is packed tightly.  This helps to keep the bars from crumbling. I waited for it to cool for about 10 minutes (you should probably wait a little bit longer – an hour or so)


Press down *firmly* to flatten


I flipped everything onto a parchment lined cutting board. I sprinkled the chocolate chips then pressed them down. Whats funny is – they started to melt 🙂 I then used a pizza wheel (genius) and a knife to separate into bars. The kids were by my feet almost the entire time just waiting to get their hands on a piece. They had some crumbled bits, but got the real deal after it came out of the fridge for about 20 minutes or so. You know, to a child that’s like “forever”.


Granola Bars in the making!


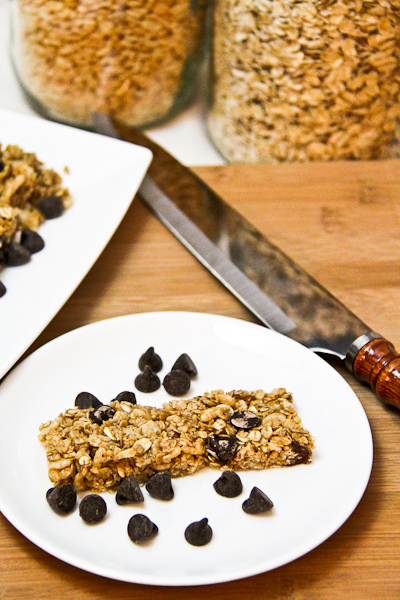
My kids loved these little bars! Okay, so did I. We all had them with a glass of milk. A sweet treat to bring the family together.


My first granola bar!


Picky eater APPROVED!


Dark Chocolate Chip Granola Bar


Happy Friday!!!

read more

Banana Nutmeg Smoothie

Oct 17, 2011 by

After chit-chatting with my friends on Facebook, I realized that Smoothies are quite popular with healthy-minded individuals! I guess I’m a bit late on the smoothie band wagon, but I’m slowly getting into it. I mean, who can resist a fruity drink that’s natural and GREAT for you? It’s always a bonus when the kids LOVE it too. I’m down for Smoothies! Are you?

  • What are your best smoothies?
  • How often do you have them?
  • What do you use to make them? (Blender, Immersion blender, Single Serving Blender etc)


Smoothies are so versatile. Its a meal on the go, or a quick nutritious snack. When it comes to ingredients, my Facebook friends have listed both fruits and veggies. Bananas seem to be the must have ingredient, followed by mango and pineapple. Peanut Butter adds a smooth shot of protein and frozen spinach adds some extra goodness to the mix. I look forward to experimenting more with Smoothies.


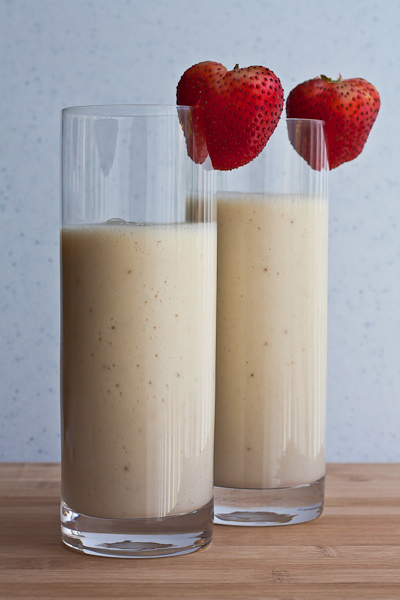
Here’s a recipe for a smoothie that my children and I enjoyed ~ Banana Nutmeg Smoothie


Ingredients:

2 Bananas (If you use frozen Bananas, you don’t need ice)

1/2 Cup Milk (Substitute with Soy or Almond if desired)

1 Cup Low Fat Vanilla Yogurt

1/4 Tsp Nutmeg

1 Cup Ice


Directions:

Add ingredients to a blender and mix until the ice is crushed and the liquid becomes frothy. Pour into individual glasses (or cups for the little ones).


If using as an adult meal replacement, adding a flavoured protein powder is great too.

Happy blending!


Lyn

Related Posts Plugin for WordPress, Blogger... read more

Related Posts

Share This

Post Popularity Graphing by Knowledge Ring