Chocolate Banana & Truffle Muffins for #MuffinMonday

Nov 19, 2012 by

I guess every now and again, we can indulge in some chocolate goodness. Besides, there’s no better time than the upcoming holiday season. The sweet indulgences that I get flooded with on Pinterest leaves me no choice but to just dive in!

When I first saw this recipe as our selection for #MuffinMonday, the first thing I wanted to do was add chocolate chips. But then I thought… that’s too easy. And is it really festive? Of course it would taste great but, I wanted to do something else. From now until the end of the year, our #MuffinMondays will be quite sensational. I hope I can keep up! I’ll be wearing my special holiday pants on from now on. You know? The one with the stretchy waist? Yes, you know the one. We ALL have a pair!

On my trip to the grocery store, I went along my merry way, picking the items on my list. I came across my most favourite treats ever! Belgian Chocolate Truffles!!!! You guys have no idea how much restraint it takes for me not to have more than one or two at a time. That’s why I rarely buy them unless it’s around Christmas time.

While I was envisioning what I was going to do with my truffles, I had to figure out how not to eat them. Sadly, I lost about three before they could get to the batter. I wanted my muffins to have a truffle centre. Can you imagine that smooth velvety truffley centre of a muffin? Heavenly! What I love about this muffins that it’s not overly sweet but still quite a chocolatey muffin. This is the most decadent muffin I have made to date. The possibilities are endless, now that I’ve made these gorgeous muffins.


Chocolate Banana & Truffle Muffins


Chocolate Banana & Truffle Muffins
 
Prep time
Cook time
Total time
 
A chocolate treat with a sweet and decadent truffle centre
Author:
Recipe type: Muffin
Ingredients
  • ¾ cup granulated sugar
  • 1 stick (1/2 cup) unsalted butter, room temperature
  • 2 large eggs
  • 3 ripe bananas
  • 1 Tbsp 2% Milk
  • 2 Tsp Vanilla
  • 1 Tsp Ground Cinnamon
  • 2 cups All Purpose Flour, Unbleached
  • ¼ Cup Dutch Dark Cocoa
  • 1 Tsp Baking Powder
  • 1 Tsp Baking Soda
  • 1 Tsp Salt
  • 15 of your favourite Truffles
Instructions
  1. Preheat Oven to 325F
  2. Grease a 12 hole muffin pan, or line with 12 paper cups
  3. In a medium bowl, mash bananas until smooth. Add milk, cinnamon and vanilla. Mix until combined
  4. In a large bowl, cream sugar and butter until light and fluffy
  5. Add eggs one at a time, beating after each addition
  6. Add the banana mixture to the butter mixture and stir until combined
  7. In a medium bowl, sift flour, baking soda, baking powder and cocoa powder. Combine with a whisk.
  8. Add flour mixture gradually to the banana mixture, stirring to combine after each addition
  9. Put about 2 tablespoons of batter into each paper liner
  10. Add a truffle to the centre and then cover with batter until about ¾ full
  11. Bake for 22 minutes until a toothpick inserted comes out clean
Notes
This recipe yields 15 muffins Adapted from http://www.foodnetwork.com/recipes/banana-bread-recipe/index.html


I didn’t actually decide to add the cocoa powder until when I realized that the batter was going to be plain. Yes, filled with sweet flavourful banana, but plain. I added it on a whim, and hoped that it would turn out okay. I can’t see how I could have gone wrong with adding more chocolate.


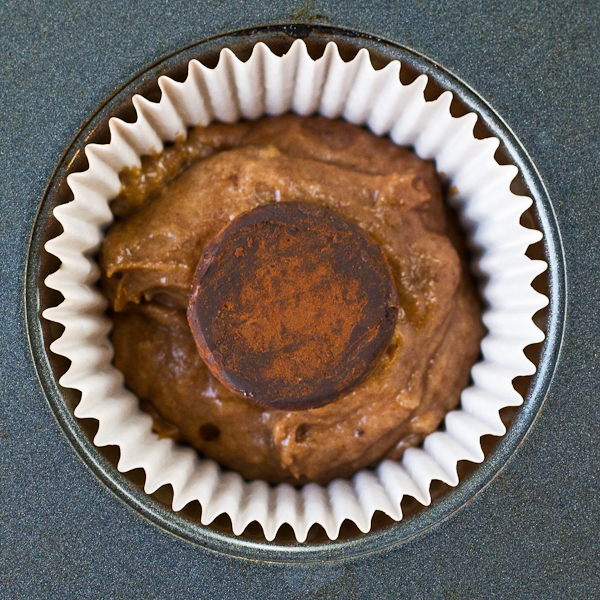
Each Truffle inserted into batter


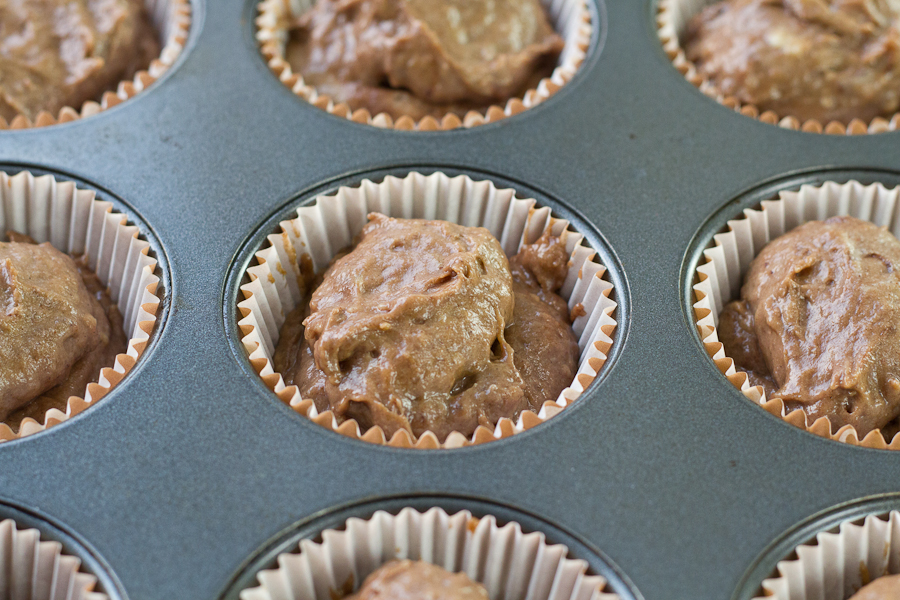
I used two spoons to  fill each cup with the remaining batter.


Truffles covered in batter


The kitchen was filled with that comforting aroma of chocolate. I could not wait to dig in! You have no idea!


Warm Muffins


And because I simple could not wait for my muffins to cool, this is what my truffle shavings looked like after a mere few seconds of making contact. I wasn’t complaining though! It wasn’t the look I was going for but hey ~ I ate this one first!


Melted Truffle Shavings


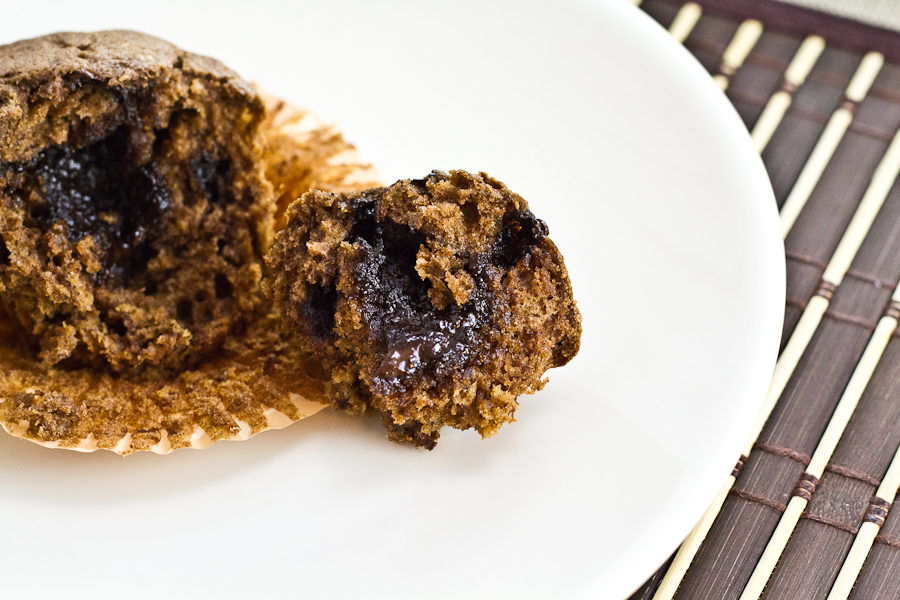
I just couldn’t help but wonder what the inside looked like… yes, the muffins were still warm. I was on a roll 🙂 The centre gets firmer when the muffins are completely cooled.


Warm Truffle Centre


Sweet, messy, awesome, Truffles! Believe me when I say none of this went to waste.


Truffle Shavings


I waited for the muffins to cool completely so that I could cover them with some truffle shavings. I allowed the truffles to firm up a bit by putting them in the fridge for a few minutes before using them.  This helped me to achieve the desired results. I was very VERY happy with these muffins. My family LOVED them!


Chocolate Banana & Truffle Muffins covered in Truffle shavings


Happy Monday!


Muffin Monday is an initiative by Baker Street. A culinary journey of sharing a wickedly delicious muffin recipe every week. Drop in a quick line to join her on her journey to make the world smile and beat glum Monday mornings week after week.

Muffin Monday: http://bakerstreet.tv/muffin-monday/

Muffin 101: http://bakerstreet.tv/muffin-monday/muffin-101/


read more

Sweet Potato Bun

Apr 15, 2012 by

I had to share this recipe. It tastes too good to keep to myself. I will also say that this is the last bun recipe I will post until next Easter. Seriously.

However, I will not classify this bun as an Easter Bun even though I found it in The Gleaner’s Easter Cookbook 2012 (Page 26). No, not this bun. This bun can be prepared at any time throughout the year. There are many recipes in the cookbook that I will be trying very soon. I have the best Dad. He mailed me the booklet so that I could have a resource for my posts. He knows how much I like to flip though pages. Isn’t he great? I’m sure you guys remember one of my most favourite things is sending and receiving mail. My dad put a really big smile on my face! Thank you Dad!

The first time I made this bun, and it was a hot mess. I’m not a baker so I had no idea what I did wrong. The batter was thin and after baking it for more than the suggested time, it still came out like a pudding. My husband described the texture of the outside of the bun felt like leather. I was so disappointed because the flavour was quite pleasant but the texture was not good at all. This was my very first baking flop. I decided to look through the ingredients again and compare with all the other bun recipes. I realized that there was probably too much liquid and not enough flour. I made some changes to the original recipe and got it right! Success!!! This is the bun that I will be making next year! I only used raisins and there’s no mixed peel to pick out.

The only way I’ll be making this bun again this year, is if someone specifically asks me to make it or places an order ($$).


Sweet Potato Bun


5.0 from 1 reviews
Sweet Potato Bun
 
Prep time
Cook time
Total time
 
A Jamaican style bun, good for any time of the year
Author:
Recipe type: Dessert, Snack
Serves: 8-10
Ingredients
  • 1 Cup Dragon Stout (or any stout available)
  • 1 Cup Brown Sugar
  • 2 Tbsp Molasses
  • 2 Tsp All Spice
  • 2 Tbsp Butter, melted
  • 1 Large Egg
  • 3 Cups All Purpose Flour, Unbleached
  • 2 Tsp Baking Powder
  • 1 Cup Pureed Sweet Potato (I used 2 Sweet Potatoes)
  • 1 Cup Raisins
  • 1 Tbsp Butter
  • 1 Tbsp Honey
  • Parchment paper and cookings spray
Instructions
  1. Pre-heat the oven to 350F
  2. Grease a standard loaf pan using cooking spray. Line with parchment paper then spray again
  3. Peel sweet potatoes then dice into 1 inch cubes
  4. Add to boiling water and cook until soft when pierced with a knife - about 15 minutes or so
  5. Strain to remove excess water
  6. Puree sweet potato chunks in a blender and measure a cup for the batter
  7. Allow to cool
  8. In a saucepan, add stout, sugar, molasses and all spice
  9. Over a low heat, stir just until the sugar has dissolved. Do not bring to a boil
  10. In a small bowl, whisk egg then add it to the stout mixture along with the butter. Whisk to combine
  11. In a medium bowl, add flour and baking powder. Whisk to combine
  12. Gradually add the stout liquid to the flour, mixing well to incorporate
  13. Stir in the sweet potato puree
  14. Fold in the raisins
  15. Pour into prepared loaf pan
  16. Bake for 45 minutes or until a knife inserted comes out clean
  17. In a small ramekin, combine butter and honey. Brush over the bun when cooled.
  18. Slice and serve with cheese and/or butter
Notes
This recipe is adapted from "Sweet Potato Easter Bun" from the Gleaner's Easter Cookbook 2012, Page 26 http://go-jamaica.com/easter2012/cookbook/index.php


I was watching the consistency so closely the second time around.


Stout Batter


I like the contrast in colours here.


Add the sweet potato puree


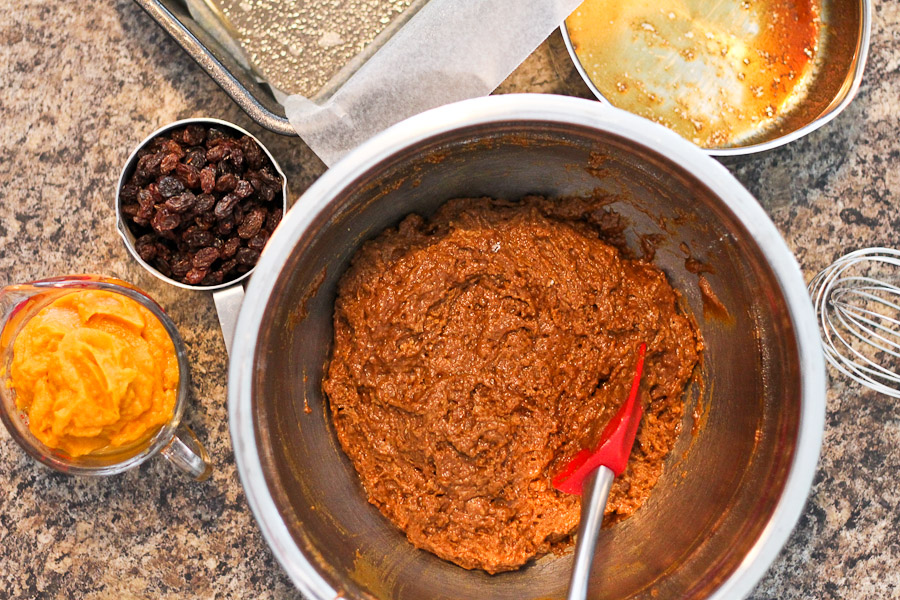
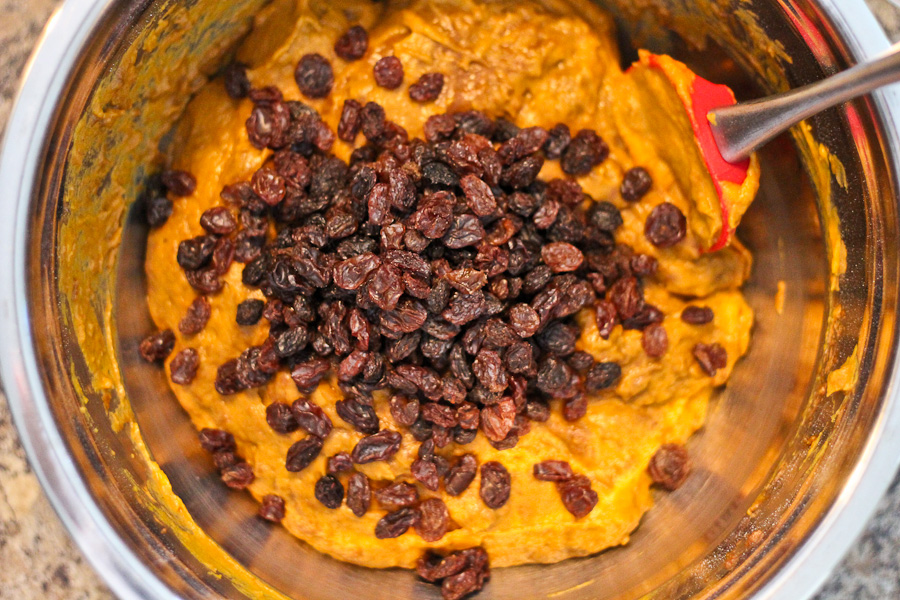
In go the raisins. The batter at this point is fairly firm and has a thick consistency. Exactly what I want.


Raisins added to batter


Ready for the oven!


Sweet Potato Bun Batter


Fresh out  the oven, looking good, smelling great and not feeling like leather on the outside 🙂


Sweet Potato Bun out the oven


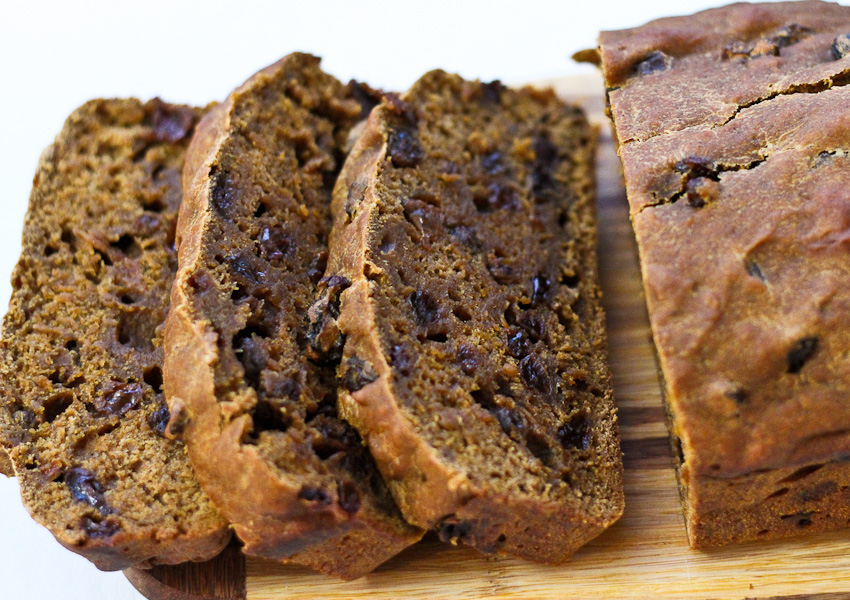
Checking for the consistency – looks perfect. And then I realized I had cut my bun before I glazed it.  So anxious!


Sweet Potato Bun, Sliced


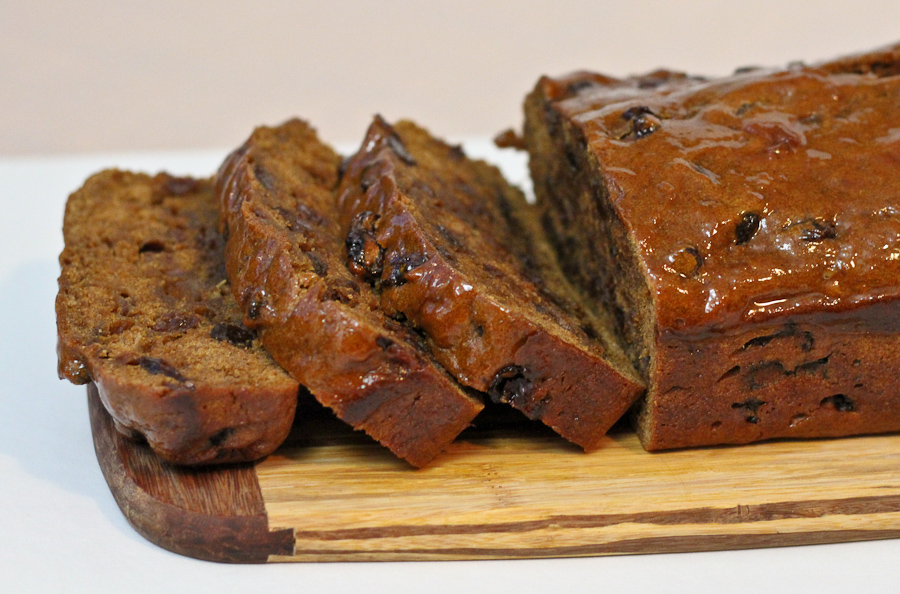
Now this is more like it!


Sweet Potato Bun, glazed, sliced


This bun was so nice, I had to double up on the cheese. It was moist and dense, as it should be. I think that’s totally acceptable since I’m not having this bun again until next year.


Sweet Potato Bun with Tastee Cheese


I feel great about this bun. Have you had any baking triumphs? I’d love to hear about it.

Have a wonderful Sunday and an awesome week!

~Lyn


read more

Chocolate Stout Cake

Mar 13, 2012 by

I tried to resist making this. I really did. But I had all the ingredients! I just had to.

I picked up a little recipe book called Irish Favourites and the recipes were interesting… as in, I’d make most of the recipes in the book! It was perfect timing seeing that St.Patrick’s day is right around the corner. The original recipe had a cream cheese frosting but I opted out. The chocolate cake is bad enough. And by bad, I mean good.


Chocolate Stout Cake


Chocolate Stout Cake
 
Prep time
Cook time
Total time
 
Chocolate Stout Cake, adapted from Irish Favourites Cookbook
Author:
Recipe type: Dessert
Serves: 12
Ingredients
  • 2 Cups All Purpose Flour, unbleached + more for dusting the pan
  • ¾ Cup unsweetened Cocoa
  • 1 Tsp Baking Soda
  • ¼ Tsp Salt
  • ¾ Cup (1½ Sticks) Unsalted Butter, softened
  • 1 Cup packed Light Brown Sugar
  • ½ Cup Granulated Sugar
  • 1 Tsp Vanilla
  • 3 Eggs
  • 1 Cup Stout, at room temperature (I used Jamaican Dragon Stout)
  • 1½ Cup Icing Sugar
  • 3-4 Tbsp Hot Water
  • 2 Tbsp Green Sprinkles
Instructions
  1. Preheat oven to 350F
  2. Spray a 10 inch Bundt Pan (a 13 X 9 inch baking pan) with cooking spray, then dust with flour
  3. Combine flour, cocoa and salt in a medium bowl. Set aside
  4. Beat butter, brown sugar and granulated sugar with a mixer at medium speed until light and fluffy
  5. Beat in vanilla
  6. Add eggs, one at a time, beating after each addition
  7. Add flour mixture alternately with stout, beating after each addition
  8. Pour batter evenly into prepared pan
  9. Bake for 35-40 minutes until a sharp knife or toothpick inserted into the centre comes out
  10. clean
  11. Allow to cool completely in the rack
  12. In a small measuring cup, sift in icing sugar. Add hot water and stir until smooth. Pour over the cake and add sprinkles for final touch


Look what I found – Jamaican Dragon Stout. The sweeter alternative to Guinness. My hubby had a stash and was nice enough to let me use one. I’m not a stout drinker myself, but I think I may like cooking with it.


Jamaican Dragon Stout


Dragon Stout - Close Up


The recipe called for a 13 X 9 inch baking pan but I thought it would be more interesting to use a Bundt pan. Okay, I just really wanted to use it. This is my first Bundt cake. Chocolate Stout Bundt Cake. Sounds good!


Chocolate Stout Cake Batter


Glazing was some messy fun! Me and my daughter had green fingers for a while…


Glaze and Sprinkles


Chocolate Stout Cake Slice


A rich but not too sweet chocolate cake, made with a Jamaican stout…just in time for St. Patrick’s Day.


Chocolate Stout Cake


About how long do I need to walk on the treadmill to fix this?

read more

Red Velvet Cupcakes with Cream Cheese Frosting

Feb 14, 2012 by

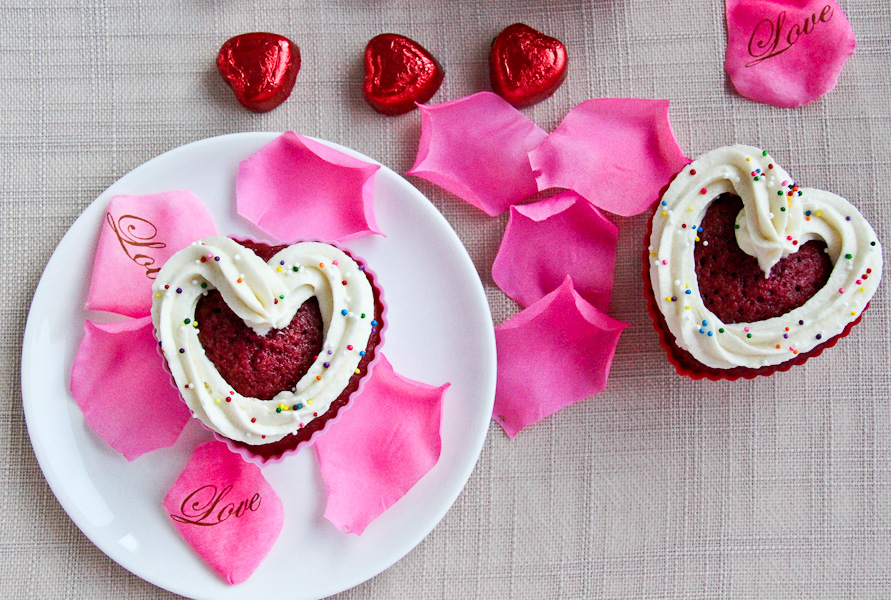
Today is Valentine’s Day and although I don’t celebrate it, I thought it would be awesome if I made something I’ve been wanting to make for a while now. A friend of mine made it and it was really nice and ever since, I keep seeing the recipe everywhere. It was a sign! So I did it. And it was FABULOUS. I swear, I ate my cupcakes in moderation.  I will not swear the same for the frosting! My daughter ate the frosting and half a cupcake. She then refused to eat any other cupcake without frosting. Major meltdown if her frosting had no sprinkles.  MAJOR.


Red Velvet Cupcake with Cream Cheese Frosting


Red Velvet Cupcake with Cream Cheese Frosting


I’ll say this now – I will likely make these Red Velvet darlings once per year. Or maybe on a REALLY special occasion. No more than that. Perhaps this will be my Valentine’s Day treat for the family. I guess it’s better than nothing 🙂 It tastes great but oh my, could we use a bit more oil? Sugar? Please? I’m sure there’s a “light” version out there somewhere in cyberland. I’ll come across it eventually.

A general warning…don’t wear white or a light coloured shirt while making this recipe. Don’t say I didn’t tell you. I really ought to invest in an apron 🙂


Here’s the recipe and a few photographs. Cupcakes are awesome models.


5.0 from 2 reviews
Red Velvet Cupcakes with Cream Cheese Frosting
 
Prep time
Cook time
Total time
 
Red Velvet Cupcakes with Cream Cheese Frosting - a treat for any special occasion
Author:
Recipe type: Dessert
Ingredients
  • 2½ Cups Cake Flour
  • 1½ Cups Sugar
  • 1 Tsp Baking Soda
  • 1 Tbsp Cocoa Powder
  • 1 Tsp Salt
  • 2 Large Eggs
  • 1½ Cups Vegetable Oil
  • 1 Cup Buttermilk (I used 1%)
  • 2 Tbsp Liquid Red Food Coloring
  • 1 Tsp Vanilla Extract
  • 1 Tsp White Vinegar
  • Cream Cheese Frosting:
  • 8 oz Cream Cheese (low-fat)
  • 5 Tbsp Unsalted Butter, at room temperature
  • 2 Tsp Vanilla Extract
  • 2 Cups Confectioners Sugar
  • 2 Tsp Lemon Juice, freshly squeezed
Instructions
  1. Preheat oven to 350F
  2. Prepare cupcake liners (Paper or Silicone)
  3. In a medium bowl, add flour, sugar, baking soda, cocoa powder and salt. Combine with a whisk.
  4. In a large bowl, add eggs, vegetable oil, buttermilk, red food coloring, sugar and vanilla. Combine with a hand-held mixer (or standing mixer if you have one)
  5. Gradually add dry ingredients into the wet, mix until smooth consistency is achieved
  6. Add batter into prepared cupcake liners
  7. Bake for 18 minutes, rotating half way through
  8. If a toothpick or sharp knife comes out clean after insertion, allow cupcakes to cool
  9. For the frosting, combine cream cheese and butter with a mixer until smooth
  10. Add Vanilla Extract, mix to combine
  11. Gradually add the confectioners' sugar and mix until combined and smooth.
  12. Lastly, add the lemon juice and give it one last mix to combine
  13. Put frosting in the refrigerator for about 10 minutes
  14. When cupcakes are completely cooled, add frosting
Notes
This recipe yields 24 cupcakes

This recipe was adapted from Annie’s Eats.


Silicone Hearts


Filling the Silicone Hearts


Cupcakes are ready!


These are ready too...


Red Velvet Heart Shaped Cupcakes with Cream Cheese Frosting


Red Velvet Cupcakes with Cream Cheese Frosting


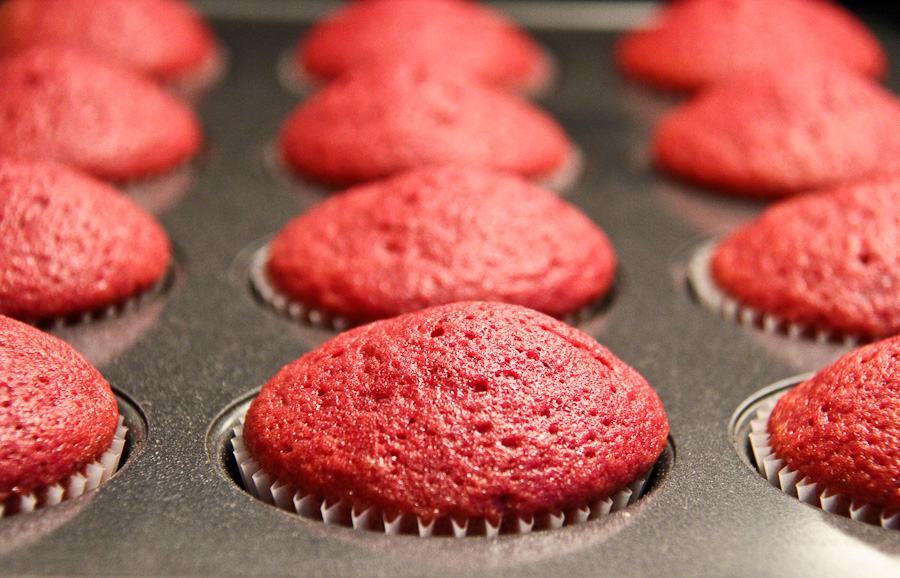
Naked Red Velvet Cupcake


Uber moist Red Velvet Cupcake


So anyway, I had a great time photographing my cupcakes. Like my silicone hearts? Beats the reusable cupcake liners! There were only 12 in a pack so I used 12 paper liners also. Fact: The cream cheese frosting was the star of the show. It’s just so GOOD!


The GOODNESS of Cream Cheese Frosting


I won’t be doing much romancing today – no more than the usual (wink). But I’m sure I’ll be watching some romantic comedy or the other on television tonight with the husband. If you celebrate Valentine’s Day, have a good one. If you don’t celebrate, have a good one!


~Lyn

read more

Sacchettini & Spinach

Aug 1, 2011 by

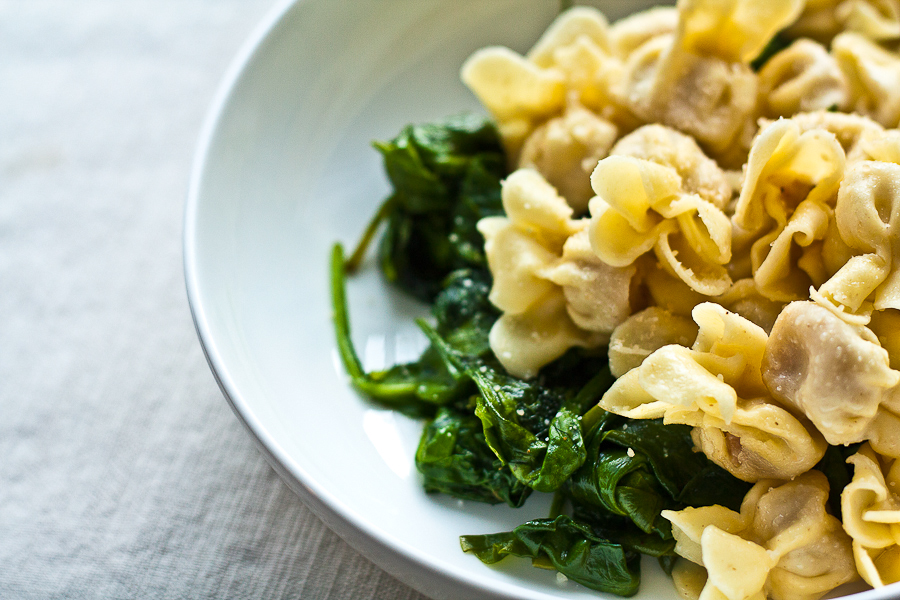
Chicken and Bacon Sacchettini with Spinach

Oh how I wish I could say that I made this from scratch. However, I`m prone to pick up frozen pasta occasionally. There are so many to choose from and the varieties are so visually appealing. On a recent trip to the supermarket, I picked up a packet of Chicken and Bacon Sacchettini. These little pasta are beautiful and they taste great too. I simply followed the cooking instructions on the packet and served it over a bed of steamed spinach. The final touch was just a sprinkle of parmesan cheese. Now that`s what I call an easy mid-week meal! Sensible portions with well planned sides, wont break the scale.

Related Posts Plugin for WordPress, Blogger... read more
Post Popularity Graphing by Knowledge Ring