Seared Scallops with White Kidney Beans & Spinach

Nov 30, 2011 by

Seared Scallops with White Kidney Beans & Spinach


Cooking brings me such joy and calm. Looking at beautiful photographs of food, and envisioning how I’ll prepare it inspires me to make what I see or to do something similar. I like to use ingredients that are available to me in the moment. For this recipe, adapted from Cooking Light’s Mix & Match Low Calorie Cookbook,  I pretty much had everything available. Except the Scallops! They look tasty and I’ve read that they have a really mild flavour. So off I went to get these scallop things from the supermarket. Scallops are generally available year round – fresh or frozen.

Scallops are a great source of : Protein, Omega-3 Fatty Acids, Vitamin B12, Magnesium and Potassium. It’s good to know how what you eat benefits your body, don’t you agree?


Ingredients:

2 Tbsp Olive Oil, divided

1 LB Sea Scallops

1 Onion, finely chopped

2 Cloves Garlic, finely chopped

1/4 Cup Dry White Wine

1/2 Cup Low Sodium Chicken Broth

1 Can White Kidney Beans, rinsed and drained

2 Cups Baby Spinach

Salt & Pepper for seasoning


Preparation:

Rinse scallops well and pat dry. In a medium-sized skillet, heat olive oil over medium heat. Season with salt and pepper on both sides. Cook on both sides  for about 2 minutes or until a nice golden colour is achieved. Set aside and keep warm. You may have to do this in batches so that you don’t have too many scallops in your skillet at one time.

Using the same skillet, add the remaining oil and saute the onions for about 2 minutes. Add the garlic and combine. Add wine and cook until most of the liquid has been reduced, about 2 minutes. Add broth and beans, allow to cook for 2 minutes. Add spinach and cook for about a minute or until it wilts nicely.

Remove from heat. Add additional salt and pepper, if needed.

I can’t believe how velvety these scallops were. Very mild and almost sweet! I enjoyed this meal and I bet you will too.


Lyn

read more

Almost Lasagna

Oct 31, 2011 by


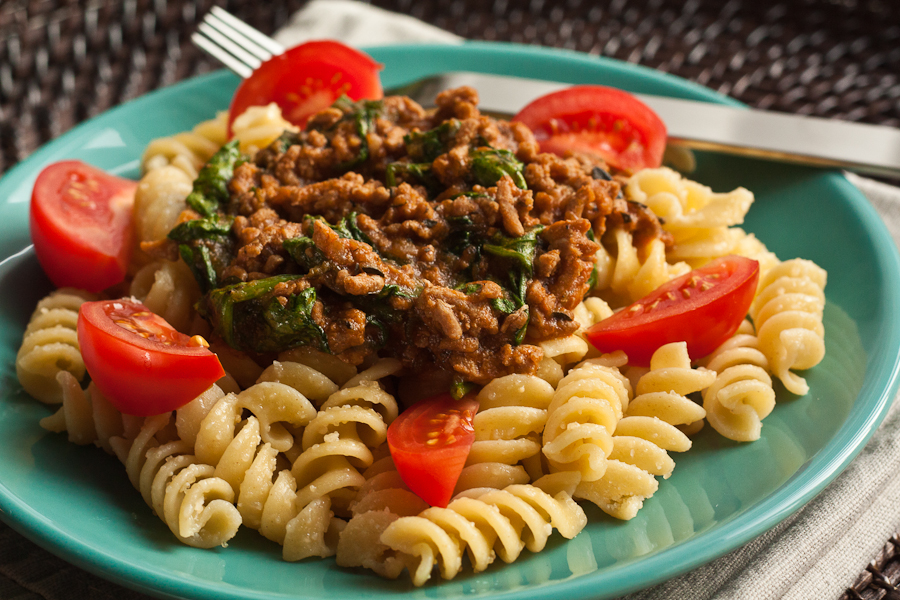
There are some days when I am willing to make Lasagna, and there are days when I wonder why go through all the layering. Don’t get me wrong, we love lasagna. It’s a beautiful thing. This is a recipe that happened one day when I started to make lasagna but never quite made it. You just never know how things will turn out  in my kitchen. This was a great meal!

Almost Lasagna
 
Prep time
Cook time
Total time
 
Author:
Recipe type: Entree
Serves: 5
Ingredients
  • 1½ lbs Lean ground turkey or ground beef
  • 1 Onion, finely chopped
  • 1 Garlic clove, finely chopped
  • 1 tbsp Italian Seasoning
  • Salt and Pepper to taste
  • 2 Cups Baby Spinach
  • 1 Cup Healthy Choice Garlic Lovers Pasta Sauce
  • 2 tbsp Olive Oil
  • ¼ Cup Chicken Broth
Instructions
  1. In a medium dutch oven, over medium high heat, brown onion and garlic in olive oil (10 minutes).
  2. Add meat and cook until browned (10 minutes).
  3. Add Italian Seasoning, salt and pepper.
  4. Add Tomato Sauce and stir to combine.
  5. Allow to simmer for about 15 minutes. If the mixture is too thick, add a little chicken broth.
  6. Simmer to desired consistency. Add additional salt and pepper if needed.
  7. When you are satisfied with the consistency, remove from heat.
  8. Add spinach, stir.
  9. Serve over a bed of pasta tossed in olive oil and parmesan cheese.


Add colourful veggies. Serve and enjoy!


read more

Related Posts

Share This

Steamed Salmon with Lemon and Thyme

Oct 24, 2011 by

I will forever consider myself to be a lifelong learner. If I’m not learning new things, I’m not growing. Ever since I discovered my love for cooking and healthy eating, my desire to learn new recipes, foods, and techniques has grown tremendously.

I am very fond of Salmon and  I’ve prepared it in various ways, but how long before I’ve exhausted all the methods that I know? Steaming fish seems simple enough if you have a steamer of some kind. But what if you don’t? How can Salmon be steamed with just a few items that you already have in your kitchen? I recently learned of a very simple technique where I enjoyed the entire process in its simplicity.

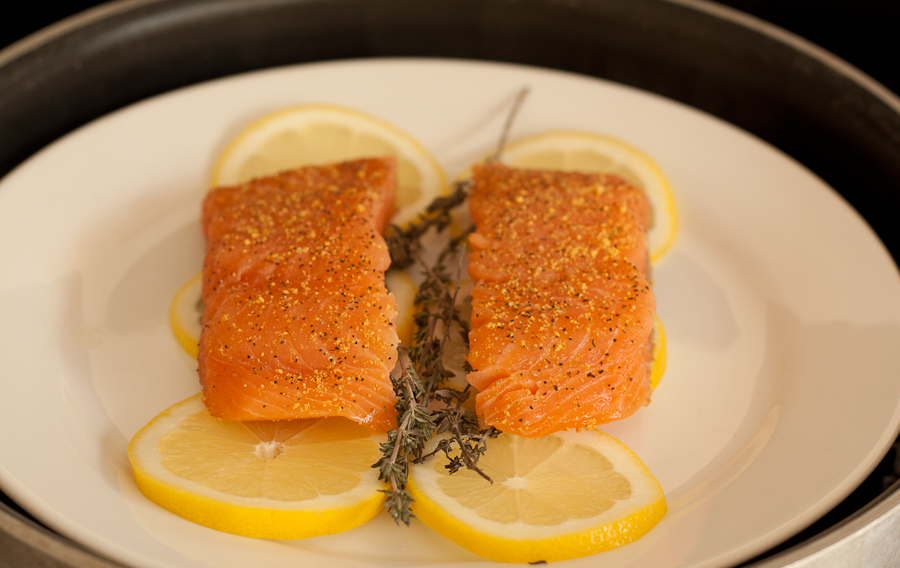
Salmon really is a beautiful fish.


The original recipe called for fresh Dill which I did not have at hand (surprise, surprise). Instead, I used some Thyme that I had drying which did the trick perfectly.


Ingredients:

2 Salmon Fillets

1 Lemon, thinly sliced

Few Sprigs Thyme

1 Red (Or green, or yellow…) Sweet Pepper, thinly sliced

Salt & Pepper

1 Tsp All Purpose Seasoning


Preparation:

1 Large Skillet

1 Plate that fits into the skillet leaving some space around the diameter (an inch is good)

Aluminium foil rolled and formed into a ring

Water


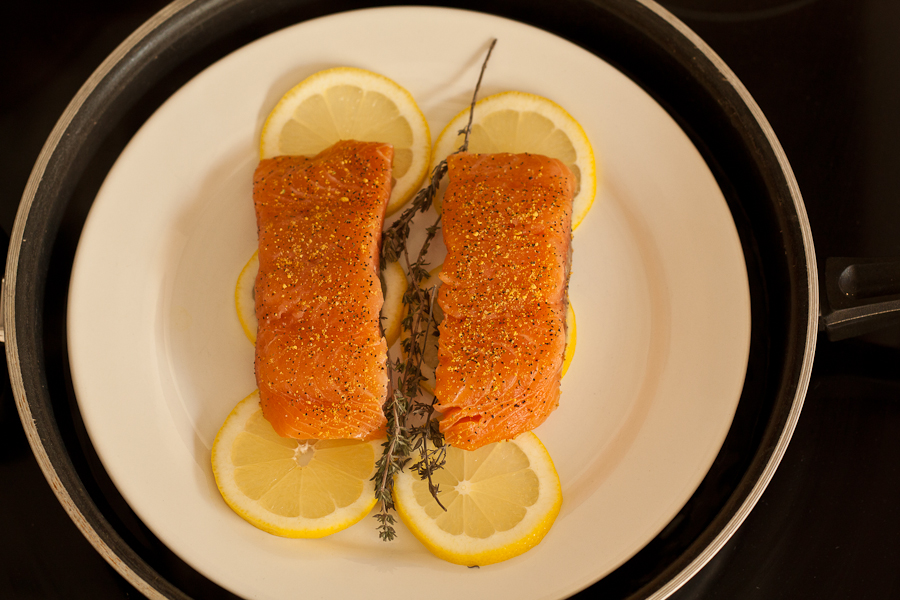
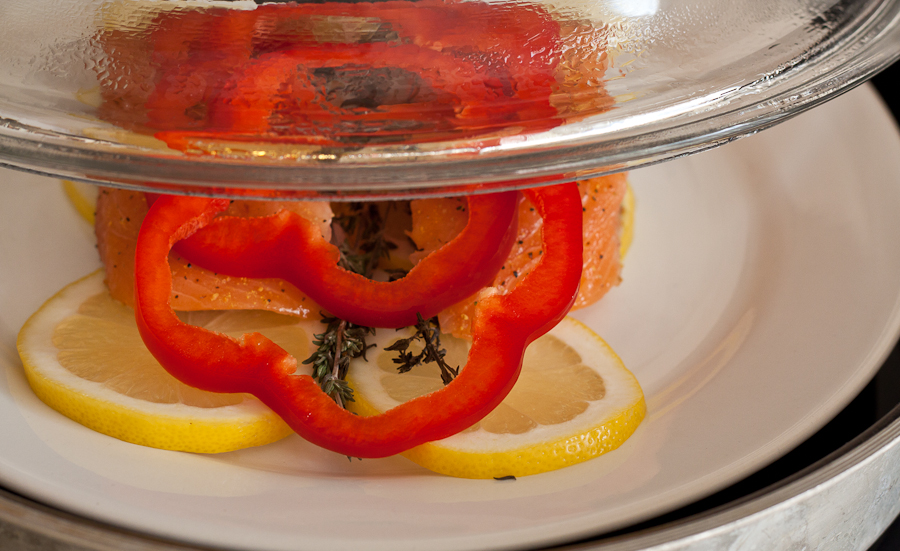
Place foil ring into the skillet with some water. The foil itself should not be submerged at all. Place the plate on top of the foil, pressing down gently, ensuring stability.


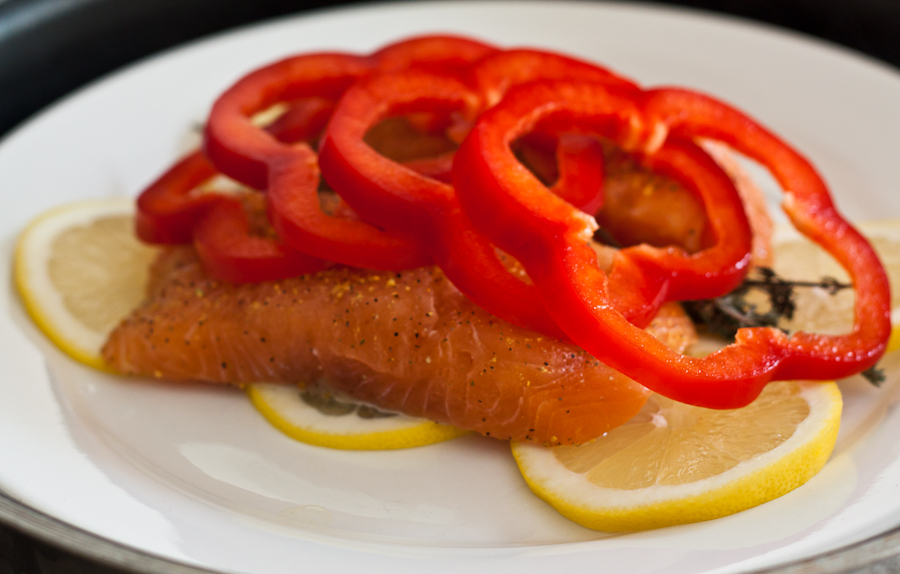
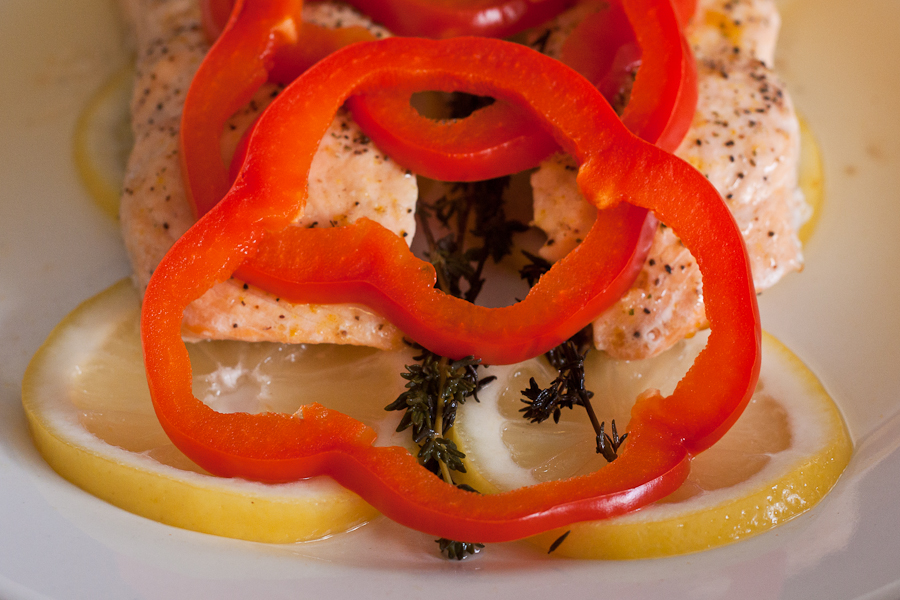
Line the plate with a few slices of lemon. I used 2 rows with 3 slices in each. Add the Salmon on top of the lemon. Add the thyme (or fresh herb of your choice) between the fillets. Season the salmon with salt, pepper, and any other desired seasoning. Go light. Salmon does not need to be over-seasoned.

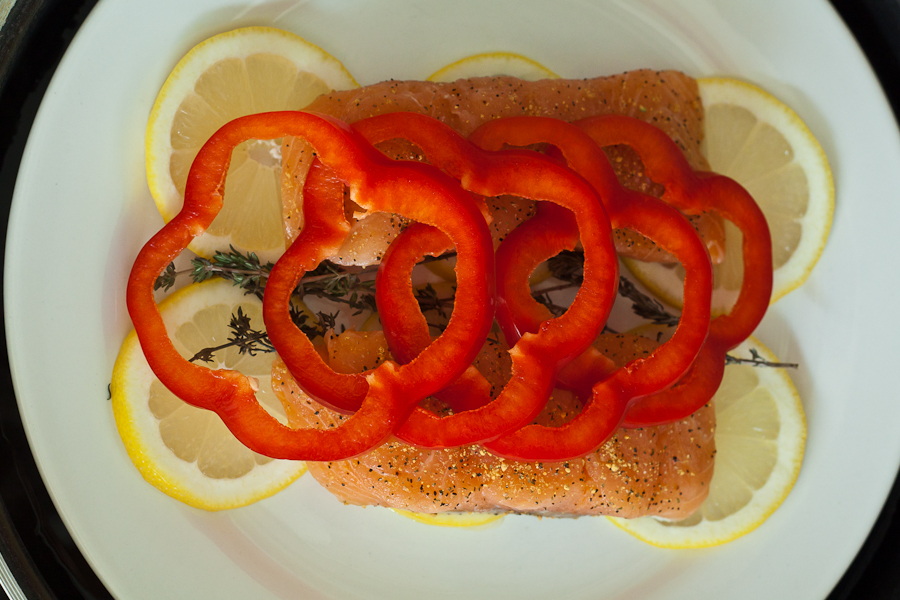
Place a few slices of sweet pepper on top of the salmon so that they overlap.


Did I mention that Salmon is a beautiful fish?


Cover the skillet and bring to a boil. This should take about 10 minutes. Reduce the heat and simmer until the salmon is cooked though. This should take about 15 minutes more.


The salmon is cooked when it is no longer pink and flakes easily with a fork. The smell is wonderful. You probably won’t be able to wait too long before you have this. I suggest you have your plate ready!


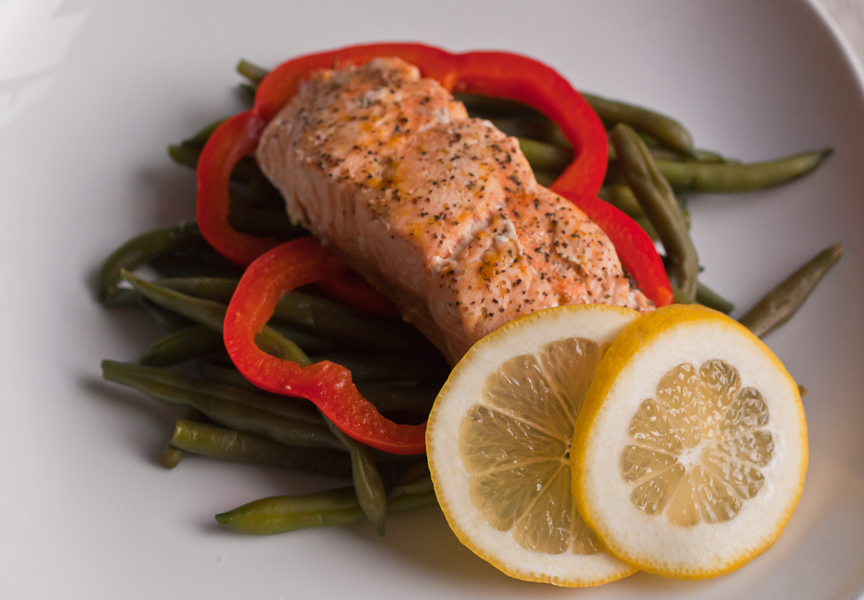
I served the salmon with some string beans. I enjoyed it. I know that you will too. You can use this technique with any fish, and try using different seasoning. Cooking is a journey in experiments. Give this a try!


Steamed Salmon with Lemon & Thyme


I’d like to thank Everyday Food for sharing this technique and allowing me to share it with my readers.


Until next time, take care of you.


~Lyn


read more

Ginger Carrot Bread

Sep 20, 2011 by

When I saw this recipe I just had to try it. An easy way to utilize carrot juice without having to juice dozens of carrots! Its already a winner in my book. I was very impressed with the bright colour as well as the texture of the bread. I found it quite tasty and of course, my mini food tasters gave it their seal of approval.

I found some natural (no preservatives added) carrot juice in the supermarket so I decided to try it not only with the recipe, but also to incorporate it into our diet. Eventually I’ll get into juicing, but for now, this is a great healthy addition to my baking.


Ginger Carrot Bread

Ingredients

  • Dry Ingredients:
  • 1 Cup Unbleached Flour
  • 1/2 Cup Wholewheat Flour
  • 3/4 Tsp Ground Ginger
  • 1/2 Tsp Salt
  • 2 Tsp Baking Powder
  • Wet Ingredients:
  • 2 Eggs
  • 1/3 Cup Vegetable Oil
  • 2 Tsp Vanilla
  • 1 Cup Carrot Juice
  • 3/4 Cup Sugar

Instructions

  1. Preheat your oven to 350F
  2. Whisk dry ingredients into a medium sized bowl. In a large bowl, combine the wet ingredients until combined. Add the dry ingredients into the wet and whisk until combined and smooth. Do not over mix as this will cause the bread to be tough.
  3. Grease an 8.5inch X 4.5inch loaf pan. Pour batter into the pan. There should be about 3/4 of batter in the pan. If there is more than that, it might spill over. Bake for 40-50 minutes.
https://lovelypantry.com/2011/09/ginger-carrot-bread/

This Ginger Carrot Bread recipe has been a certified hit and its always a pleasure to make it and share with family and friends. The gorgeous, striking colour is always a topic for discussion!


 Enjoy!

read more

Roasted Chicken & Potatoes

Aug 30, 2011 by


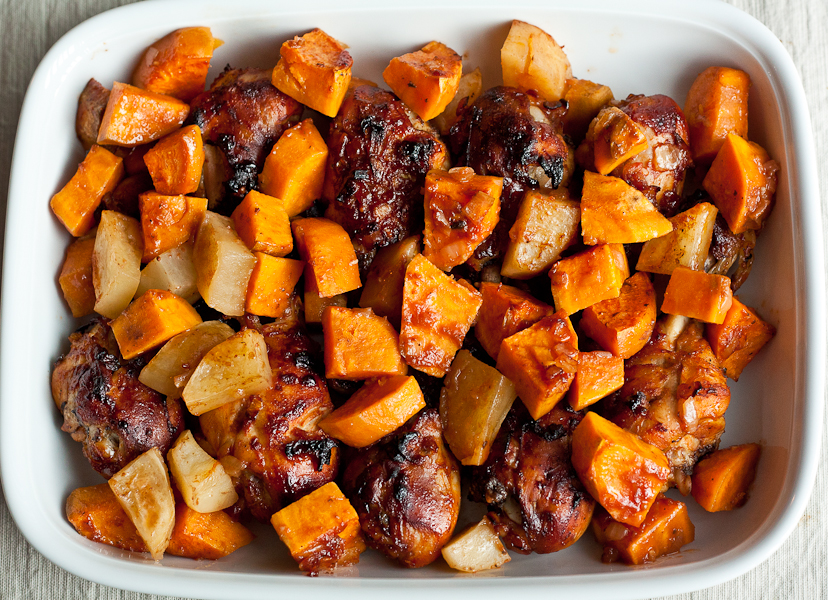
Have you ever had company over and didn’t have a clue what you were making for dinner? This happened to me recently. I did not plan for company that night, but thankfully had some drumsticks ready to be cooked. I reached in my cupboard and found a cookbook called Easy Chicken 🙂 It had the recipe I needed based on the ingredients I had available. There is though, that nervousness when you try something for the first time and share with friends. Essentially you’re winging it. If you like taking chances and trying recipes for the first time with visitors, well here’s a safe bet. Of course, this is my own version of the recipe.

Roasted Chicken & Potatoes
 
Prep time
Cook time
Total time
 
A tasty meal that the whole family will enjoy
Author:
Recipe type: Main
Serves: 4
Ingredients
  • 8 Pieces of chicken (Drumsticks, Thighs, or both)
  • 1 Tsp Salt, 1 Tsp Black Pepper
  • 1 Onion, finely minced
  • 8 Tblsp Organic Ketchup
  • 2 Tblsp Maple Syrup
  • 1 Tblsp Worcestershire Sauce
  • 1 Tblsp Mustard
  • 2 Cloves Garlic, minced
  • 3 Tblsp Extra Virgin Olive Oil
  • 2 Sweet Potatoes (2 medium or 1 large)
  • 2 White Potatoes peeled and cut into chunks
Instructions
  1. Preheat oven to 400F
  2. Score each piece of chicken 2 - 3 times
  3. Mix together all the ingredients, except the sweet potatoes, in a large bowl.
  4. Add the chicken and toss to coat.
  5. Cover with plastic wrap and let marinate in the fridge for about 20 minutes.
  6. In a large oven proof dish, empty the chicken and sweet potatoes and arrange them so that nothing is overlapping.
  7. Roast for 40-50 minutes until well browned and chicken cooked through. The chicken should be tender and the juices run clear when the thickest part of the meat is pierced.
  8. Serve with rice and a salad of your choice.


I had no idea how this meal was going to turn out, but based on the ingredients alone and my track record for selecting tasty meals –  I knew it would be good. And it was. I’d prepare this again in a heartbeat.

Enjoy!

Related Posts Plugin for WordPress, Blogger... read more
Post Popularity Graphing by Knowledge Ring