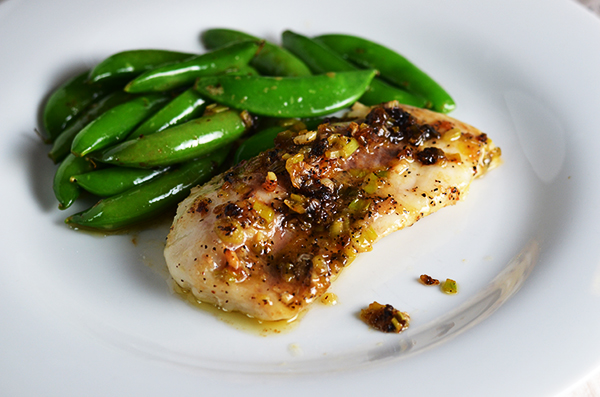
Meatloaf & Smashed Potatoes

Feb 29, 2012 by

Have you ever had meatloaf before? It may sound strange to ask. But when I had meatloaf for the first time, I knew I was missing a great deal! I saw the recipe on Everyday Food and decided to give it a go. Of course, I made changes to their recipe. I generally do. Ha! I enjoyed preparing it but found that it’s really a lot of meat! I may have to find a way to prepare it differently or make mini meatloaves or something. All in all, it tasted great and the family enjoyed it. I chose to mix the meats to get the most flavour. Originally I was going to use the usual ground turkey but felt the flavour would not be rich enough. I’m sure there are many variations of meatloaf so if you’re a food blogger, and you happen to come across my version, please leave a comment and a link to your recipe. I’d love to see.

Oh, and as for the smashed mini potatoes – I saw Laura Calder do it and I thought it was hilarious! But after the first few times I did it, I found them to be cute little things. And I LOVE the taste of baked mini red potatoes. LOVE.

I have to tell you guys that my son ate his dinner with no fuss. Knowing that he would not eat meat for so long, and finally he’s eating like a “big boy” really makes me happy. My daughter is now going through this meatless phase, so I’m being patient with her but I look forward to when she can eat just like her brother. She might even start asking for broccoli or string beans with her dinner, just like her big brother! It’s a daily task, offering her different veggies, and foods, but she’s just 2 and still trying to figure it all out. I’m here to help and show her by example. A mother’s work is truly never done.

I’m proud of my first attempt at meatloaf. Here’s the recipe and photographs.


Meatloaf, Smashed Mini Potatoes, Steamed Broccoli


5.0 from 2 reviews
Meatloaf & Smashed Potatoes
 
Prep time
Cook time
Total time
 
A family favourite - Meatloaf & Potatoes
Author:
Recipe type: Dinner, Main
Serves: 6
Ingredients
  • 12 Baby Red Potatoes, washed and dried
  • ¼ Cup Milk
  • 3 Slices Whole Wheat Bread
  • 1 Small Onion, coarsely chopped
  • 3 Cloves Garlic, finely chopped
  • ½ Cup chopped spinach
  • 1 Egg lightly whisked
  • 1 Tsp Dried Thyme
  • 1 Tsp Dried Oregano
  • Salt & Pepper
  • ½ Cup Tomato Sauce + ¼ Cup for garnish
  • 1 lbs Ground Veal
  • 1 lbs Ground Beef
Instructions
  1. Preheat oven to 375F
  2. Boil the potatoes until it can be easily pierced with a fork, about 15 minutes
  3. Tear bread and place in a small bowl
  4. Pour ¼ cup milk over the bread and allow to absorb
  5. In a large bowl, combine bread, beef, veal, onion, garlic, spinach egg, thyme, oregano, salt, pepper, ½ cup tomato sauce
  6. Combine to make a loaf (I used my hands) and place into a 9" X 5" bread pan
  7. Bake for 30 minutes
  8. Take the mini potatoes and toss in olive oil and season with salt and pepper
  9. place them onto a rimmed baking tray
  10. using the bottom of a saucepan, smash the potatoes in order to flatten them a little bit, not completely
  11. After 30 minutes, remove the meat loaf and spread remaining tomato sauce on top
  12. Continue baking for another 30 minutes
  13. At this time, add the tray of smashed mini potatoes and bake alongside the meatloaf for about 30-40 minutes
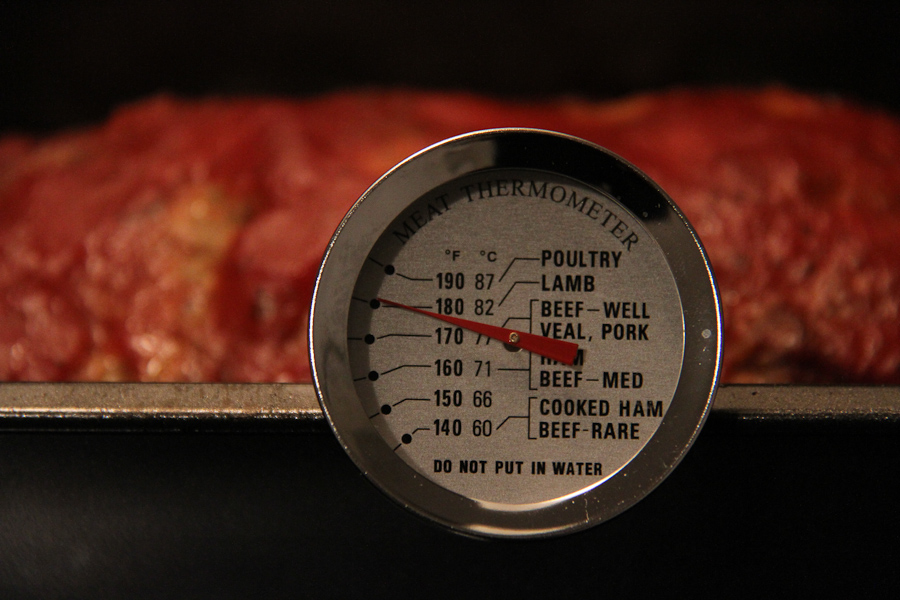
  14. Test meat loaf for an internal temperature of 180F
  15. Remove from oven and allow to rest for about 10 minutes
  16. Removed from pan, and serve in slices
  17. Remove the potatoes when the skin is crispy


While taking into consideration the fact that some ovens are hotter than others, I wanted to ensure that the loaf was cooked through. You can never be too sure.


Internal temperature


It looked great, and smelled wonderful. I couldn’t wait to cut it into slices.


Meatloaf


The tomato sauce was so sweet… a perfect combination.


Meatloaf slices


When will you be making meatloaf for your family?


Meatloaf, Smashed Mini Potatoes, Steamed Broccoli


Take care folks! See you again soon 🙂


read more

Red Velvet Cupcakes with Cream Cheese Frosting

Feb 14, 2012 by

Today is Valentine’s Day and although I don’t celebrate it, I thought it would be awesome if I made something I’ve been wanting to make for a while now. A friend of mine made it and it was really nice and ever since, I keep seeing the recipe everywhere. It was a sign! So I did it. And it was FABULOUS. I swear, I ate my cupcakes in moderation.  I will not swear the same for the frosting! My daughter ate the frosting and half a cupcake. She then refused to eat any other cupcake without frosting. Major meltdown if her frosting had no sprinkles.  MAJOR.


Red Velvet Cupcake with Cream Cheese Frosting


Red Velvet Cupcake with Cream Cheese Frosting


I’ll say this now – I will likely make these Red Velvet darlings once per year. Or maybe on a REALLY special occasion. No more than that. Perhaps this will be my Valentine’s Day treat for the family. I guess it’s better than nothing 🙂 It tastes great but oh my, could we use a bit more oil? Sugar? Please? I’m sure there’s a “light” version out there somewhere in cyberland. I’ll come across it eventually.

A general warning…don’t wear white or a light coloured shirt while making this recipe. Don’t say I didn’t tell you. I really ought to invest in an apron 🙂


Here’s the recipe and a few photographs. Cupcakes are awesome models.


5.0 from 2 reviews
Red Velvet Cupcakes with Cream Cheese Frosting
 
Prep time
Cook time
Total time
 
Red Velvet Cupcakes with Cream Cheese Frosting - a treat for any special occasion
Author:
Recipe type: Dessert
Ingredients
  • 2½ Cups Cake Flour
  • 1½ Cups Sugar
  • 1 Tsp Baking Soda
  • 1 Tbsp Cocoa Powder
  • 1 Tsp Salt
  • 2 Large Eggs
  • 1½ Cups Vegetable Oil
  • 1 Cup Buttermilk (I used 1%)
  • 2 Tbsp Liquid Red Food Coloring
  • 1 Tsp Vanilla Extract
  • 1 Tsp White Vinegar
  • Cream Cheese Frosting:
  • 8 oz Cream Cheese (low-fat)
  • 5 Tbsp Unsalted Butter, at room temperature
  • 2 Tsp Vanilla Extract
  • 2 Cups Confectioners Sugar
  • 2 Tsp Lemon Juice, freshly squeezed
Instructions
  1. Preheat oven to 350F
  2. Prepare cupcake liners (Paper or Silicone)
  3. In a medium bowl, add flour, sugar, baking soda, cocoa powder and salt. Combine with a whisk.
  4. In a large bowl, add eggs, vegetable oil, buttermilk, red food coloring, sugar and vanilla. Combine with a hand-held mixer (or standing mixer if you have one)
  5. Gradually add dry ingredients into the wet, mix until smooth consistency is achieved
  6. Add batter into prepared cupcake liners
  7. Bake for 18 minutes, rotating half way through
  8. If a toothpick or sharp knife comes out clean after insertion, allow cupcakes to cool
  9. For the frosting, combine cream cheese and butter with a mixer until smooth
  10. Add Vanilla Extract, mix to combine
  11. Gradually add the confectioners' sugar and mix until combined and smooth.
  12. Lastly, add the lemon juice and give it one last mix to combine
  13. Put frosting in the refrigerator for about 10 minutes
  14. When cupcakes are completely cooled, add frosting
Notes
This recipe yields 24 cupcakes

This recipe was adapted from Annie’s Eats.


Silicone Hearts


Filling the Silicone Hearts


Cupcakes are ready!


These are ready too...


Red Velvet Heart Shaped Cupcakes with Cream Cheese Frosting


Red Velvet Cupcakes with Cream Cheese Frosting


Naked Red Velvet Cupcake


Uber moist Red Velvet Cupcake


So anyway, I had a great time photographing my cupcakes. Like my silicone hearts? Beats the reusable cupcake liners! There were only 12 in a pack so I used 12 paper liners also. Fact: The cream cheese frosting was the star of the show. It’s just so GOOD!


The GOODNESS of Cream Cheese Frosting


I won’t be doing much romancing today – no more than the usual (wink). But I’m sure I’ll be watching some romantic comedy or the other on television tonight with the husband. If you celebrate Valentine’s Day, have a good one. If you don’t celebrate, have a good one!


~Lyn

read more

Lyn’s Oxtails

Feb 3, 2012 by


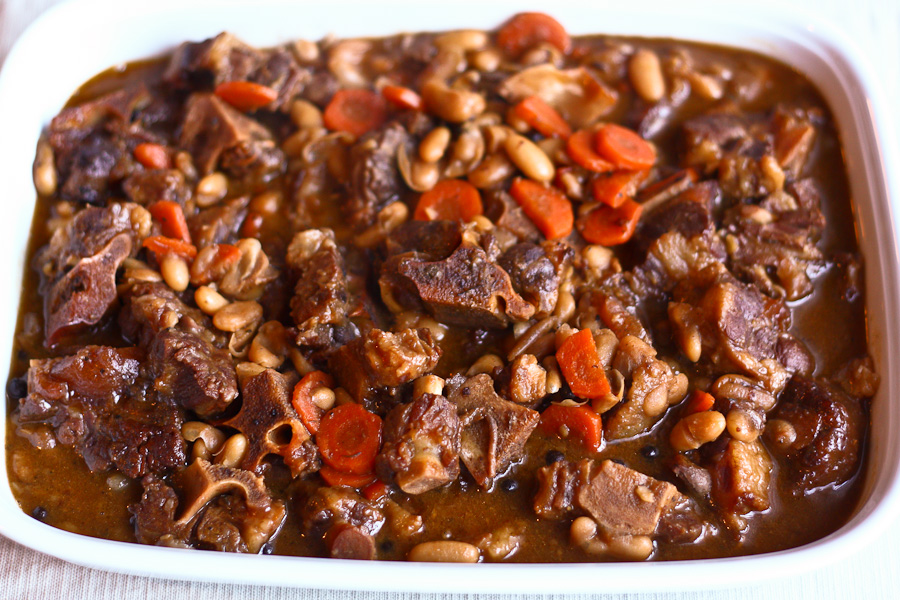
Lyn’s Oxtails with carrots and white kidney beans


Oxtail is one of my most favourite and beloved dishes – ever. It’s a popular Jamaican meal which has a deep, rich flavour that I love so much. It’s a heavy meat so I choose not to eat it too often. I think its safe to say I have it about 3-4 times per year, at most. I’ve had it at a few restaurants here in Canada as well as in Jamaica but I’ve always been concerned with the taste and how it is prepared. Oxtails taste differently every where I go. Some places are better at preparing it than others, and that’s expected.

Traditionally, the Oxtails are seasoned (often overnight) then browned in oil before being cooked down in water over a few hours, and may include dumplings or as we call them in certain dishes – “spinners” (elongated shaped dumplings). This is how my maternal grandmother used to cook it for me and it took her hours! I have fond memories of her at the stove making it, because we both loved it so much. Alas, this is when I was young and slender and nothing could change my figure (LOL). So now that I’m older and more conscious of what I consume, I try to have my favourite things in moderation. I also find ways to prepare them that I find acceptable. For me, this means no frying in oil. This may not be acceptable to some traditionalists, and that is okay 🙂

I bake my Oxtails in the oven. I’ve been doing this for years and I’m thinking it tastes better than some of what I’ve had at restaurants… hmmm…

Here’s how I do it.


Lyn’s Oxtails

Prep Time: 30 minutes

Cook Time: 4 hours

Total Time: 4 hours, 30 minutes

Yield: 6-8

Ingredients

  • 3lbs Oxtails
  • Salt & Pepper
  • 3 Tsp All Purpose Seasoning
  • 2 Tsp Dried Thyme
  • 1 Tsp Oregano
  • 1 Tbsp Pimento Seeds
  • 3 Cloves Garlic, roughly chopped
  • 1 Large Carrot, sliced about 1/4 inch
  • 2 Tbsp low sodium Soy Sauce
  • 1/4 Cup Hoisin Sauce
  • 1 Can White Kidney Beans (Or Lima), rinsed and drained

Instructions

  1. Pre-heat oven to 350F
  2. In a deep bowl, mix oxtail and ingredients together
  3. Once combined, pour into a large oven-proof baking dish with a cover
  4. Set timer for 4 hours
  5. check every hour and add water (1/4 cup or so to keep the base moist) to ensure it doesn't dry out (or burn)
  6. After 1 hour, I usually have to add more all-purpose seasoning and water. Stir to combine. Then add white kidney beans and carrots at the 3rd hour. Cover and cook for an hour
  7. Within the last hour, check to see that the meat is soft, tender and falling off the bone
  8. Depending on the size of the meat, it may need an additional 30 minutes or so to cook
  9. Serve with white rice or Jamaican style rice and peas

Notes

It is a good idea to season the oxtails and allow them to rest in the refrigerator overnight for the best flavour.

When purchasing, pick up Oxtails or request that it be cut into small pieces (2-3 inches in diameter) as they cook in about 3 hours. Larger pieces take a lot longer.

https://lovelypantry.com/2012/02/lyns-oxtails/

5.0 from 1 reviews


I should mention that there is usually a certain amount of “heat” in most Jamaican fare. And by “heat”, I’m referring to Jamaican Scotch Bonnet Pepper. If you wanted to add heat, I would probably add the pepper at the beginning and remove it half way through so that it does not burst. I personally cannot eat too much pepper because it gives me some major heartburn! Plus, my little ones palates are so darn sensitive. A little is fine though, it gives it a little extra kick.

There are so many variations of Oxtails that I would love to try. One of my Aunts introduced me to this method (as in, using the oven). Another Aunt of mine prepares her Ox with BEER. I think I’ll be giving her a call soon for that recipe 🙂


A special shout out to my cousin Shelley – Happy Birthday sweetie! This recipe is for you ~ now at least you’ll have it in writing 🙂

Take care, guys! Have an awesome weekend! ~ Lyn


read more
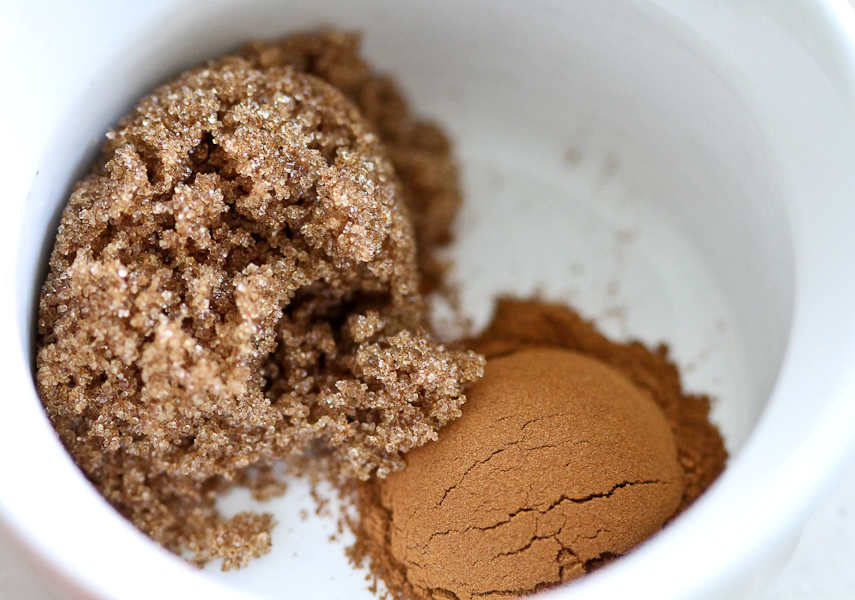
Peanut Butter Chocolate Cookies

Jan 18, 2012 by

I wanted to post the recipe for these cookies for a few days now but alas, I’m slightly behind in my posting. I’m so happy to share this with you though, as these are my husband’s favourite cookies. I kinda love them too. I promised him I’d make a batch this week so me posting is great timing. I love the simplicity, and also that I’m using  low-fat peanut butter, less sugar than what the original recipe called for plus I used dark chocolate chips. Sounds like some good stuff right? You can substitute peanut butter for the organic kind. I plan to use vegan dark chocolate peanut butter to see how it comes out. I may omit the chocolate chips to avoid overkill. We’ll see!

This recipe is adapted from Everyday Food.


Peanut Butter Chocolate Chip Cookie


Peanut Butter Chocolate Cookies

Prep Time: 20 minutes

Cook Time: 14 minutes

Total Time: 31 minutes

Yield: 32 Cookies

Ingredients

  • 1 Cup Low-Fat Peanut Butter
  • 1/2 Cup Granulated Sugar
  • 1 Egg
  • 1/2 Tsp Baking Soda
  • 1/4 Tsp Salt
  • 3/4 Cup Dark Chocolate Chips

Instructions

  1. In a medium bowl, combine peanut butter, sugar, egg, baking soda and salt
  2. Once combined, mix in chocolate chips
  3. Using a cookie-scoop, take walnut sized portions and with moistened hands, roll into balls
  4. Place on a parchment lined cookie sheet, leaving 2 inches between each ball
  5. Bake for 12-14 minutes in a 350F oven
  6. Allow to cool on the baking tray for about 10 minutes before transferring to a cooling rack
https://lovelypantry.com/2012/01/peanut-butter-chocolate-cookies/

5.0 from 1 reviews


Peanut Butter Chocolate Chip Cookie – Ready to eat!


Don’t you just want to dive in? Seriously.


Peanut Butter Chocolate Chip Cookie


Take good care guys! ~ Lyn


read more
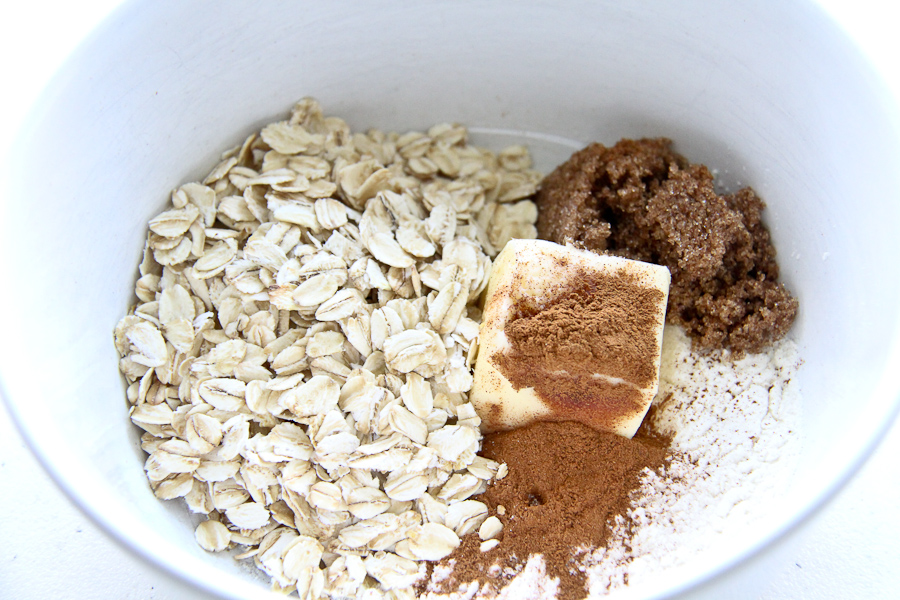
Apple Crisp

Jan 9, 2012 by

For those that don’t know me, I have a deep love for my family. I suppose it only gets magnified knowing that I’m so far away from them. But it warms my heart whenever we do get a chance to talk and catch up with each other. I’m always so happy to help with any recipes or techniques should they inquire. Recently, my cousin called me with a question that was so simple, but somehow I didn’t have an answer for her. She had an apple and wanted to know if I had any recipes for a single apple. I looked for recipes for a while just to satisfy that desire to have a recipe for a single apple 🙂 Although I did not find exactly what I was looking for, I played around with the basic concept of apple crisp and came up with my own version. I did it quite a few times until my husband and I agreed that we had arrived at something special. So thanks to Kim, I’m able to share this recipe today.

I wanted to keep the ingredients as simple as possible and good for you too.


Royal Gala Apple


Whole Grain Oats


Apple Crisp Ingredients


5.0 from 2 reviews
Apple Crisp
 
Prep time
Cook time
Total time
 
A simple recipe for Apple Crisp
Author:
Recipe type: Dessert
Serves: 1
Ingredients
  • Apple Filling:
  • 1 Apple - Royal Gala (or a firm apple like Granny Smith)
  • 1 Tbsp Agave Nectar
  • 1 Tsp Lemon Juice
  • 1 Tsp Flour
  • Butter for greasing oven-proof bowl
  • Oats Topping:
  • 2 Tbsp Butter, softened
  • 1 Tbsp Flour
  • 1 Tbsp Brown Sugar
  • 1 Tsp Cinnamon Powder
  • 4 Tbsp Whole Oats
Instructions
  1. Peel the apple and cut into small chunks.
  2. Use butter and grease a small oven proof bowl (I used a16oz bowl, 5inches in diameter)
  3. In a separate bowl, mix apple, agave nectar, lemon juice and flour so that apple is fully coated
  4. Empty coated apple into prepared oven proof bowl
  5. In a small bowl, add softened butter, flour, sugar, cinnamon and oats
  6. Combine using a fork and then crumble with your fingers until all the ingredients are combined
  7. Spread oats mixture on top of the apple in the prepared bowl
  8. Bake in a 375F oven until nicely browned on top, about 25 minutes
  9. Remove from oven and allow to rest for about 10 minutes
  10. Enjoy by itself or with traditional vanilla ice-cream


Apple Filling with agave nectar, lemon juice and flour


For some reason, Brown Sugar and Cinnamon look so beautiful together…


Brown Sugar and Cinnamon


Ingredients for the Topping


Ready for the oven


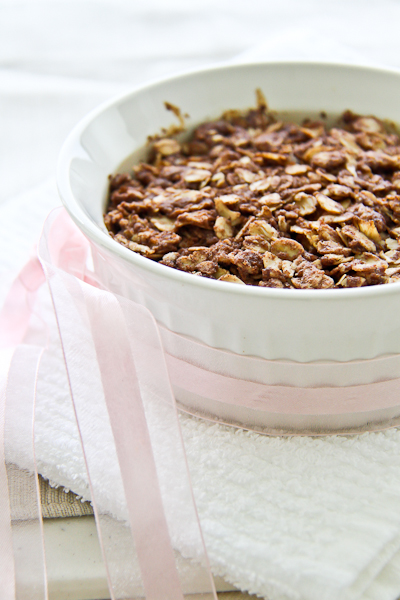
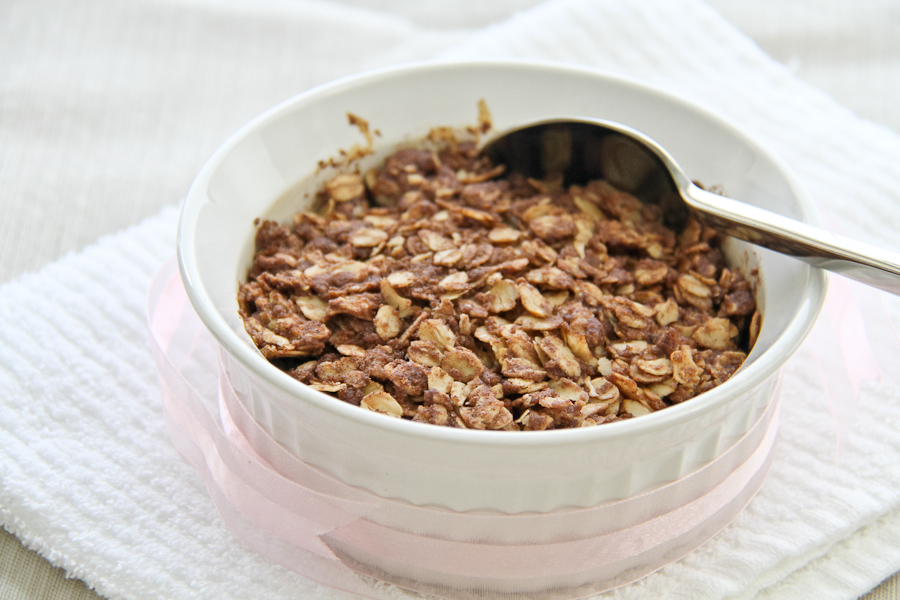
The result is a very clean and lean Apple Crisp that I’ve enjoyed many times. Thanks, Kim!


Kim's Apple Crisp


Apple Crisp


Have a great week everyone!

~Lyn


Related Posts Plugin for WordPress, Blogger... read more
Post Popularity Graphing by Knowledge Ring