Tarragon Chicken #SundaySupper

May 6, 2012 by

I’m very happy to be able to participate in this weeks #SundaySupper! Todays theme is “May Flowers, Veggies and Herbs.” I didn’t  hesitate to prepare this as a wonderful spring dish. I think I may have tweeted my joy when I saw that Tarragon was available again ~ a true indication that spring has arrived! For those that are not familiar with Tarragon, it is an herb that is quite popular in French cuisine and pairs very well with chicken and fish. It is very aromatic and reminds me of liquorice! When I made this dish almost 2 years ago for the first time, I enjoyed it immensely. I decided to serve the chicken with Fennel (a vegetable with a very similar aroma to Tarragon) as well as Zucchini and Jasmine Rice.


Tarragon Chicken with Pan Seared Fennel and Zucchini, Jasmine Rice


5.0 from 2 reviews
Tarragon Chicken
 
Prep time
Cook time
Total time
 
A French dish, perfect for a comforting family dinner
Author:
Recipe type: Main
Serves: 4
Ingredients
  • 1 Tbsp unsalted butter
  • 4 Tbsp olive oil
  • 8 Drumsticks, Skinless (any part of the chicken is good)
  • Salt and pepper
  • ½ cup chicken stock
  • ½ cup dry white wine
  • 1 shallot, minced
  • ½ Cup Half & Half
  • ½ cup fresh tarragon and a few extra for garnish
Instructions
  1. Season chicken with salt and pepper
  2. In a large dutch oven, warm oil and butter over a medium-high heat
  3. Brown chicken in batches and set aside
  4. Add all the chicken pieces back to the pot
  5. Add broth, cover and simmer for about 20 minutes
  6. Take the chicken from the pot and set aside.
  7. Add shallot to the pot and soften, about 5 minutes
  8. Add wine, allow to reduce about 7 minutes
  9. Add half and half, stir to combine
  10. Add chopped Tarragon, stir and cover for about 5 minutes
  11. Add chicken back to the pot, cover and allow to simmer for about 10 minutes
  12. Serve and garnish with fresh Tarragon
Notes
Served with pan seared Fennel, pan seared Zucchini Slices and aromatic Jasmine Rice Recipe adapted from Laura Calder's version: http://www.foodnetwork.ca/recipes/Herbs/recipe.html?dishid=9128


Such a lovely herb. I love the scent and flavour!


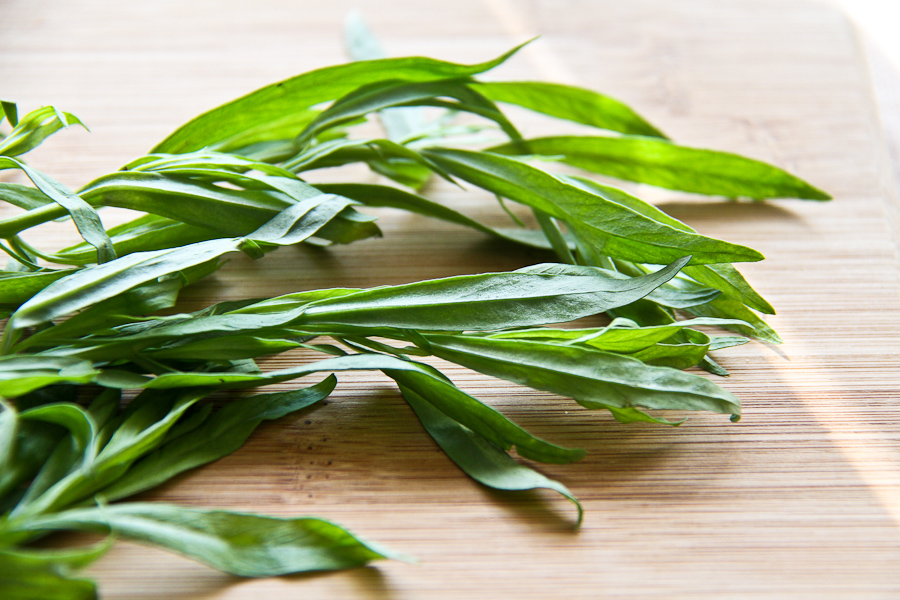
Fresh Tarragon


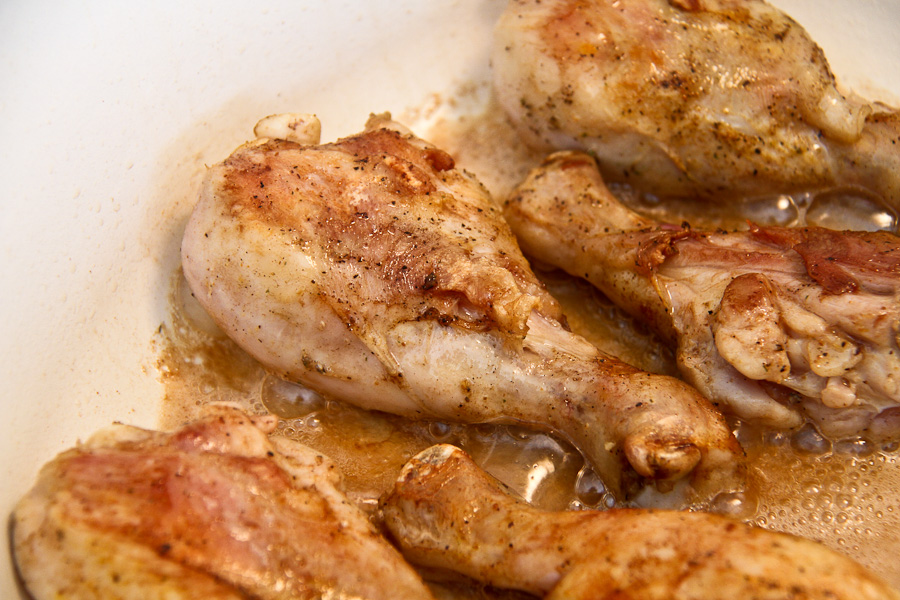
Brown the chicken pieces in batches. If you used chicken pieces with the skin on, you may want to skim some of the fat left over in the pot. Not too much – since that’s where the base flavour is.


Chicken in Olive Oil and Butter


After you’ve browned all pieces of chicken, and cooked them down in the broth, set them aside while you build the Tarragon sauce.


Chicken, resting


Soften the shallots in the broth.


Softening the Shallot


Add the fresh Tarragon into the Broth and cream mixture. Simmer.


Fresh Tarragon in wine and cream sauce


The sauce should have a rich, thick consistency. Taste at this point, to see if you need salt and/or pepper. Add the chicken back to the pot to incorporate the flavour.


Tarragon Chicken Sauce


The sauce is terrific. The texture is great and the flavour is awesome.


Creamy Tarragon Chicken Sauce


Dinner is served!


Tarragon Chicken, Jasmine Rice, Fennel and Zucchini


Here are some wonderful spring inspired meal ideas for #SundaySupper using Herbs and Vegetables. These recipes will  inspire you to spend more time Around the Family Table!

Cocktails and Wine Pairings: 

Appetizers:

Entrees:

Side Dishes:

Dessert:


Happy Sunday! Enjoy quality time with your loved ones this evening.

~Lyn

read more

Dark Chocolate Chip Granola Bars

May 4, 2012 by

I’ve been wanting to make granola bars in what seems like forever! But I finally found a recipe that I liked and wanted to try. I really have to look at the ingredients in order for me to decide if I’m going to make it. I’m not crazy about nuts (I prefer them on their own) and it’s not uncommon to see many granola recipes with a variety of nuts included. I wanted something that the kids would enjoy and not find things to pick out or require too much effort on their part. When I came across this awesome recipe from a lovely little blog called Lauren’s Latest, I knew I had found “it”. Lauren’s recipe was adapted from Rachel Ray, and I adapted her version with what I had available.

I decided to make these after I lost my natural light, but I knew there would be nothing left after they were ready, so I went ahead and took photographs anyway. I’ve made these granola bars twice and only a few make it to daylight.

Chocolate Chip Granola Bar - No bake


5.0 from 2 reviews
Dark Chocolate Chip Granola Bars, No-Bake
 
Prep time
Total time
 
An easy granola bar recipe that can be made within minutes!
Author:
Recipe type: Treat, Snack
Serves: 8
Ingredients
  • 3 Tbsp Butter
  • 3 Tbsp Cinnamon Creamed Honey (Or plain honey)
  • 1 Tbsp Agave Nectar
  • ⅓ Cup Brown Sugar
  • 2 Cups Quick Oats
  • 1 Cup Puffed Rice Cereal (like Rice Krispies)
  • 1 Tsp Vanilla
  • ½ Cup Dark Chocolate Chips (or milk chocolate)
Instructions
  1. In a medium bowl, add cereal and oats. Stir to combine and set aside.
  2. In a small saucepan, melt butter, honey, agave, and sugar over medium heat just to a boil. Stir to combine. Reduce heat and remove after about 2-3 minutes.
  3. Add vanilla and stir
  4. Pour into cereal and oats, mix well to incorporate
  5. Transfer into a rimmed tray (12X8 inch and about an inch deep)
  6. Press firmly in order for the oats to cover the entire surface evenly
  7. Sprinkle with chocolate chips and gently, press down
  8. Allow to cool for a few minutes in the fridge (or an hour at room temperature)
  9. When firm, cut into bars.
Notes
Press firmly into the tray to prevent the bars from falling apart. Try to achieve about ¾ inch thickness. I put mine in the fridge for about 20 minutes before serving.


Rice Krispies and Quick Oats. These two ingredients were united for the first time in my house. I never had to buy Rice Krispies prior to this recipe. I even allowed my son to listen to them “snap, crackle and pop” like the commercials I used to see as a child. Embrace the Rice Krispie experience!


Rice Krispies and Quick Oats


I chose to use the Cinnamon Creamed Honey that I bought from the Farmer’s Market over the plain honey. The jar was unopened. How could  that be!!!??? When I tasted it at the market, it was splendid! I envisioned myself having it on toast with a cup of tea! I suppose I also wanted to add a very special flavour to the granola bars too. It worked out very well!


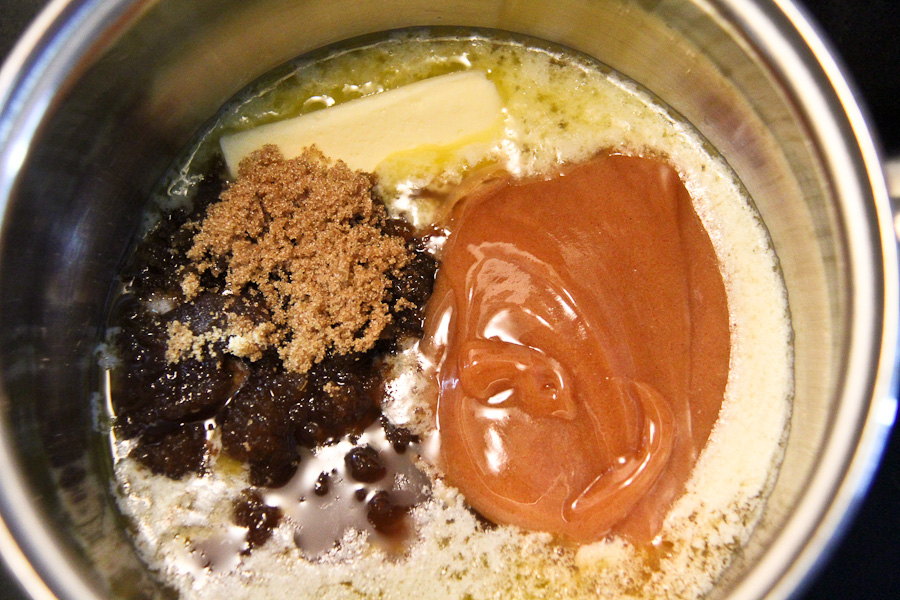
Cinnamon Creamed Honey, Butter, Agave Nectar, Brown Sugar


I didn’t allow it to remain at a boil, I just wanted to make sure everything was combined well before I removed it from the heat.


Mixture just to a boil, and combined


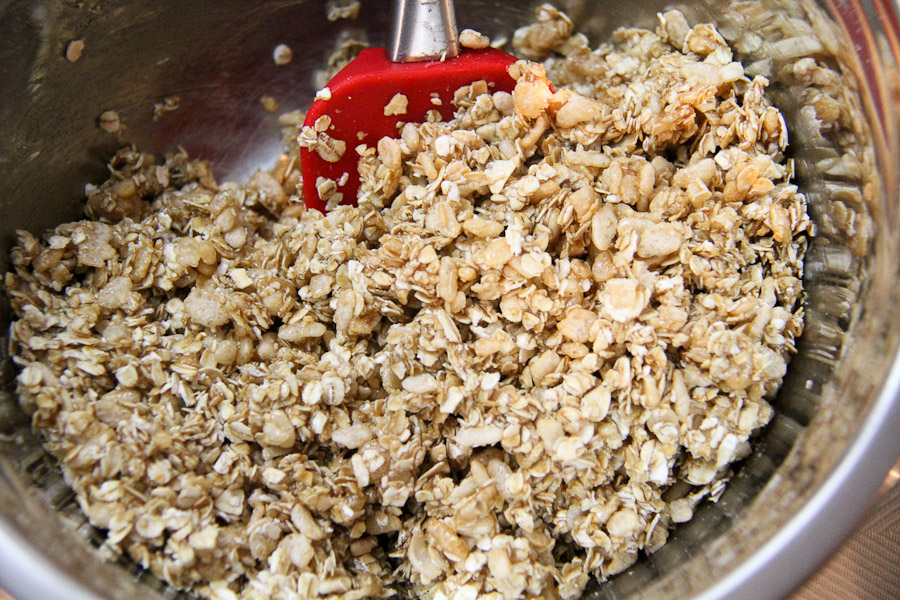
Muscle up for this part. The liquid firms up rather quickly and you have to make sure that everything is thoroughly combined.


Combining the honey mixture with the oats and cereal


Press firmly to ensure the mixture is packed tightly.  This helps to keep the bars from crumbling. I waited for it to cool for about 10 minutes (you should probably wait a little bit longer – an hour or so)


Press down *firmly* to flatten


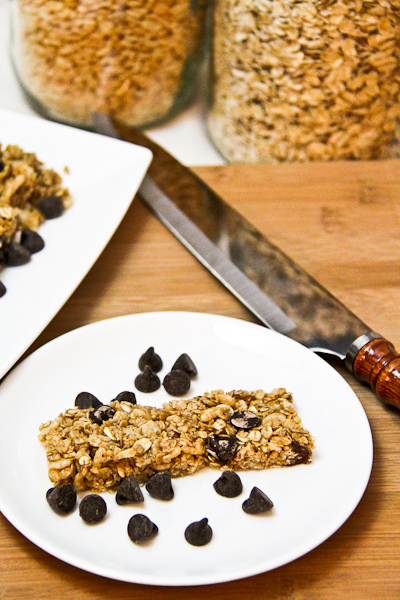
I flipped everything onto a parchment lined cutting board. I sprinkled the chocolate chips then pressed them down. Whats funny is – they started to melt 🙂 I then used a pizza wheel (genius) and a knife to separate into bars. The kids were by my feet almost the entire time just waiting to get their hands on a piece. They had some crumbled bits, but got the real deal after it came out of the fridge for about 20 minutes or so. You know, to a child that’s like “forever”.


Granola Bars in the making!


My kids loved these little bars! Okay, so did I. We all had them with a glass of milk. A sweet treat to bring the family together.


My first granola bar!


Picky eater APPROVED!


Dark Chocolate Chip Granola Bar


Happy Friday!!!

read more

Baked Butternut Squash & Asparagus Risotto #SundaySupper

Apr 29, 2012 by

Today’s post is contributing to the #SundaySupper movement on Twitter. Every Sunday, food bloggers share themed recipes and tips to encourage family dining. The recipes are fabulous and any inspiration that you need for your Sunday family meal is always a tweet away. I’m very glad to have joined up with such a warm and welcoming group! Today’s theme is budget friendly meals.

My cookbook collection could easily get out of hand. And I’m not even worried. I love to see bookshelves lined with books from end to end. Over the years, I’ve been buying cookbooks, food related books as well as photography books. This passion is here to stay. If ever I doubt my true love, all I need to do is look at my collection. What I love about books in general, is that a particular book may seem new to you if you haven’t read it or seen it in a while. I have cookbooks that I haven’t even looked through properly. That thought alone excites me! I’m surrounded by inspiration.

Risotto is a great meal that can be made with simple, budget friendly ingredients. Perfect for a Sunday Supper. I was browsing through some or my treasures and my search led me to a cookbook that it would seem I had not looked in. The photographs were superb and I wished my photographs looked just like them or similar. So anyway, the original recipe used pumpkin and sage – I didn’t have those items but if you’ve been reading my blog for a minute, you’ll know that I use what I have if I cannot do any better at the moment. I had a Butternut Squash and fresh Asparagus. Done deal, in my head.

I’m not sure what tickled me more – the idea that I was baking the risotto, or that I wouldn’t have to stir constantly for half an hour. I was totally pleased with the outcome and perhaps… just maybe… I’ll make Risotto like this from now on. This is a fantastic way to have dinner ready in under an hour, no stress on the stirring arm.


Baked Butternut Squash & Asparagus Risotto for #SundaySupper


This recipe was inspired by “Fast, Fresh, Simple” by Donna Hay, page 162.


5.0 from 1 reviews
Baked Butternut Squash & Asparagus Risotto #SundaySupper
 
Prep time
Cook time
Total time
 
A meat free family meal, easy to make and ready in under an hour
Author:
Recipe type: Main
Serves: 6
Ingredients
  • 1 Tbsp Olive Oil
  • 1 Onion, Chopped
  • 12 stalks Asparagus, washed and trimmed
  • 2 Cups Arborio Rice
  • 2 Cups Butternut Squash, diced
  • 5 Cups Low Sodium Chicken Stock
  • 3 Tbsp Butter
  • ½ Cup Grated Parmesan Cheese
  • Salt and Pepper
  • Grated Parmesan to serve
Instructions
  1. Preheat oven to 400F
  2. In a large dutch oven (or oven proof pot), add oil and onion over medium heat
  3. Cook for until soft, about 3 minutes
  4. Add the asparagus and cook for about a minute
  5. Add the pumpkin and cook for about a minute. Stir to combine
  6. Add the rice and stock. Cover pot with a tight-fitting lid
  7. Bake for 30 minutes
  8. The Risotto will be moist and there may still be some liquid. Add salt, pepper, butter and parmesan and stir until the risotto thickens
  9. Plate and serve with some extra parmesan
Notes
Adapted from Donna Hay's recipe Baked Pumpkin & Sage Risotto from her book "Fast, Fresh, Simple" - page 162


Fresh spring flavour

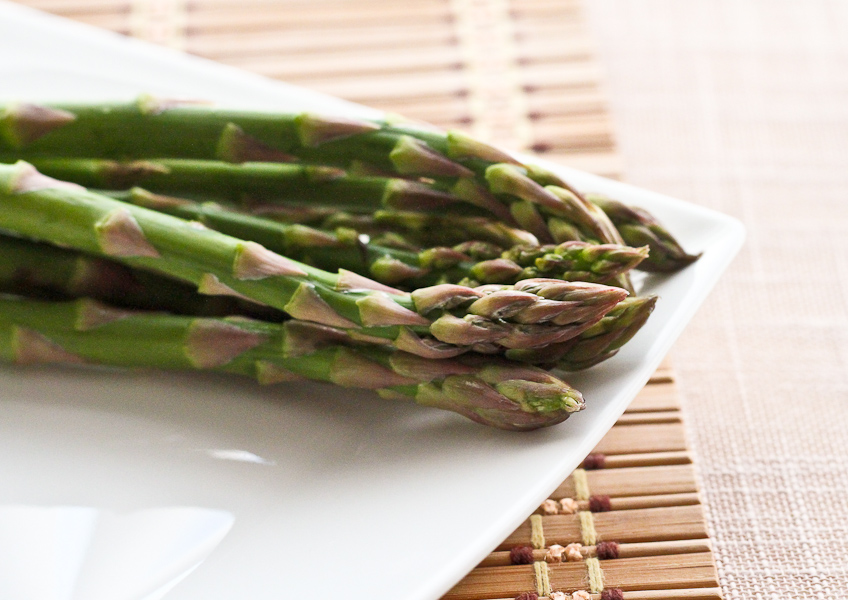
Asparagus


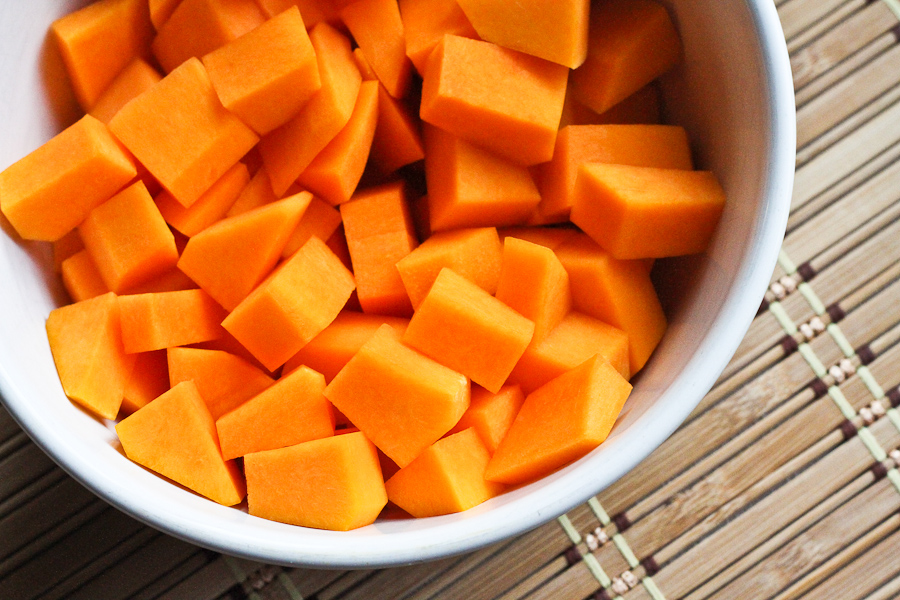
I was glad to use Butternut Squash in this recipe. It holds up quite well and adds beautiful colour to the meal.


Butternut Squash, diced


Asparagus is a really good-looking vegetable. I’m looking forward to experimenting more with it.


Asparagus, washed, trimmed, cut into 1-2 inch pieces


I believe these two paired very well together.


Butternut Squash, Asparagus and Onions


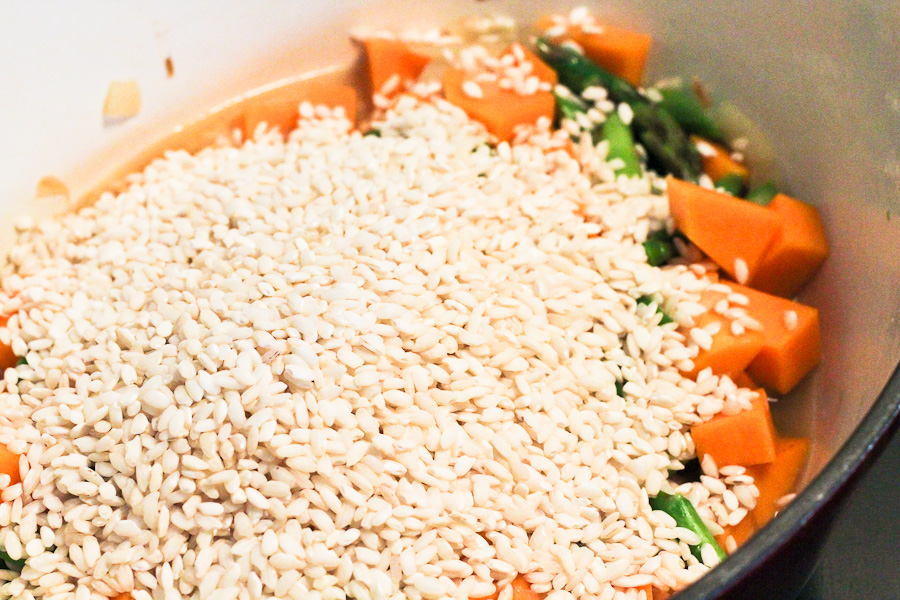
Add the rice and give it a quick stir to combine before placing the pot into the oven.


Arborio Rice added to the dutch oven


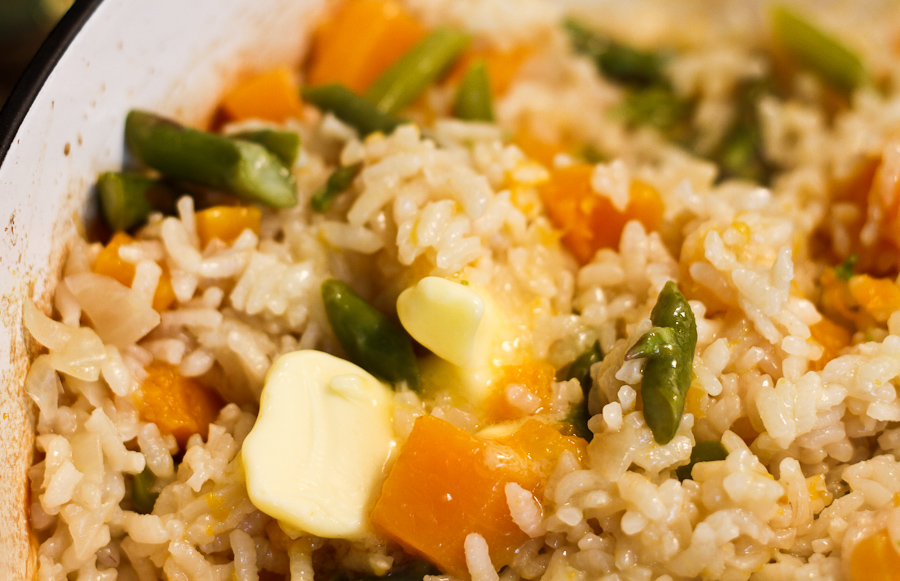
This is what it looks like straight from the oven. There is very little broth left and the vegetables are cooked through.


Risotto out of the oven


Add the butter and gently stir to combine


Melting butter


Here is the plated Risotto. Add the parmesan cheese before eating.


Baked Butternut Squash & Asparagus Risotto


Dinner is served!


Baked Butternut Squash & Asparagus Risotto with Parmesan Cheese


I hope you enjoyed my recipe today. Please check out what the rest of my food blogger friends are bringing to #SundaySupper:

Lane from Supper for a Steal with her Chicken Tortellini Soup Recipe

Sasha from Rambling Notebook  with her Crock Pot Curried Carrot Ginger Soup

Jennie from The Messy Baker Blog with her Recipe for Meatball Subs

Amrita from Beetles Kitchen with her Vegetable Manchurian Recipe

Pam from The Meltaways is bringing her Chicken Enchilada Pasta

Carla from Chocolate Moosey is sharing her Sweet Chili Wings Recipe

Karen from Notes from the Cookie Jar is bringing her Chickpea Masala Sandwiches

An from Baker Street is bringing her Blueberry Lime Bread

Liz from That Skinny Chick Can Bake is bringing her Creme Brulee French Toast because sometimes Breakfast for Dinner is fun!


read more

Orange and Almond Muffins

Apr 23, 2012 by

Muffins are so simple, and tasty to make. I mean, who doesn’t love a good muffin, right? I pulled out my little muffin recipe book called “100 Muffins from 1 Easy Recipe” and found another nice recipe. The last muffins I made from this book were the Easter Muffins and they were great. These were just as light and just as simple. They could easily be a quick breakfast on the go, or a snack. What I love is that there’s not too much sugar but it has a lovely citrus flavour. Really nice! The kids loved them, but they started to slow down once they hit the middle. I guess there’s no sugar in the middle! They also asked where the frosting was….


Orange and Almond Muffins


5.0 from 2 reviews
Orange and Almond Muffins
 
Prep time
Cook time
Total time
 
A light, citrus infused muffin
Author:
Recipe type: Muffin
Ingredients
  • 2 Oranges
  • ½ Cup Milk
  • 1½ Cups All Purpose Flour, Unbleached
  • 1 Tbsp Baking Powder
  • ⅛ Tsp Salt
  • ½ Cup Superfine Sugar
  • ½ Cup Ground Almonds
  • 2 Eggs
  • 6 Tbsp Sunflower Oil (or melted cooled butter)
  • ½ Tsp Almond Extract
  • 3 Tbsp Turbinado Sugar (Raw Sugar)
Instructions
  1. Preheat oven to 400F
  2. Grease a 12-cup muffin pan, or use 12 paper liners
  3. Finely grate the rind from both oranges and extract the juice into a measuring cup
  4. To the measuring cup with juice, add milk to make a full up and add rind
  5. In a large bowl, sift together flour, baking powder, and salt
  6. Stir in sugar and ground almonds
  7. In a large bowl, lightly whisk eggs, then beat in the orange/milk mixture, oil and almond extract
  8. Make a well in the dry ingredients and pour in the liquid mixture
  9. Stir until just combined. Take care not to over mix
  10. Spoon the batter into the prepared muffin pan
  11. Sprinkle Turbinado Sugar over the top of the muffins
  12. Bake for 20 minutes until well risen, golden brown and firm to the touch
  13. Allow muffins to cool in the pan for about 5 minutes before serving
Notes
Slightly adapted from "100 Muffins From 1 Easy Recipe", Page 60


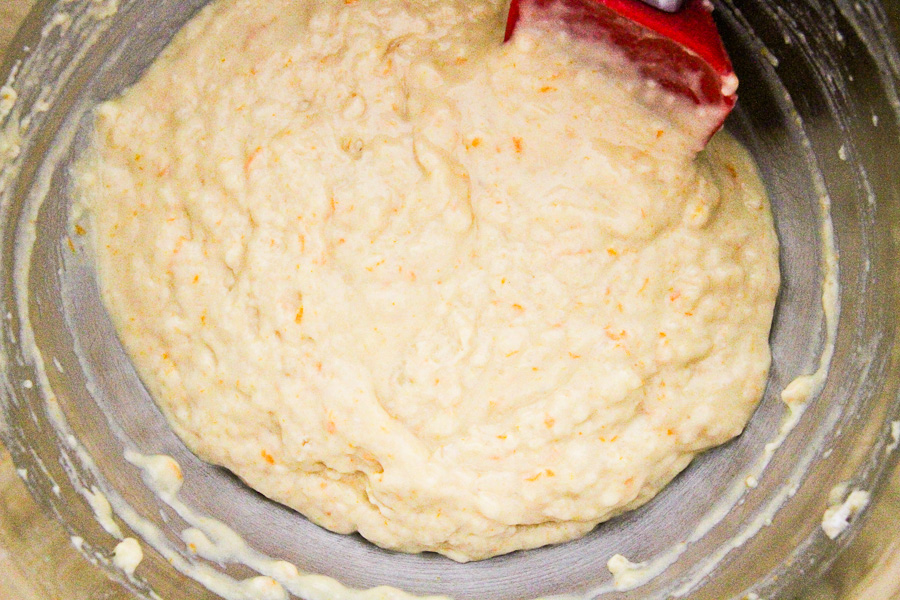
Even before it is baked, it smells really good!


Zesty Batter


I like the coarse grittiness of the Turbinado Sugar. It gives a nice crunch at the end.


Muffin liners filled with batter and topped with Turbinado Sugar


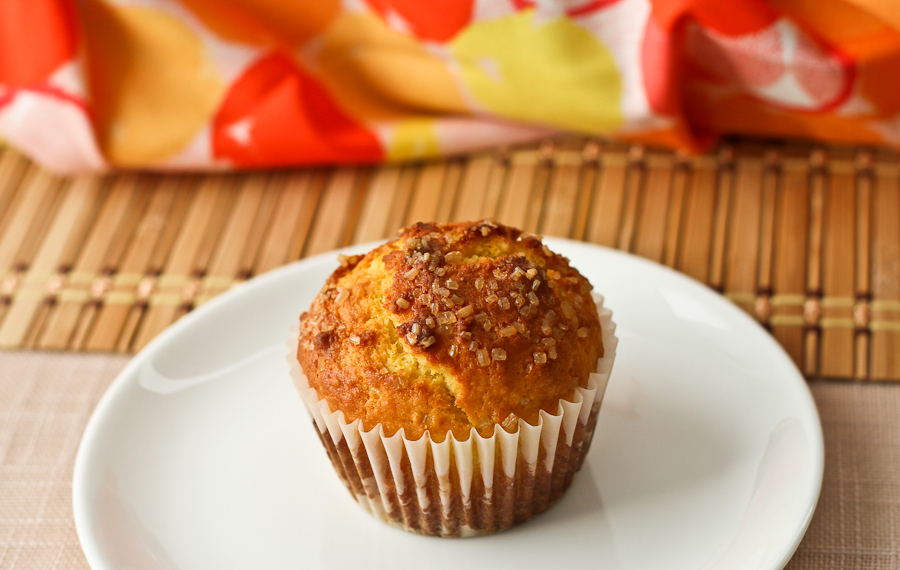
The house smells great right about now!


Orange & Almond Muffins fresh out the oven!


I used Navel Oranges for this recipe. I find them to be sweet and very juicy.


Orange & Almond Muffin


Such a great little muffin. Bake, grab, go!


Orange & Almond Muffins


Happy Monday my dear friends! Have an awesome week!

~Lyn

read more

Quinoa Cakes With Apple Sauce

Apr 19, 2012 by

I was super excited when I came across this recipe. I love Quinoa. It is by far my most favourite grain. It can be cooked in a variety of ways, and provides many nutritional benefits to my joy and comfort 🙂 I like to make “special pancakes” for my kids. This certainly is a very special pancake. I also wanted to make Apple Sauce to go with it. I got the Quinoa Cakes recipe from Martha Stewart. I swear, her recipes never fail me! Even when I make slight substitutions, whatever I make always comes out great.

I was attracted to this recipe because I wanted to have some kid-friendly quinoa recipes ready to go. I need them to be easy, tasty and enjoyable by my kids. I believe this did the trick. My apple sauce addition paired well with them and tasted awesome! The texture came out so smooth – the quinoa was hardly noticeable. Amazing.


Quinoa Cakes with Apple Sauce


5.0 from 1 reviews
Quinoa Pancakes With Apple Sauce
 
Prep time
Cook time
Total time
 
A healthy pancake made with superfood Quinoa
Author:
Recipe type: Breakfast or Brunch
Serves: 4-6
Ingredients
  • 1 cup cooked quinoa
  • ¾ cup all-purpose flour, unbleached
  • 2 teaspoons baking powder
  • ½ tsp coarse salt
  • 1 egg, plus 1 egg white
  • 1 tbsp unsalted butter, melted
  • ¼ cup low-fat milk
  • 2 tbsp maple syrup + more for serving
  • Cooking spray
  • Apple Sauce:
  • 2 Apples, peeled, cores removed, diced (I used Royal Gala)
  • ¼ Cup Brown Sugar
  • ¼ Tsp Cinnamon
  • 2 Tbsp Apple Juice
Instructions
  1. Start the apple sauce first - place apple, sugar, cinnamon and apple juice in a small saucepan. Cover and cook on low heat 30-45 minutes or until you have reached a desired consistency. Stir occasionally every 15 minutes.
  2. In a medium bowl, mix quinoa, flour, baking powder and salt
  3. In a medium bowl, whisk together egg, egg white, butter, milk and syrup until smooth
  4. Add wet ingredients into dry
  5. Lightly coat a non-stick skillet with cooking spray and bring to medium heat
  6. Drop batter by heaping tablespoonful into skillet
  7. Cook until bubbles appear on top for about 2 minutes
  8. Flip and cook until golden brown for another 2 minutes
  9. Repeat in batches until batter is finished
  10. Serve with apple sauce or fruits and maple syrup
Notes
This recipe yields about 18 2-inch pancakes Quinoa Cake Recipe from http://www.marthastewart.com/329047/quinoa-cakes The apple sauce took the longest to cook - about 40 minutes to reduce


See the difference between cooked and uncooked Quinoa? It fluffs up quite a bit. A little goes a long way. I usually cook one cup of quinoa at a time and it lasts me a few days – depending on what I end up doing with it.


Uncooked & Cooked Quinoa


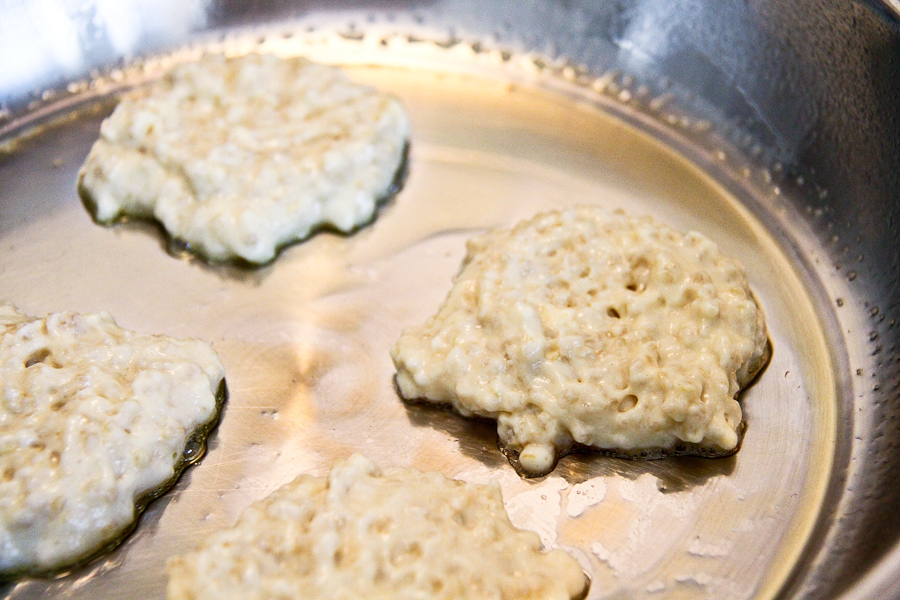
Here’s the batter – ready to be spooned into the skillet. Making them this small meant a few batches, but it was well worth it. I’ll try making them a little bigger next time.


Quinoa Cake Batter


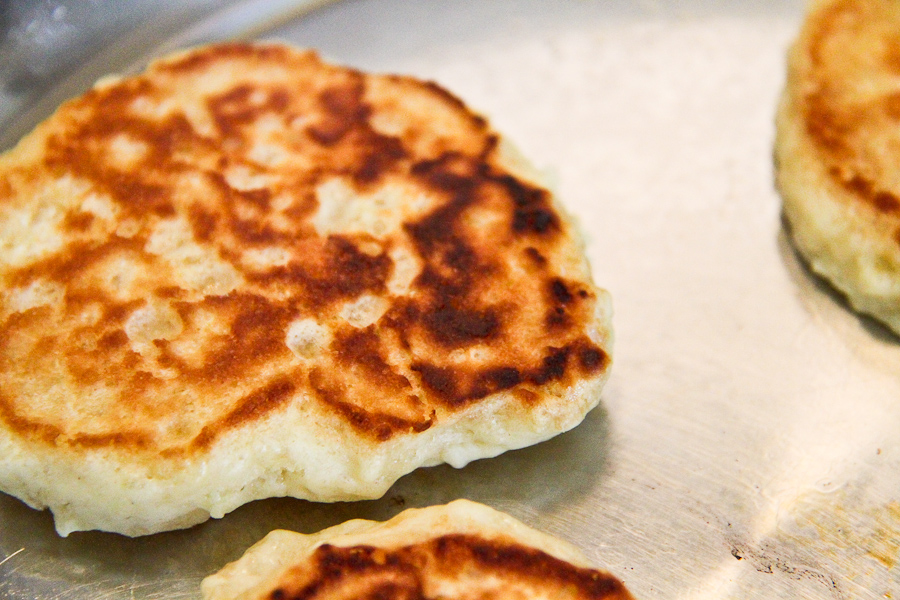
I don’t know about you, but I always mess up the first batch. The second set is usually a lot better. They taste the same, but aren’t as pretty.


Quinoa Cakes in skillet


They are so tiny and cook quickly, so you can’t leave them unattended. The most I could do was stir the apple sauce and then get back to the cakes.


Quinoa Cakes in skillet


Confession: I popped a few of these into my mouth before I added the syrup and apple sauce. Sorry. They smelled really good.


Naked Quinoa Cakes


And then there was a feast.


Quinoa Cakes with Apple Sauce and Maple Syrup


We had leftovers.

Brilliant.

Take good care, friends!

~Lyn


read more

Spicy Thai Tuna & Fennel Salad

Apr 16, 2012 by

I’ve been doing a lot of eating over the past week. I think its time to slow it down and get back into my usual eating habits. I was looking through my recipes and realized that I really don’t post enough salads. That is not to say that I don’t eat salads ~I just haven’t posted. I made a dressing that I adapted from Everyday Food over a year ago. I don’t fancy store bought dressings that much. Generally I have my salad naked – sans dressing. I adore crunchy romaine with garden vegetables. But I also like warm salads that include Quinoa, Zucchini and other root vegetables.

Today’s recipe is a quick and easy, nutritious salad. I usually serve the dressing on the side so that I pour what I desire. For the Tuna, I added only to the plate because it was too spicy for my son so I could not mix it into the main bowl. I find regular tuna to be one of my least favourite things when its plain, so the Spicy Thai version is the one I prefer. It is quite spicy for me, so I don’t eat more than half a can at a time. A little goes a very long way for me. Regular tuna can certainly be substituted and you can use as much as you would like from the can. You can also choose to omit the tuna and serve the salad along with dinner. I am also using Fennel for the first time in a very long time. I forgot how much I liked it. I’m happy I was able to incorporate it in this freestyle salad. I believe the Fennel and Tuna are the unusual suspects and so, I named the salad for them 🙂


Spicy Thai Tuna and Fennel Salad


Spicy Thai Tuna & Fennel Salad
 
Prep time
Total time
 
A quick salad with Spicy Thai Tuna and Fennel
Author:
Recipe type: Salad
Serves: 2
Ingredients
  • Vinaigrette:
  • 2 Tbsp White Wine Vinegar
  • 3 Tsp Honey Mustard Dijon
  • ⅓ Cup Olive Oil
  • Salt & Pepper
  • Salad:
  • 1 Head Romaine Lettuce, chopped and washed
  • 2 Baby Cucumbers, thinly sliced
  • 2 Tomatoes, diced
  • 1 Fennel, thinly sliced
  • 1 85g Can Spicy Thai Tuna (or any tuna you like)
Instructions
  1. Add all the ingredients for the vinaigrette into a jar. Shake and set aside
  2. In a large bowl, add romaine, tomatoes, fennel and cucumbers
  3. Toss to combine
  4. Add tuna and dressing, toss to coat or serve dressing on the side, serve Tuna in individual plates


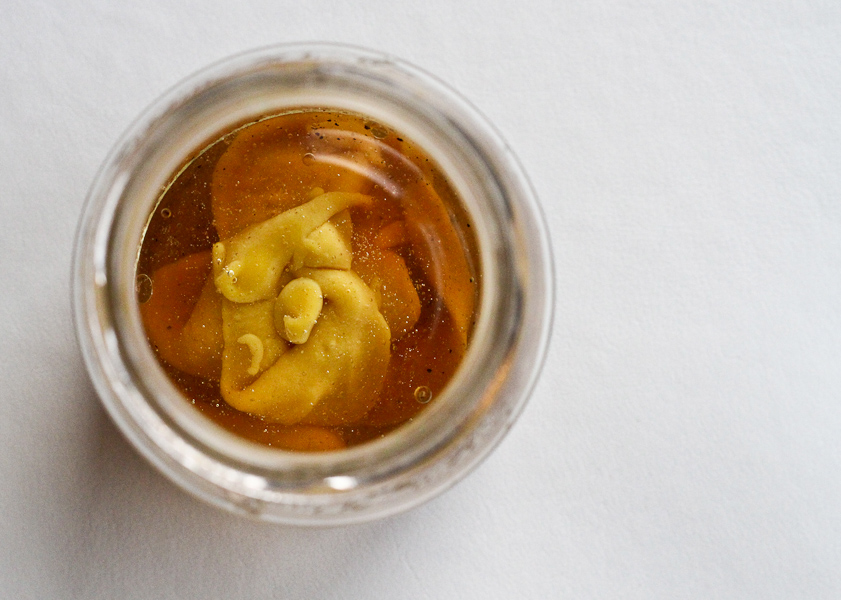
The dressing before I shook it. Not sure why, but it looked like a flower to me. I see beauty in weird places, I guess. OK, don’t stare at it! lol


Salad Dressing


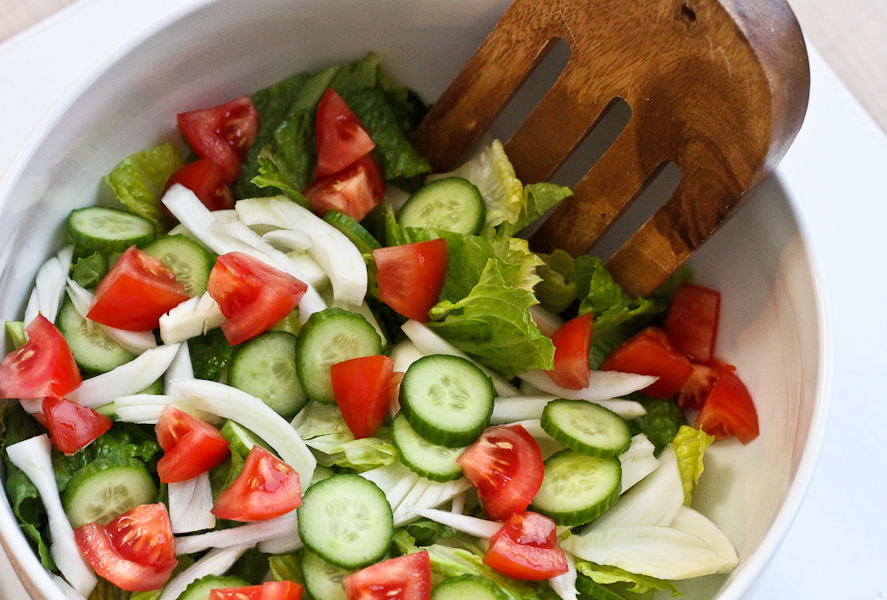
I almost omitted the tuna when I saw how attractive the salad looked. Way to go tomatoes!


Tossed salad!


So here was my turning point. Do I add the Tuna? Or have it on its own, this gorgeous salad.


Fennel, Romaine, Cucumbers & Tomatoes


I added the dressing to the salad, followed by the tuna.


Spicy Thai Tuna and Fennel Salad


I feel much better about all that eating during Easter. Much better.


~Lyn

read more

Related Posts

Share This

Sweet Potato Bun

Apr 15, 2012 by

I had to share this recipe. It tastes too good to keep to myself. I will also say that this is the last bun recipe I will post until next Easter. Seriously.

However, I will not classify this bun as an Easter Bun even though I found it in The Gleaner’s Easter Cookbook 2012 (Page 26). No, not this bun. This bun can be prepared at any time throughout the year. There are many recipes in the cookbook that I will be trying very soon. I have the best Dad. He mailed me the booklet so that I could have a resource for my posts. He knows how much I like to flip though pages. Isn’t he great? I’m sure you guys remember one of my most favourite things is sending and receiving mail. My dad put a really big smile on my face! Thank you Dad!

The first time I made this bun, and it was a hot mess. I’m not a baker so I had no idea what I did wrong. The batter was thin and after baking it for more than the suggested time, it still came out like a pudding. My husband described the texture of the outside of the bun felt like leather. I was so disappointed because the flavour was quite pleasant but the texture was not good at all. This was my very first baking flop. I decided to look through the ingredients again and compare with all the other bun recipes. I realized that there was probably too much liquid and not enough flour. I made some changes to the original recipe and got it right! Success!!! This is the bun that I will be making next year! I only used raisins and there’s no mixed peel to pick out.

The only way I’ll be making this bun again this year, is if someone specifically asks me to make it or places an order ($$).


Sweet Potato Bun


5.0 from 1 reviews
Sweet Potato Bun
 
Prep time
Cook time
Total time
 
A Jamaican style bun, good for any time of the year
Author:
Recipe type: Dessert, Snack
Serves: 8-10
Ingredients
  • 1 Cup Dragon Stout (or any stout available)
  • 1 Cup Brown Sugar
  • 2 Tbsp Molasses
  • 2 Tsp All Spice
  • 2 Tbsp Butter, melted
  • 1 Large Egg
  • 3 Cups All Purpose Flour, Unbleached
  • 2 Tsp Baking Powder
  • 1 Cup Pureed Sweet Potato (I used 2 Sweet Potatoes)
  • 1 Cup Raisins
  • 1 Tbsp Butter
  • 1 Tbsp Honey
  • Parchment paper and cookings spray
Instructions
  1. Pre-heat the oven to 350F
  2. Grease a standard loaf pan using cooking spray. Line with parchment paper then spray again
  3. Peel sweet potatoes then dice into 1 inch cubes
  4. Add to boiling water and cook until soft when pierced with a knife - about 15 minutes or so
  5. Strain to remove excess water
  6. Puree sweet potato chunks in a blender and measure a cup for the batter
  7. Allow to cool
  8. In a saucepan, add stout, sugar, molasses and all spice
  9. Over a low heat, stir just until the sugar has dissolved. Do not bring to a boil
  10. In a small bowl, whisk egg then add it to the stout mixture along with the butter. Whisk to combine
  11. In a medium bowl, add flour and baking powder. Whisk to combine
  12. Gradually add the stout liquid to the flour, mixing well to incorporate
  13. Stir in the sweet potato puree
  14. Fold in the raisins
  15. Pour into prepared loaf pan
  16. Bake for 45 minutes or until a knife inserted comes out clean
  17. In a small ramekin, combine butter and honey. Brush over the bun when cooled.
  18. Slice and serve with cheese and/or butter
Notes
This recipe is adapted from "Sweet Potato Easter Bun" from the Gleaner's Easter Cookbook 2012, Page 26 http://go-jamaica.com/easter2012/cookbook/index.php


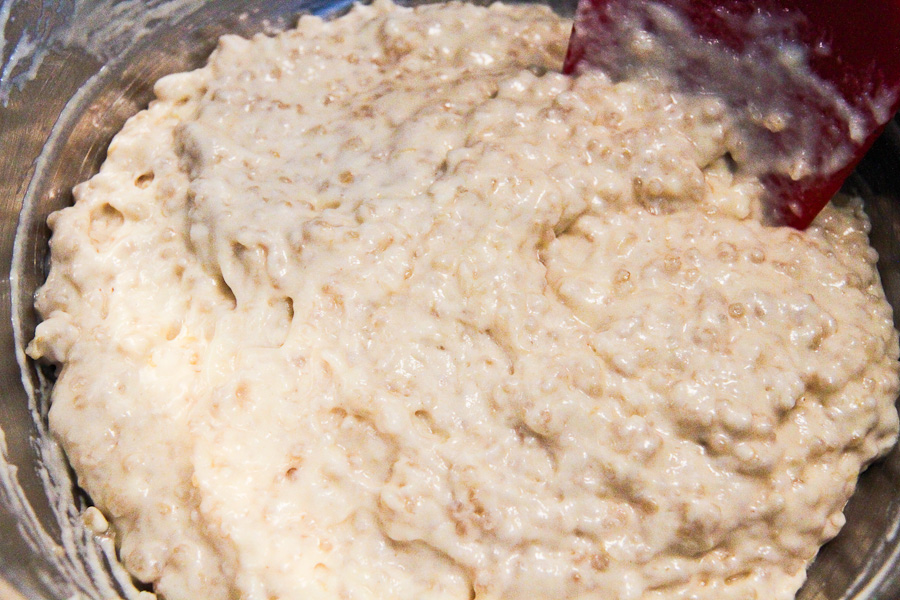
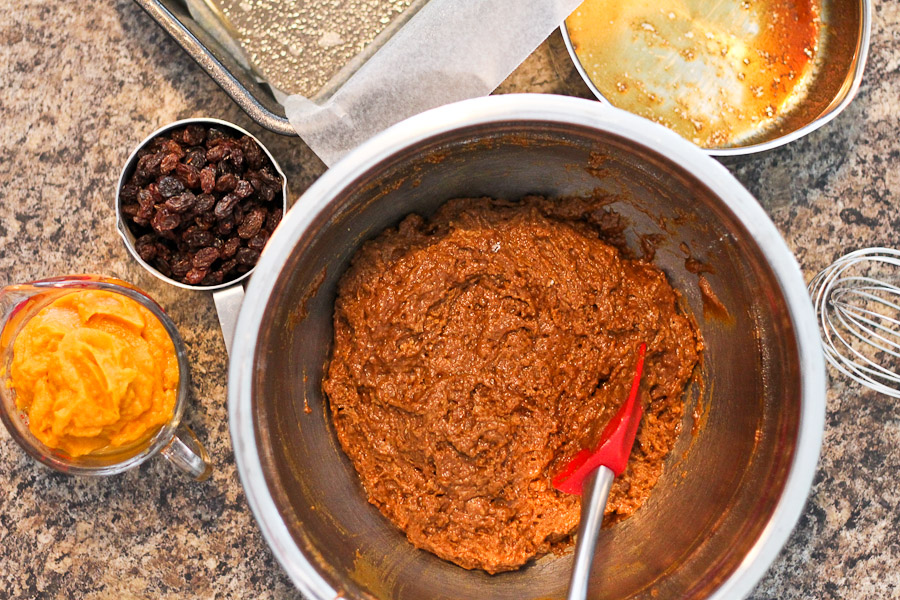
I was watching the consistency so closely the second time around.


Stout Batter


I like the contrast in colours here.


Add the sweet potato puree


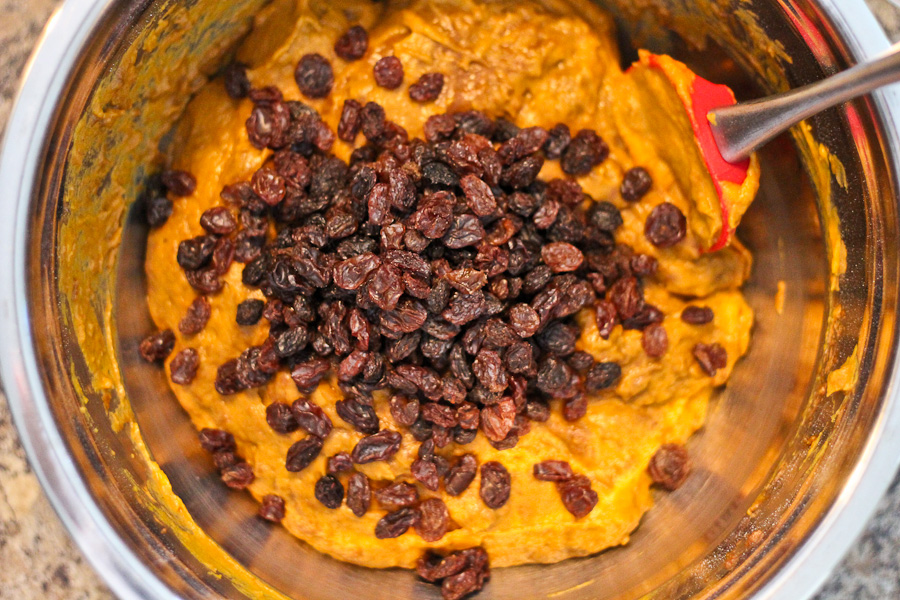
In go the raisins. The batter at this point is fairly firm and has a thick consistency. Exactly what I want.


Raisins added to batter


Ready for the oven!


Sweet Potato Bun Batter


Fresh out  the oven, looking good, smelling great and not feeling like leather on the outside 🙂


Sweet Potato Bun out the oven


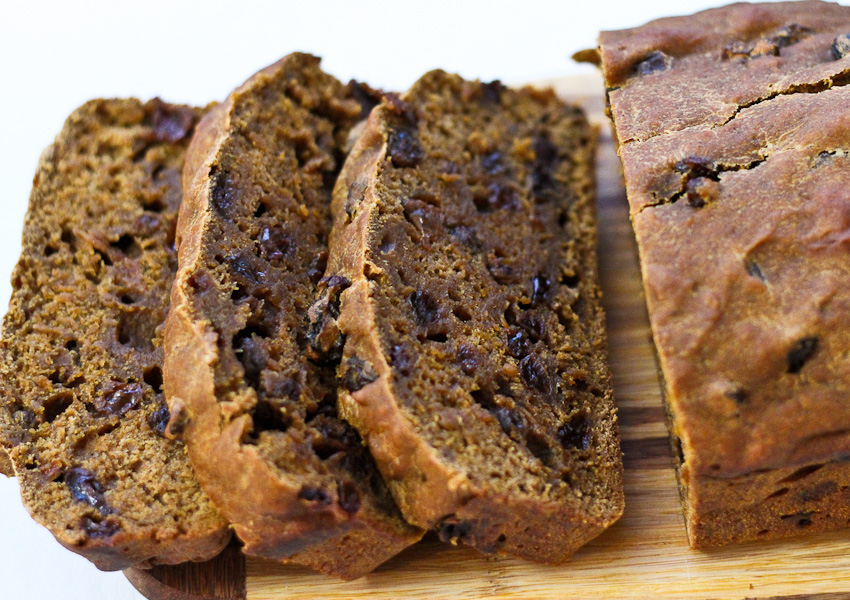
Checking for the consistency – looks perfect. And then I realized I had cut my bun before I glazed it.  So anxious!


Sweet Potato Bun, Sliced


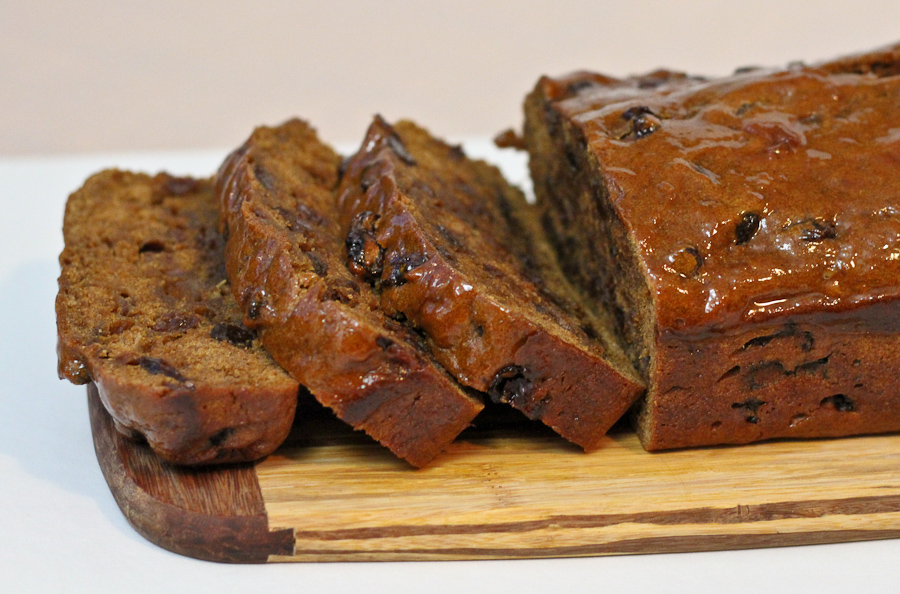
Now this is more like it!


Sweet Potato Bun, glazed, sliced


This bun was so nice, I had to double up on the cheese. It was moist and dense, as it should be. I think that’s totally acceptable since I’m not having this bun again until next year.


Sweet Potato Bun with Tastee Cheese


I feel great about this bun. Have you had any baking triumphs? I’d love to hear about it.

Have a wonderful Sunday and an awesome week!

~Lyn


Related Posts Plugin for WordPress, Blogger... read more
Post Popularity Graphing by Knowledge Ring