Ackee & Saltfish

Apr 10, 2012 by

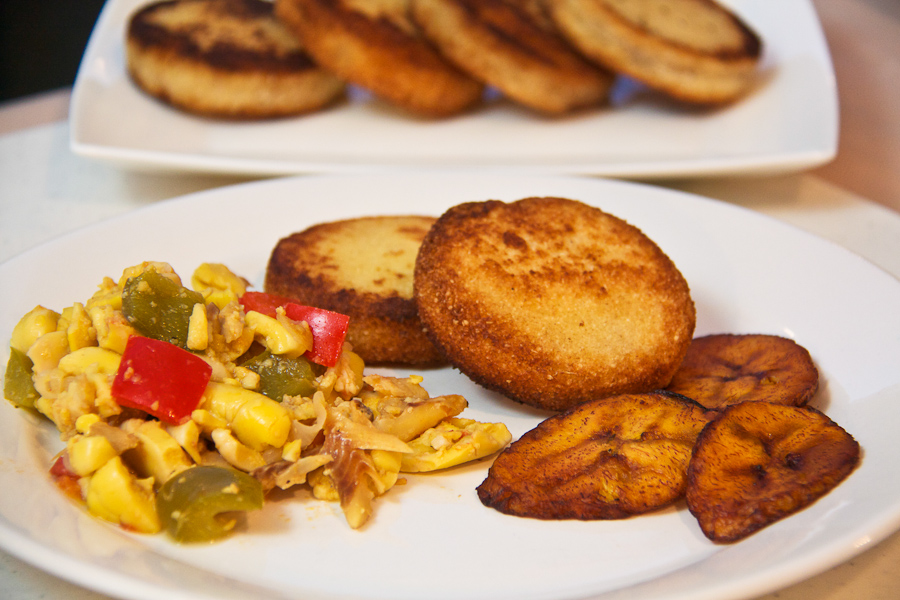
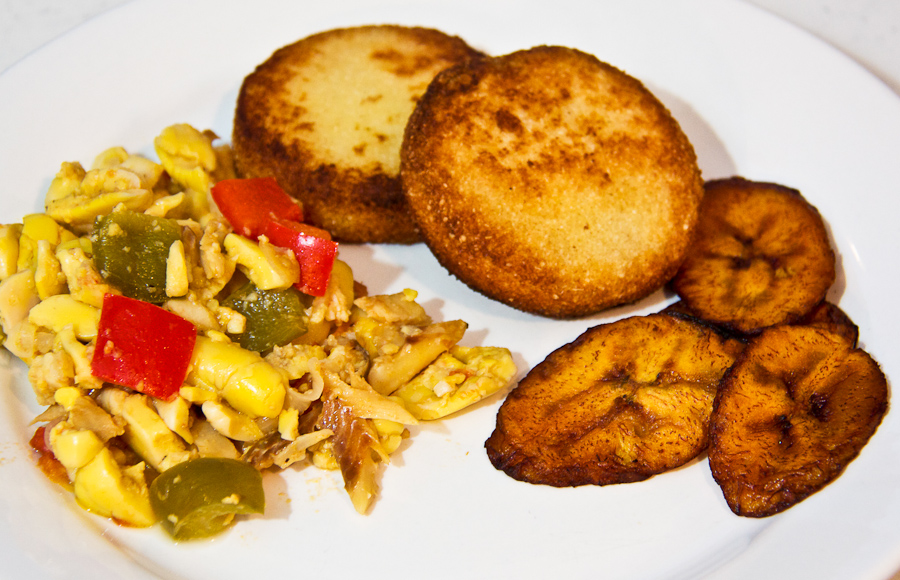
Ackee, oh Ackee. Ackee is Jamaica’s national fruit. Ackee paired with Saltfish (Salted Codfish) is Jamaica’s National Dish. This is a dish that is near and dear to my heart, as my Mother always prepared it for my family on the weekend. She makes it so very well. I remember having to “flake” the saltfish (not often, a few times perhaps) to remove the bones and to reduce them into smaller pieces the night before for easy preparation in the morning. I hated having to pick out the bones, but boy did I enjoy eating it! I was in the mood for traditional Jamaican fare so I gathered my ingredients to make Ackee and Saltfish served with fried Bammy and fried Plantains.


Ackee and Saltfish with Bammy and Plantain


5.0 from 3 reviews
Ackee & Saltfish
 
Prep time
Cook time
Total time
 
Jamaica's National Dish, Suitable for Breakfast, Lunch or Dinner. It can be served with Fried Dumplings, Boiled Dumplings, Fried Bammy, Boiled Banana, Fried Plantains, Boiled Yam, Roast Yam or White Rice
Author:
Recipe type: Breakfast, Lunch, Dinner
Serves: 6
Ingredients
  • 2 Dozen Ackees (or 2 Tins of Ackee)
  • ½lb Salted Codfish
  • ¼ Cup Coconut Oil (or vegetable oil)
  • 1 Medium Tomato, chopped
  • 1 Red Sweet Pepper, chopped
  • 1 Green Sweet Pepper, chopped
  • 1 Onion chopped, or thinly sliced
  • Salt and Pepper
  • A few Pimento seeds (optional)
  • 1 Tsp All Purpose Seasoning (optional)
  • A pack of Bammy (8 small round Bammies)
  • 1 Ripe Plantain
  • 1 Cup Milk
  • 1 Tbsp Sugar
  • 2 Tbsp vegetable Oil
  • 1 Tbsp Butter
  • Oil for frying the plantain
Instructions
  1. Soak the saltfish overnight in a covered pot. In the morning, pour off the water. Add fresh water and bring to a boil. Taste the fish to ensure that most of the salt has been boiled off. If it is very salty, pour off the water, add fresh water and boil again. This should be enough. The saltfish should not be bland. Pour off water and allow to cool. Using your fingers, break the fish into small pieces while removing any present bones. Be careful, the bones can be very small. You should end up with a heaping cup full of flaked saltfish.
  2. If using canned ackees, drain liquid from the ackees and add to a pot of boiling water for about 2-3 minutes. Drain and set aside.
  3. If using fresh ackees, boil in salted water for about 15 minutes, or until ackees can be pierced with no resistance with a fork. Do not overcook. Drain and set aside
  4. In a large skillet or dutch oven, warm the oil over medium heat
  5. Add onion, tomatoes and sweet peppers. Sauté until softened about 5 minutes
  6. Add saltfish and stir to combine
  7. Add ackee to the pot
  8. Add salt and pepper
  9. Give a gentle stir so that you don't break up the ackee
  10. Cover and allow to simmer for about 15 minutes
  11. Gently stir to fully combine. Season with salt and pepper to taste
  12. For the bammies:Dissolve sugar in a cup of milk. Pour into a shallow dish. Place bammies into the milk and leave for about 5 minutes. Flip onto the other side. The bammy will absorb the milk.
  13. In a medium-hot skillet with oil, fry the soaked bammy in oil and butter until golden brown, about 8 minutes on each side
  14. Place on a paper towel to soak up oil from the bammy. Set aside
  15. Thinly slice the plantain on the diagonal. Fry each piece in hot oil until brown on both sides. Place on paper towel to absorb oil
  16. Serve and enjoy
Notes
Be careful not to overcook the ackee as it will get extremely soft and turn into mush If you do not have saltfish available, crispy bacon is a great substitute. Just fry and break into bits. A whole Scotch Bonnet pepper is an optional ingredient and would be added along with the ackee and allowed to simmer. Remove before serving, taking care not to pierce the pepper


Charlene, a friend and a Jamaican photographer, has allowed me to use her photograph of Ackee in the pods so I can share with you all. This is not something that you can see in North America. I grew up with an Ackee tree on my family property so I saw this often. Here in Canada (and in the United States), you buy Ackee from the tin. I’ve had it an it is not at all bad. It’s a great way to still have Ackee.

To see more of Charlene’s beautiful photography, please click on the photograph.
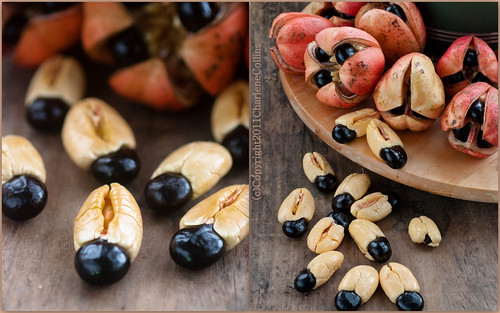
Fresh - Ackee


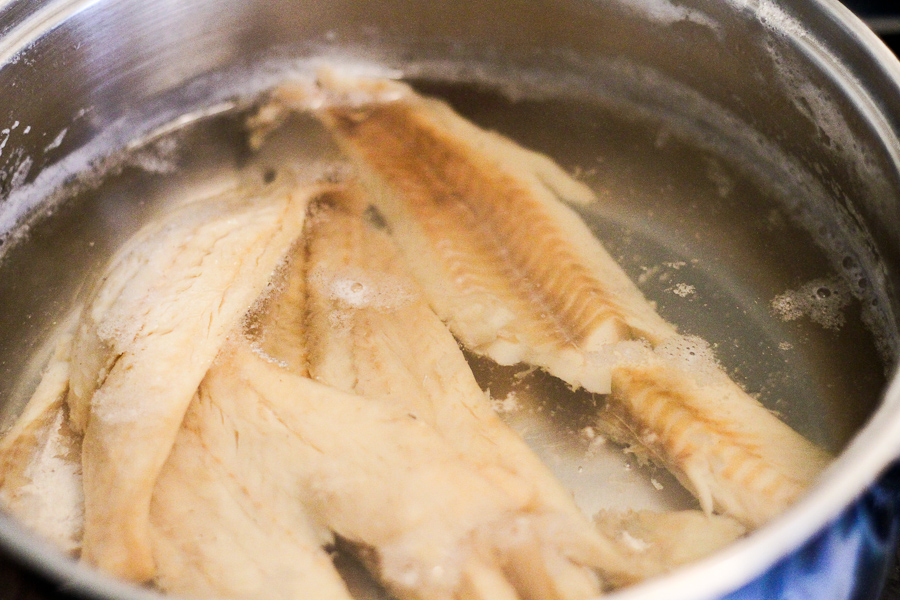
Soak the saltfish overnight, or at least for a few hours. I soaked mine overnight then started the boiling process in the morning to reduce the salt. The fish should still have a certain amount of salty taste to it, otherwise it won’t taste great and then you’ll have to add salt back to the dish. In this photograph, I have about a pound of saltfish but I only used half. I reserved the other half for another special recipe.


Boiled Saltfish (Salt Cod)


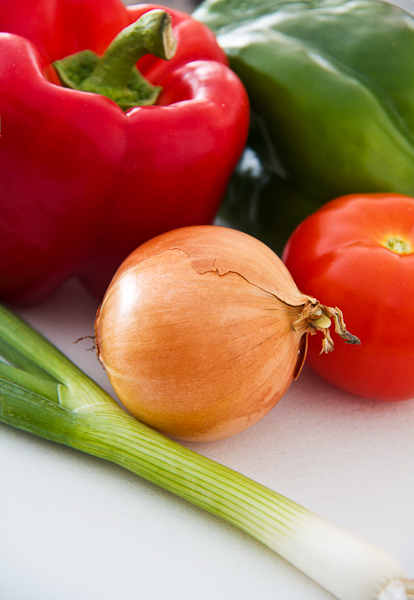
Lovely fresh ingredients (I didn’t end up using the scallion)


Sweet Peppers, Onion, Tomato, Scallion


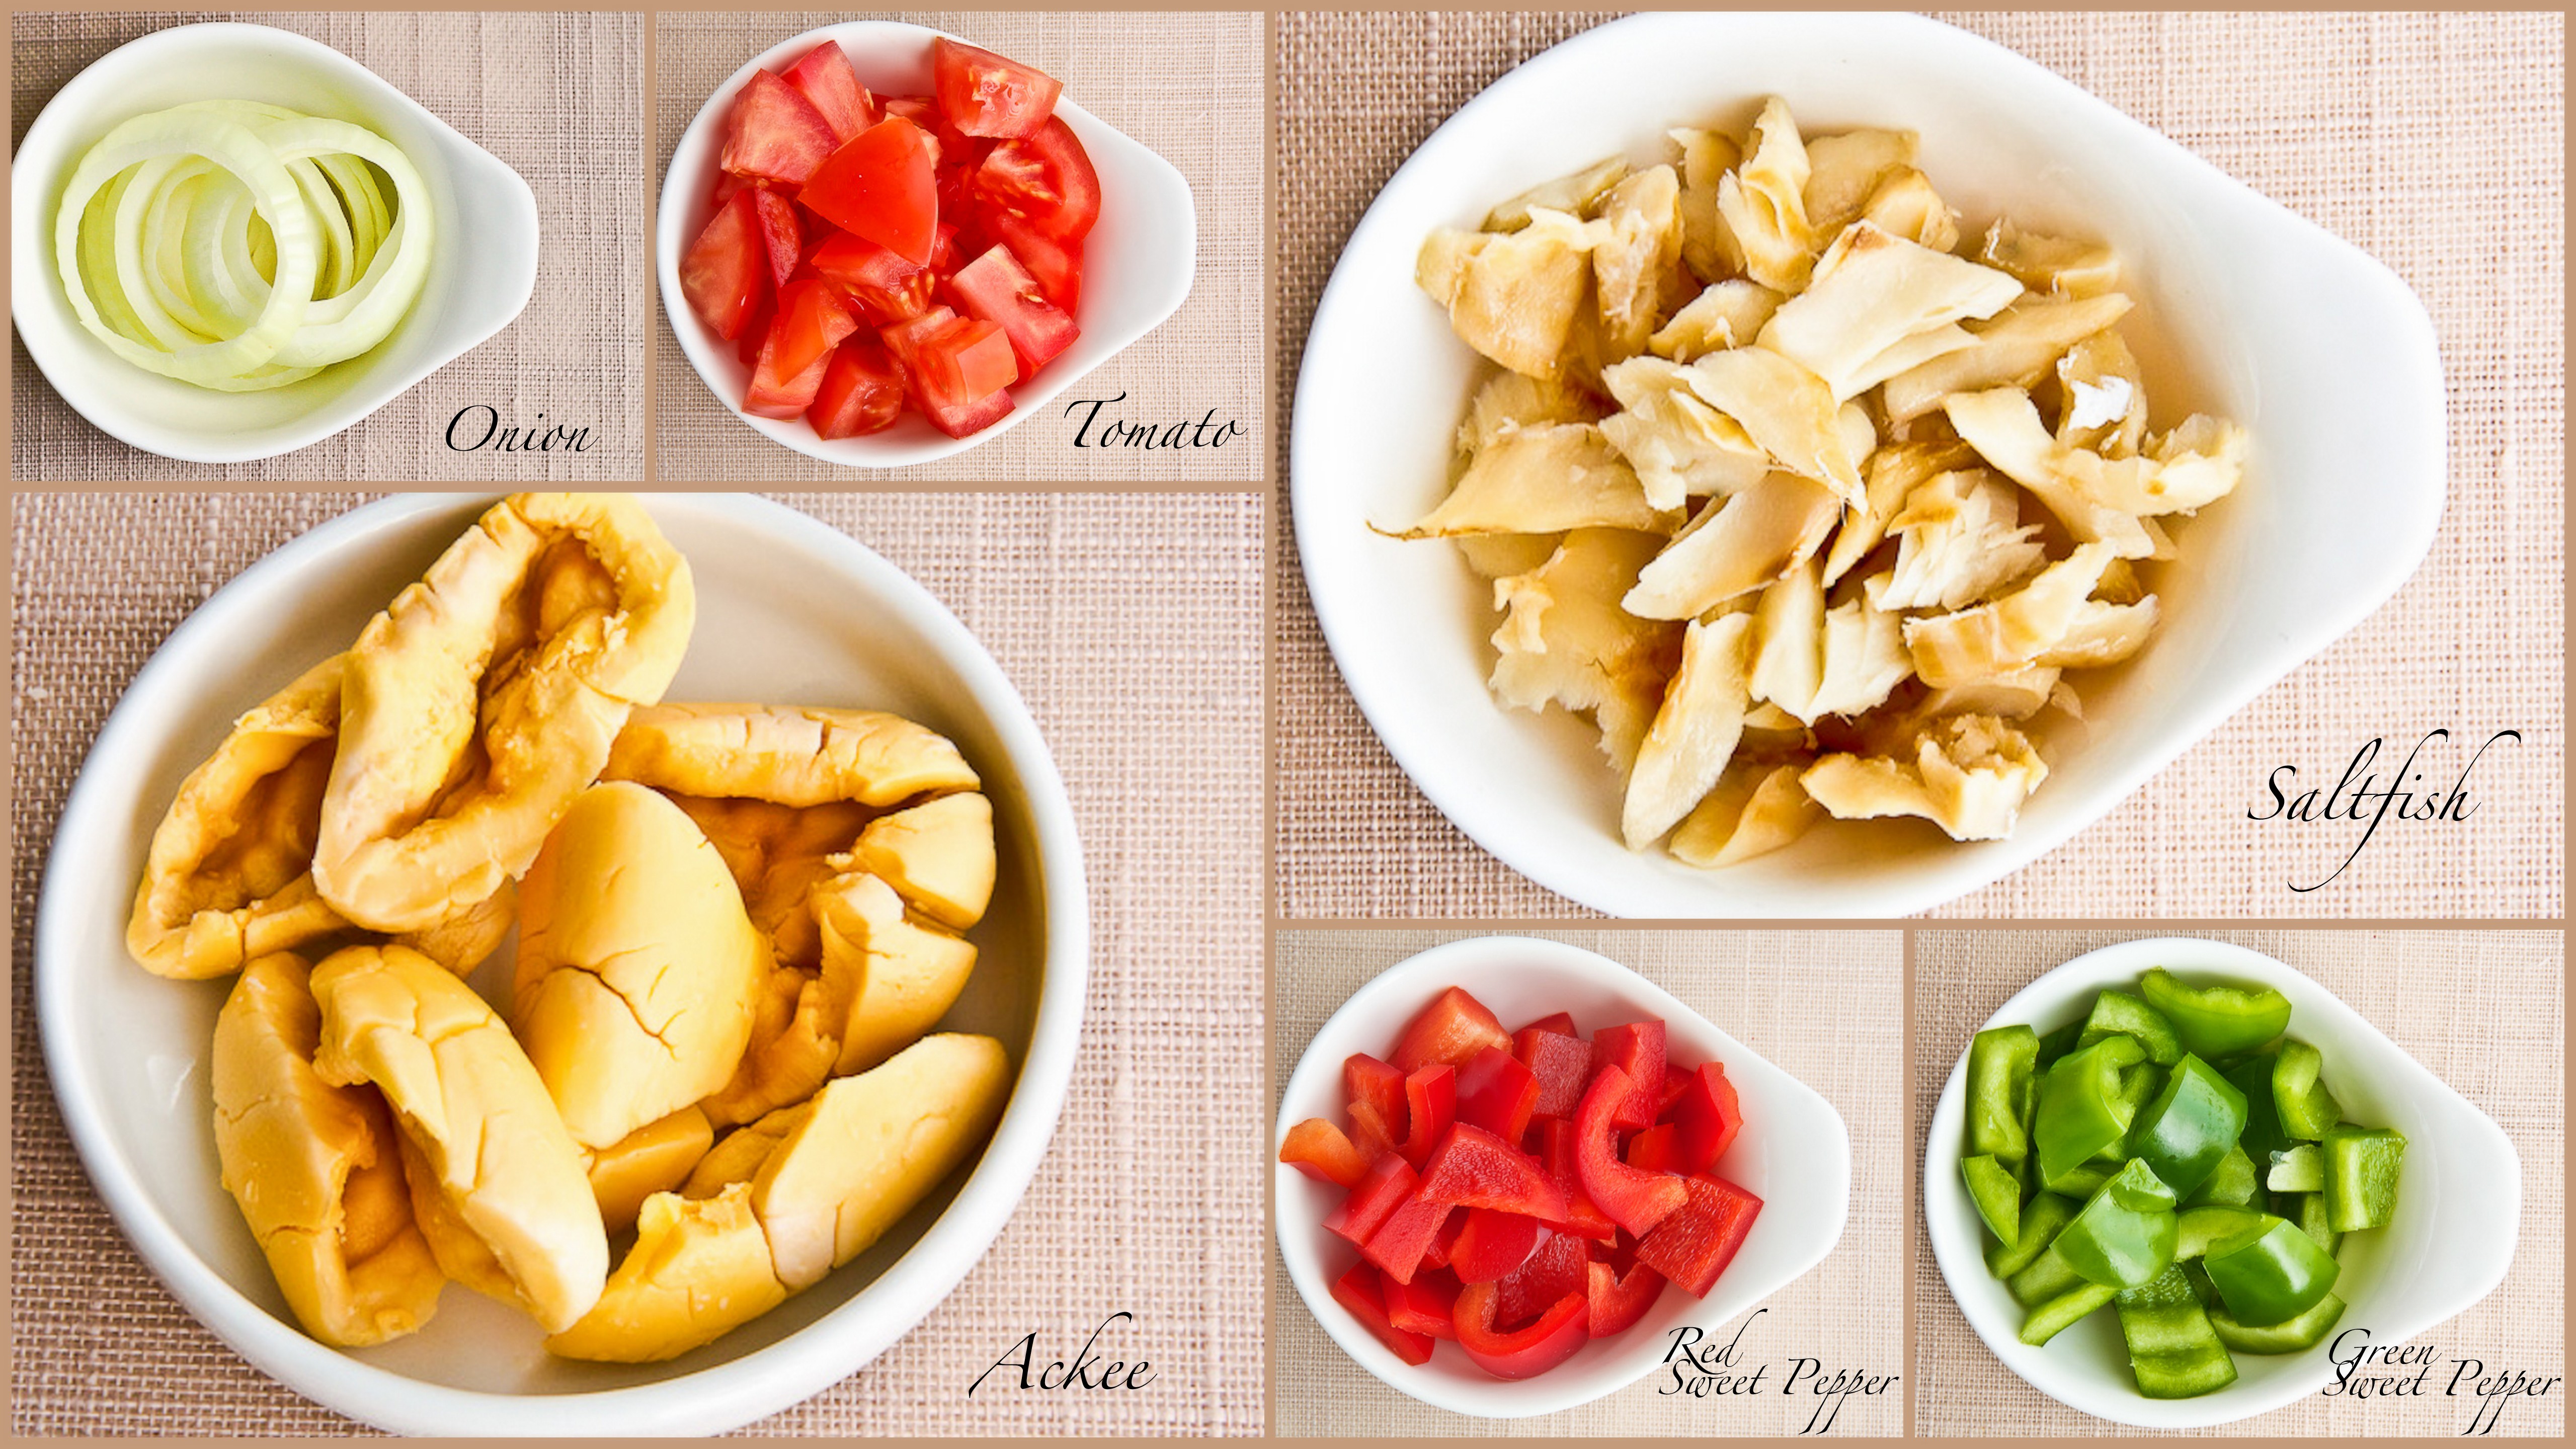
The main ingredients:


Bammy is a thick version of a flatbread made from cassava. Bammies can be soaked in either milk or coconut milk. Then it can be baked or fried until browned and cooked through. It has a very light and delicate taste and can be enjoyed with a variety of meals. It’s great for soaking up gravy!


Bammies soaked in milk


Such an amazing aroma.


Vegetables in the pot


Ackee and Saltfish are cooked though, and ready to be served


Ackee and Saltfish


Ackee and Saltfish is likely to be served with fried dumplings. My Mom is an expert at making fried dumplings. I have yet to try my hand at that so Bammies are where it’s at until I  try the dumplings. This is generally a breakfast dish, but I have had it for dinner too, as I did here.


Ackee, Saltfish, Bammy, Plantains


I hope you enjoyed today’s post. I really like making traditional Jamaican dishes and sharing with everyone. I don’t generally prepare traditional meals but I’m willing to try every now and again.

Have a super week!

~Lyn


read more

Polenta with Parmesan and Parsley, Mozzarella and Tomato

Mar 19, 2012 by

I  haven’t made polenta in some time now. A friend of mine recently asked me if I had a recipe – which I did. But because this friend is super special to me and one of my BIGGEST supporters, not only of The Lovely Pantry, but of me as a person… I wanted to do something nice and a little different. A delicate dish that was smooth, flavourful and good for the body. I think I’ve accomplished that with this recipe and presentation.

In Jamaica, the term “Polenta” is rarely used however, I believe Jamaicans are becoming more aware of the term. Polenta is quite like a dish we call Turn Cornmeal or “Tun Cornmeal” – which is a dish of a similar consistency but includes ingredients such as coconut milk, escallion, garlic, thyme and of course, scotch bonnet pepper. Just like Polenta, Turn cornmeal can be served in a variety of ways and with different meats or sauces. Personally, I don’t like my Polenta mushy. I prefer it crispy on the outside and soft but firm on the inside.

Todays dish is meat free and fabulous. I hope to make more dishes like this. I believe this could be a snack, a breakfast or an appetizer. What do you think?


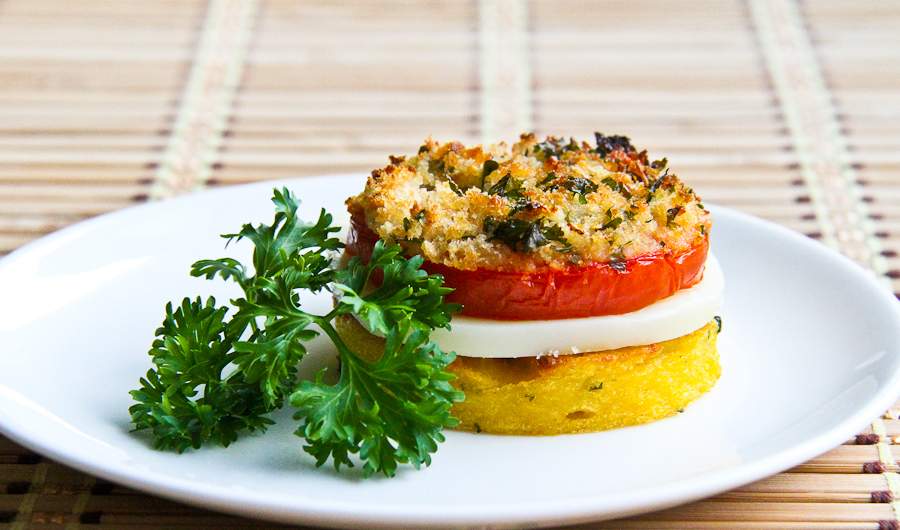
Parsley Polenta with Mozzarella & Tomato


This is basically how I make my polenta but you can certainly make variations. If you don’t have parsley, chop some spinach or kale. Add some sweet corn. Get creative! I have made polenta using water and I’ll never do that again – too bland. I will always add a broth because I find it to be more flavourful that way. I decided to dress up my polenta with mozzarella (more cheese, I know!!) and broiled tomato slices topped with a seasoned breadcrumb mixture.


Polenta with Parmesan and Parsley, Mozzarella and Tomato

Prep Time: 15 minutes

Cook Time: 40 minutes

Total Time: 53 minutes

Polenta, a dish so versatile it can be had in so many ways. Made with yellow cornmeal, chicken broth, parmesan cheese and parsley

Ingredients

  • 6 Cups Low Sodium Chicken Broth (or Vegetable Broth)
  • 1 3/4 Cup Yellow Cornmeal
  • 3 Tbsp Butter
  • 4 Slices Mozzarella Cheese
  • 1/2 Cup Grated Parmesan Cheese + 1 Tbsp
  • 1/2 Cup Parsley, finely chopped + 1 Tbsp
  • 1 Tomato, firm
  • 1/4 Cup Breadcrumbs
  • Salt and Pepper
  • Cooking spray
  • Olive Oil

Instructions

  1. In a large saucepan, bring chicken broth to a boil
  2. Gradually whisk in the cornmeal, removing any lumps that may form
  3. Reduce heat and cook until the mixture thickens, stirring often for about 15 minutes
  4. Add parmesan, stir to combine
  5. Add butter, stir to combine
  6. Finally, add parsley and stir to combine
  7. Pour into a shallow dish about an inch deep. Use a spatula to spread into the corners. Allow to rest and firm up
  8. In a small bowl, combine breadcrumbs, 1 Tbsp parsley, 1 Tbsp parmesan. Mix to combine.
  9. Remove the top and bottom from the tomato and cut into 4 slices
  10. Line a baking tray with parchment paper. Lightly grease with cooking spray
  11. Place tomatoes on the tray and sprinkle each slice with a pinch of salt and pepper and then the breadcrumb mixture
  12. Drizzle olive oil over the breadcrumbs on each tomato slice
  13. Place in broiler for about 5-8 minutes or until the breadcrumbs are golden brown. Set aside when done
  14. Using cookie cutters, cut out 4 circles about 2-3 inches in diameter from the cooled polenta
  15. In a hot skillet, spray with cooking spray, brown polenta about 3-4 minutes on each side, until crispy and golden brown. Set aside.
  16. When the polenta and tomato are cool to the touch, place a slice of mozzarella on each polenta disc then top with a slice of tomato
https://lovelypantry.com/2012/03/polenta-with-parmesan-and-parsley-mozzarella-and-tomato/

4.5 from 4 reviews
 

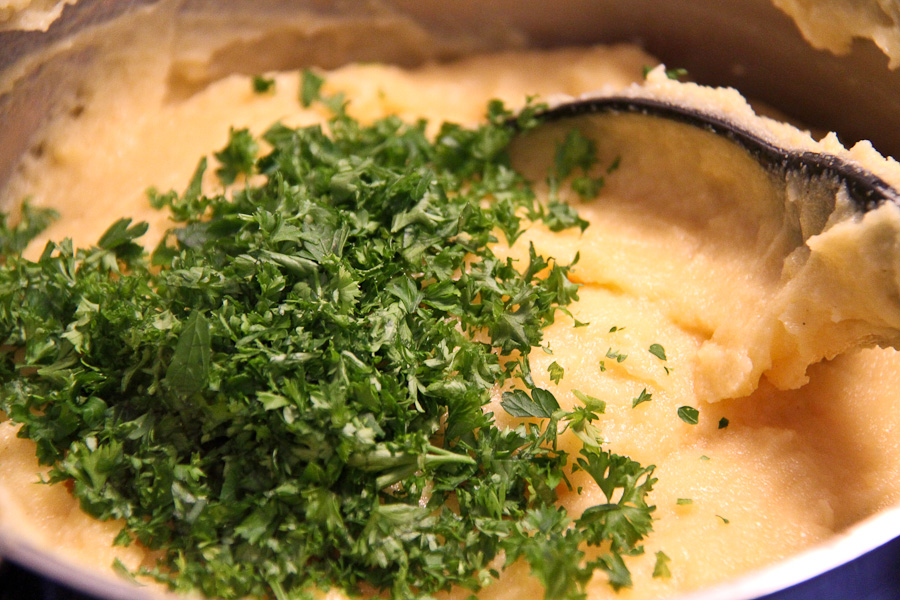
Looks a lot like cornmeal porridge here!


Yellow Cornmeal being cooked


I love the splash colour that parsley adds.


Add the parsley to the cornmeal


Spread the polenta evenly into the baking tray as best you can. It is quite thick at this point and needs “encouragement” to get into the corners.


Spread the polenta in a rimmed baking tray


I used a cookie cutter only because I wanted to stack with other ingredients that were round. Otherwise I would have just used a sharp knife and cut square pieces.


Cookie Cutter


So here’s the thing. I don’t love tomatoes. But I’ll eat them like how I’ve prepared them here – with breadcrumbs. I know, I know. Weird. I’m trying to eat more though. So good for you.


Tomato Slices


I loved the smooth and creamy texture that the mozzarella added to this combination. You don’t need too much, since the flavour is very mild.


Parmesan Polenta, Mozzarella, Tomato with breadcrumbs


Picture perfect Polenta!


Polenta, Mozzarella, Tomato


And there you have it! A tasty way to make polenta.  Left over polenta is awesome pan-fried for breakfast with some maple syrup. Its like the breakfast of champions!

To my friend, Nicky – Thank you!


Happy Monday to you all!


read more

Related Posts

Tags

Share This

Seared Scallops with White Kidney Beans & Spinach

Nov 30, 2011 by

Seared Scallops with White Kidney Beans & Spinach


Cooking brings me such joy and calm. Looking at beautiful photographs of food, and envisioning how I’ll prepare it inspires me to make what I see or to do something similar. I like to use ingredients that are available to me in the moment. For this recipe, adapted from Cooking Light’s Mix & Match Low Calorie Cookbook,  I pretty much had everything available. Except the Scallops! They look tasty and I’ve read that they have a really mild flavour. So off I went to get these scallop things from the supermarket. Scallops are generally available year round – fresh or frozen.

Scallops are a great source of : Protein, Omega-3 Fatty Acids, Vitamin B12, Magnesium and Potassium. It’s good to know how what you eat benefits your body, don’t you agree?


Ingredients:

2 Tbsp Olive Oil, divided

1 LB Sea Scallops

1 Onion, finely chopped

2 Cloves Garlic, finely chopped

1/4 Cup Dry White Wine

1/2 Cup Low Sodium Chicken Broth

1 Can White Kidney Beans, rinsed and drained

2 Cups Baby Spinach

Salt & Pepper for seasoning


Preparation:

Rinse scallops well and pat dry. In a medium-sized skillet, heat olive oil over medium heat. Season with salt and pepper on both sides. Cook on both sides  for about 2 minutes or until a nice golden colour is achieved. Set aside and keep warm. You may have to do this in batches so that you don’t have too many scallops in your skillet at one time.

Using the same skillet, add the remaining oil and saute the onions for about 2 minutes. Add the garlic and combine. Add wine and cook until most of the liquid has been reduced, about 2 minutes. Add broth and beans, allow to cook for 2 minutes. Add spinach and cook for about a minute or until it wilts nicely.

Remove from heat. Add additional salt and pepper, if needed.

I can’t believe how velvety these scallops were. Very mild and almost sweet! I enjoyed this meal and I bet you will too.


Lyn

read more

Banana Nutmeg Smoothie

Oct 17, 2011 by

After chit-chatting with my friends on Facebook, I realized that Smoothies are quite popular with healthy-minded individuals! I guess I’m a bit late on the smoothie band wagon, but I’m slowly getting into it. I mean, who can resist a fruity drink that’s natural and GREAT for you? It’s always a bonus when the kids LOVE it too. I’m down for Smoothies! Are you?

  • What are your best smoothies?
  • How often do you have them?
  • What do you use to make them? (Blender, Immersion blender, Single Serving Blender etc)


Smoothies are so versatile. Its a meal on the go, or a quick nutritious snack. When it comes to ingredients, my Facebook friends have listed both fruits and veggies. Bananas seem to be the must have ingredient, followed by mango and pineapple. Peanut Butter adds a smooth shot of protein and frozen spinach adds some extra goodness to the mix. I look forward to experimenting more with Smoothies.


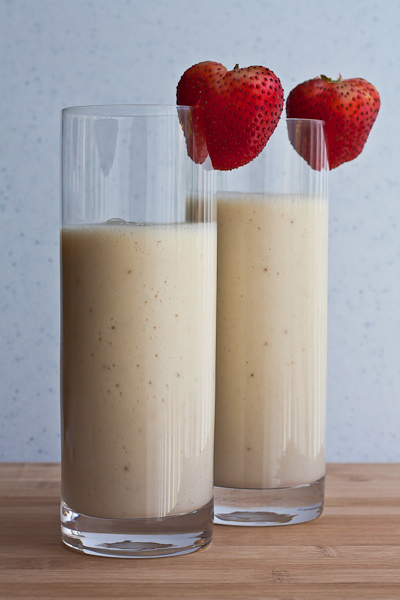
Here’s a recipe for a smoothie that my children and I enjoyed ~ Banana Nutmeg Smoothie


Ingredients:

2 Bananas (If you use frozen Bananas, you don’t need ice)

1/2 Cup Milk (Substitute with Soy or Almond if desired)

1 Cup Low Fat Vanilla Yogurt

1/4 Tsp Nutmeg

1 Cup Ice


Directions:

Add ingredients to a blender and mix until the ice is crushed and the liquid becomes frothy. Pour into individual glasses (or cups for the little ones).


If using as an adult meal replacement, adding a flavoured protein powder is great too.

Happy blending!


Lyn

read more

Related Posts

Share This

Chicken Parmigiana

Sep 12, 2011 by

I love to make dishes that are tasty and family friendly. They can be as simple or as fussy as I want them to be, since in the end, my efforts will be worth it. I am steadily appreciating the flavour of tomatoes (that’s right, I don’t like them so much) and I’m slowly incorporating them into meals a few times per week. Chicken Parmigiana was something that always looked great but I remember when I tried it some time ago, there was just too much tomato sauce. I decided to try it my way.

I went looking for a sauce that I was comfortable with. I found a Pasta Sauce by a brand called Healthy Choice. There was a limited variety from their line but I went with the Garlic and Fine Herb. It’s the only one that I use now. I’m very happy with it.


Ingredients:

1/4 Cup Breadcrumbs

1 Egg

6 Chicken breast cutlets, seasoned with salt and pepper {If you use whole breasts, you’ll have to thinly slice it length-wise in half to get a nice cutlet.}

1/4 Cup Gratered Parmesan Cheese

1 Cup Tomato Sauce

1/2 Cup Shredded Mozzarella Cheese (or if you’re using sliced Mozzarella cheese, 1 slice per piece of chicken)

Olive Oil for browning chicken


Directions:

Turn on your broiler to  high.

In a large non-stick skillet, heat a few tablespoons of Olive Oil.

In a shallow dish, add bread crumbs and parmesan cheese.

Lightly beat the egg and pour into another shallow dish.

Dip each chicken breast into the egg to coat, then dip into the breadcrumb/cheese mixture. Shake off any excess. Brown each piece of chicken and be sure to do it in batches.

In an oven proof casserole dish, pour in tomato sauce to coat the bottom evenly. Place each piece of cooked chicken into the dish, slightly overlapping.

Sprinkle mozzarella over the chicken (or layer slices across the top of the chicken).

Place in your oven broiler at about 4 inches from the heat source for about 5-8 minutes. Allow the cheese to brown nicely. Serve with Pasta and Salad.

I enjoy this every time I cook it. Hopefully you will too!


Recipe adapted from Everyday Food.


read more

Sacchettini & Spinach

Aug 1, 2011 by

Chicken and Bacon Sacchettini with Spinach

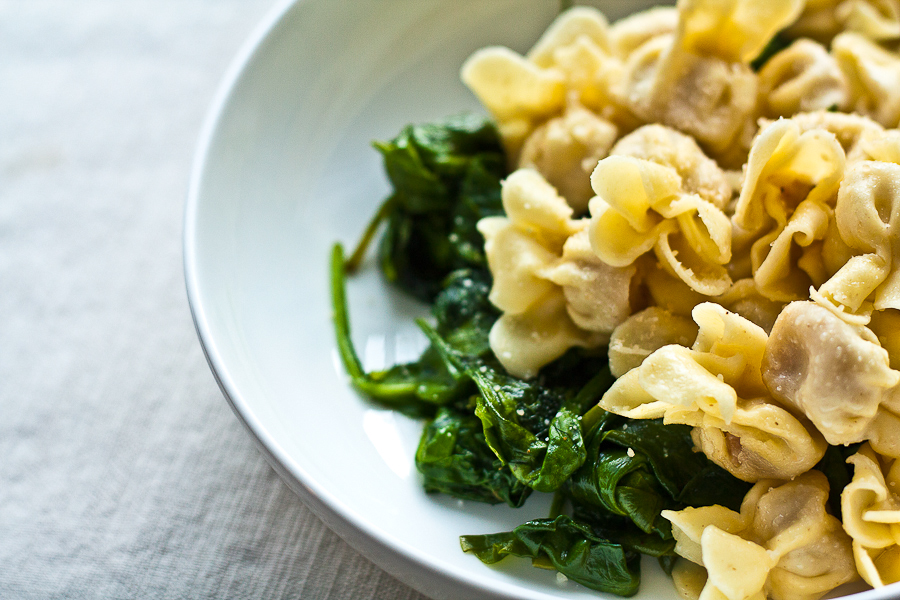
Oh how I wish I could say that I made this from scratch. However, I`m prone to pick up frozen pasta occasionally. There are so many to choose from and the varieties are so visually appealing. On a recent trip to the supermarket, I picked up a packet of Chicken and Bacon Sacchettini. These little pasta are beautiful and they taste great too. I simply followed the cooking instructions on the packet and served it over a bed of steamed spinach. The final touch was just a sprinkle of parmesan cheese. Now that`s what I call an easy mid-week meal! Sensible portions with well planned sides, wont break the scale.

Related Posts Plugin for WordPress, Blogger... read more
Post Popularity Graphing by Knowledge Ring