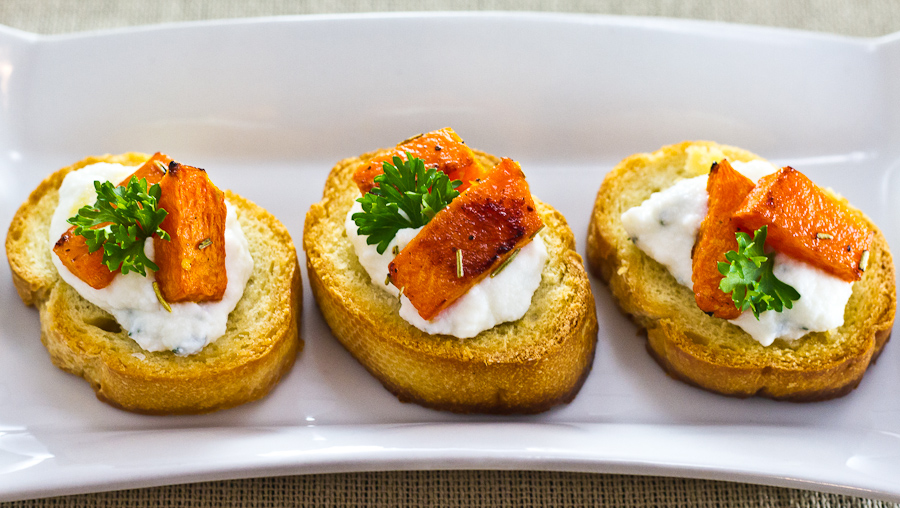
Roast Pumpkin and Ricotta Crostini

Dec 19, 2012 by

I’ve been fluttering in my cookbooks again. It’s a wonderful way to spend a few borrowed minutes, just to browse and find your next victory. The problem is, there are so many recipes I want to try, and very little time to try them all. I will continue to compete with my family’s schedule and create wonderfully tasting food – even if it’s just for me 🙂 Today, that’s not the case. This dish is great for a light snack  or even as an appetizer. You decide! It’s always a good idea to serve vegetables in a nice way, especially during the holiday season.

I love bread. Usually most breads will appeal to me if its crusty on the outside, light and fluffy on the inside. Toasted with butter and some other condiment will also do the trick. I have fond memories of having French Bread as a child growing up in England. It was something that we enjoyed served with a soup or just whenever we felt like having it.

This recipe was adapted from “Cooking Season by Season” – I basically cut the recipe in half to suit my household.


Roasted Pumpkin & Ricotta Crostini


Prep time
Cook time
Total time
 
Ingredients
  • 8 oz Pumpkin, peeled seeded and cut into chunks
  • 1 Tbsp Olive Oil
  • 1 Clove Garlic, minced
  • 2 Tbsp freshly squeezed lemon juice + the zest of ½ a lemon
  • 7 Tbsp Light Ricotta Cheese
  • 1 Tsp Dried Rosemary
  • 1 Tsp Fresh Thyme Leaves
  • Crostini:
  • 8 Slices Crusty Baguette
  • 1 Tbsp Olive Oil
  • Salt + Pepper
Instructions
  1. Preheat oven to 400F
  2. Brush a foil lined baking sheet with olive oil.
  3. Lay baguette slices on the foil and then brush the top with olive oil
  4. lightly sprinkle with salt and pepper
  5. Bake for 10 minutes until golden brown
  6. Remove from oven and allow to cool on a wire rack
  7. In a bowl, toss the pumpkin chunks with oil, garlic, lemon zest and rosemary
  8. Season with salt and pepper then roast for 35 minutes until tender and golden
  9. Remove from oven and allow to cool
  10. In a small bowl, combine ricotta, thyme and lemon juice
  11. Add about a tablespoonful of ricotta on each crostini and top with a few chunks of roasted pumpkin, pressing down a little into the ricotta
  12. Serve and enjoy


How do you dress up your fall/winter vegetables? I love roasting root veggies. It keeps it simple and tasty.


Roasted Pumpkin & Ricotta Crostini-2

Roasted Pumpkin & Ricotta Crostini


Enjoy!

~Lyn


read more

Related Posts

Share This

Risotto Pie

Nov 30, 2012 by

Today I’m sharing a recipe I tried out of curiosity. I love trying new recipes, and after looking through the ingredients, I knew I couldn’t go wrong. I did however add a few items to give some more flavour and of course, a pop of colour. I have made risotto a few times and most definitely enjoy everything about it. The texture, the possibilities, even the technique – I like it. I’ve made risotto the traditional way, by stirring consistently. I’ve also baked risotto, with excellent results. I’ve never made Risotto  Pie, though. Until now.

This recipe is adapted from a cookbook called “Gluten, Wheat & Dairy Free” – I want to make everything in this book. The recipes are so easy and delicious looking! I won’t necessarily prepare each recipe based on the exact ingredients (whether it be gluten-free, wheat free or dairy free) but it will be good for my readers to know that it can be adapted to suit your personal preferences and sensitivities. Those are the recipes I enjoy the most!


Risotto Pie


Risotto Pie
 
Prep time
Cook time
Total time
 
A savory pie made from risotto, scallions, spinach, mushrooms and corn
Author:
Recipe type: Main, Lunch
Serves: 6
Ingredients
  • 1 Tbsp Olive Oil + Cooking Spray
  • 1 Cup Arborio Risotto Rice
  • 2 Cups (Gluten Free) Low Sodium Chicken Broth or Vegetable Broth
  • ½ Cup Coconut Milk
  • 4 Scallions, thinly sliced
  • 1 Cup Fresh Baby Spinach
  • 1 Cup Mushrooms, chopped
  • 1 Cup Sweet Corn
  • 2 Eggs, beaten
  • 1 Tbsp Chopped Parsley
  • Salt & Pepper
Instructions
  1. Preheat oven to 400F
  2. Using a 9-inch spring form pan, line with parchment paper and spray with cooking spray.
  3. In a medium-sized saucepan, heat olive oil.
  4. Add the rice and stir for about a minute. Gradually add about ¼ cup of broth at a time, stirring often until the liquid is absorbed.
  5. When the rice is tender and all the broth has been used, stir in the coconut milk, scallions and mushrooms.
  6. Season well with salt and pepper.
  7. Remove from heat.
  8. Stir in eggs
  9. Add spinach, parsley and corn, stir to combine.
  10. Transfer the mixture into the prepared pan
  11. Smooth the mixture into the pan, then bake for 30 minutes until golden brown
  12. Cut and serve when warm


I’m so glad I added the sweet corn and mushrooms. The corn adds a little sweetness to this savory dish. And the mushroom gives that added flavour and texture.


Risotto Pie, ready for the oven


This pie is quite delicate so care should be taken when transferring to a serving platter.


Risotto Pie, made with spinach, scallions, mushrooms, parsley and sweet corn


I garnished with some fresh spinach and a few carrot shavings.


Risotto Pie


This is Risotto after all. But I tried my best to resist adding cheese…for as long as I could.


Risotto Pie


My husband and I really enjoyed this Risotto Pie. It was different, it was interesting.  I enjoyed my serving with Parmesan cheese! I just couldn’t help myself.


Risotto Pie


I hope you enjoyed this recipe today!

~Lyn


read more

Red Quinoa and Avocado Salad with Goldenberries, Edamame and a Lemon-Cumin Vinaigrette

May 25, 2012 by

Some women buy shoes. Others buy clothes, or even make up. I use to be one of those women. I do get the occasional urge to indulge every now and again. But my real problem is visiting my health food store. Lets face it. Some of the things I use aren’t sold at the conventional grocery stores and if they are, I end up paying more than I would at the health food store. At least, that has been my personal experience. I no longer buy quinoa from the supermarket. No way! Another thing I like about my health food store is that I learn about a new ingredient upon every single visit. If I see something that peaks my interest, all I have to do is ask about it. I really enjoy going there.

Upon my last trip, I grabbed a few items, Red Quinoa was one of them. I’ve been using the regular Quinoa for a few years now but I really wanted to try the red, even just for the colourful appeal. I imagined its rich deep red colour against something green or yellow. I was flipping through Fine Cooking’s Magazine – CookFresh Spring 2012 edition, and saw a beautiful recipe using Red Quinoa. I didn’t have all the ingredients but it inspired me to get some things together. I picked up a pack of dried Goldenberries (also known as cape gooseberries) at an event a few weeks ago and I thought this was an awesome time to experiment with them.


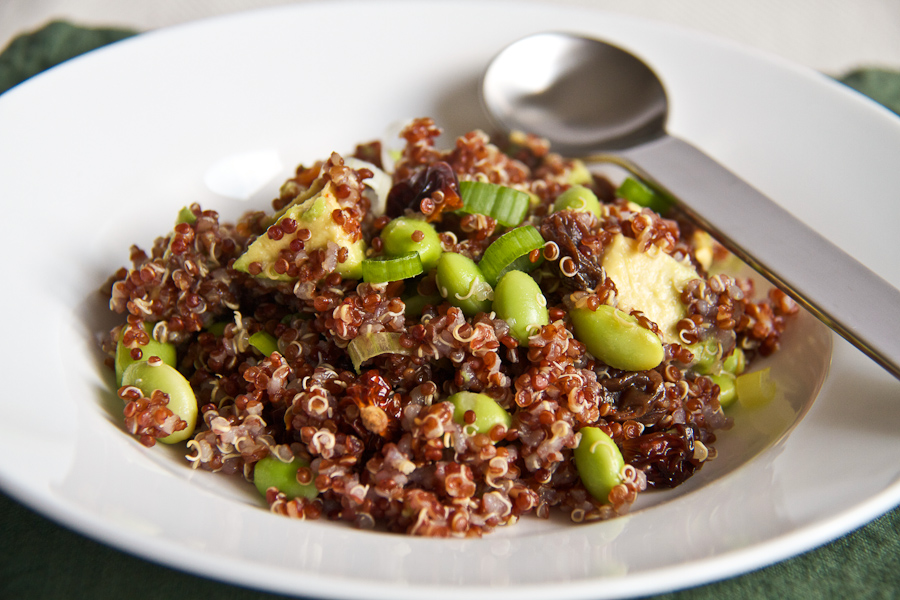
Red Quinoa and Avocado Salad with Goldenberries, Edamame and a Lemon-Cumin Vinaigrette


5.0 from 1 reviews
Red Quinoa and Avocado Salad with Goldenberries, Edamame and a Lemon-Cumin Vinaigrette
 
Prep time
Total time
 
A gluten-free, vegetarian meal that can be ready in minutes.
Author:
Recipe type: Main
Serves: 2
Ingredients
  • 2 Tbsp Raisins
  • 2 Tbsp Goldenberries
  • 3 Tbsp Edamame, thawed from frozen
  • ½ Cup Quinoa, rinsed well
  • 1 Cup Vegetable Broth (or water, if you prefer)
  • 1 Large Lemon
  • 1 Tbsp Olive Oil
  • ⅛ Tsp Ground Cumin
  • ⅛ Tsp Paprika
  • 1 Medium Avocado, pitted and cut into bite sized chunks
  • 1 Scallion, thinly sliced
  • Kosher Salt
  • Black Pepper
Instructions
  1. In a small bowl, soak the raisins and goldenberries in hot water for 5 minutes. Drain and set aside.
  2. In a small pot, add quinoa, a pinch of salt and a cup of vegetable broth to a boil. Cover and reduce to a simmer until all the water has been absorbed, about 15 minutes
  3. Fluff quinoa and remove from heat and allow to cool
  4. Grate zest from the lemon and combine with the juice from the lemon in a small bowl
  5. To the lemon juice, add olive oil, cumin, paprika and a pinch of salt, whisk to combine
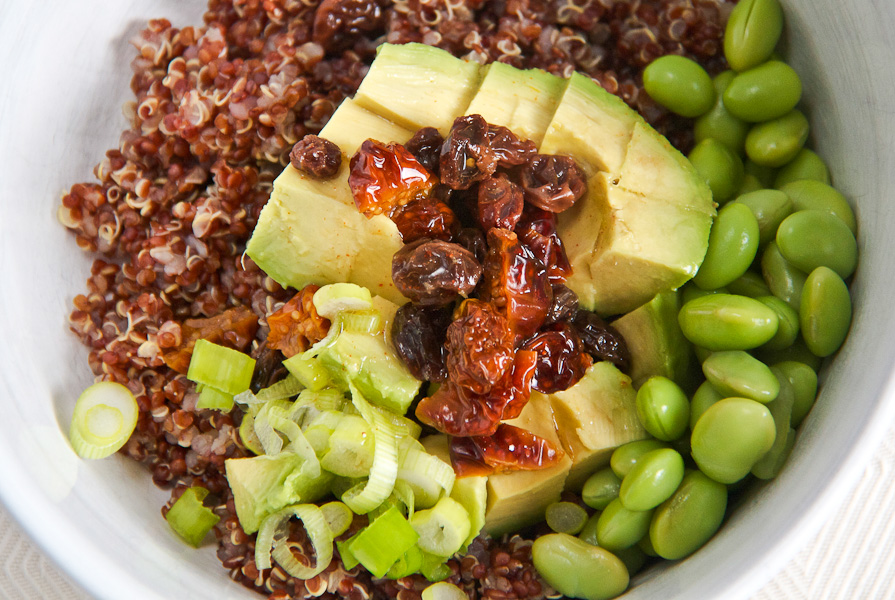
  6. In a medium bowl, toss vinaigrette with quinoa, raisins, goldenberries, edamame, avocado and scallion.
  7. Plate and serve, enjoy.


I wish I could tell you that there was more to it than this, but just put the ingredients into a bowl. Add the vinaigrette and toss. Plate and serve.


Red Quinoa, Avocado, Raisins, Edamame, Goldenberries, Scallions


This is an excellent way to use up left over quinoa. Regular White Quinoa can be used if you don’t have the red. It will taste just as good and look just as lovely.


Red Quinoa and Avocado Salad with Goldenberries, Edamame and a Lemon-Cumin Vinaigrette


Happy Friday Friends!


~Lyn


read more

Dark Chocolate Chip Granola Bars

May 4, 2012 by

I’ve been wanting to make granola bars in what seems like forever! But I finally found a recipe that I liked and wanted to try. I really have to look at the ingredients in order for me to decide if I’m going to make it. I’m not crazy about nuts (I prefer them on their own) and it’s not uncommon to see many granola recipes with a variety of nuts included. I wanted something that the kids would enjoy and not find things to pick out or require too much effort on their part. When I came across this awesome recipe from a lovely little blog called Lauren’s Latest, I knew I had found “it”. Lauren’s recipe was adapted from Rachel Ray, and I adapted her version with what I had available.

I decided to make these after I lost my natural light, but I knew there would be nothing left after they were ready, so I went ahead and took photographs anyway. I’ve made these granola bars twice and only a few make it to daylight.

Chocolate Chip Granola Bar - No bake


5.0 from 2 reviews
Dark Chocolate Chip Granola Bars, No-Bake
 
Prep time
Total time
 
An easy granola bar recipe that can be made within minutes!
Author:
Recipe type: Treat, Snack
Serves: 8
Ingredients
  • 3 Tbsp Butter
  • 3 Tbsp Cinnamon Creamed Honey (Or plain honey)
  • 1 Tbsp Agave Nectar
  • ⅓ Cup Brown Sugar
  • 2 Cups Quick Oats
  • 1 Cup Puffed Rice Cereal (like Rice Krispies)
  • 1 Tsp Vanilla
  • ½ Cup Dark Chocolate Chips (or milk chocolate)
Instructions
  1. In a medium bowl, add cereal and oats. Stir to combine and set aside.
  2. In a small saucepan, melt butter, honey, agave, and sugar over medium heat just to a boil. Stir to combine. Reduce heat and remove after about 2-3 minutes.
  3. Add vanilla and stir
  4. Pour into cereal and oats, mix well to incorporate
  5. Transfer into a rimmed tray (12X8 inch and about an inch deep)
  6. Press firmly in order for the oats to cover the entire surface evenly
  7. Sprinkle with chocolate chips and gently, press down
  8. Allow to cool for a few minutes in the fridge (or an hour at room temperature)
  9. When firm, cut into bars.
Notes
Press firmly into the tray to prevent the bars from falling apart. Try to achieve about ¾ inch thickness. I put mine in the fridge for about 20 minutes before serving.


Rice Krispies and Quick Oats. These two ingredients were united for the first time in my house. I never had to buy Rice Krispies prior to this recipe. I even allowed my son to listen to them “snap, crackle and pop” like the commercials I used to see as a child. Embrace the Rice Krispie experience!


Rice Krispies and Quick Oats


I chose to use the Cinnamon Creamed Honey that I bought from the Farmer’s Market over the plain honey. The jar was unopened. How could  that be!!!??? When I tasted it at the market, it was splendid! I envisioned myself having it on toast with a cup of tea! I suppose I also wanted to add a very special flavour to the granola bars too. It worked out very well!


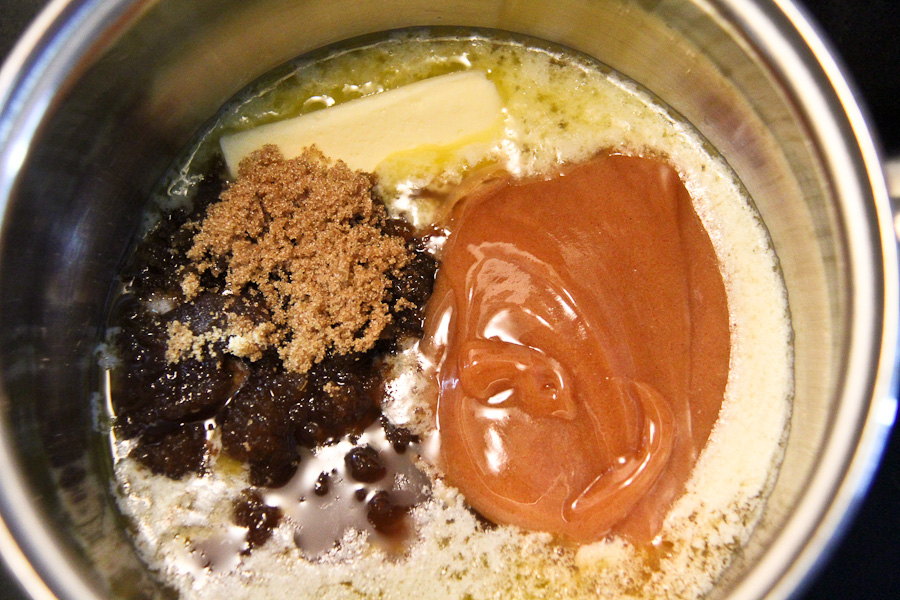
Cinnamon Creamed Honey, Butter, Agave Nectar, Brown Sugar


I didn’t allow it to remain at a boil, I just wanted to make sure everything was combined well before I removed it from the heat.


Mixture just to a boil, and combined


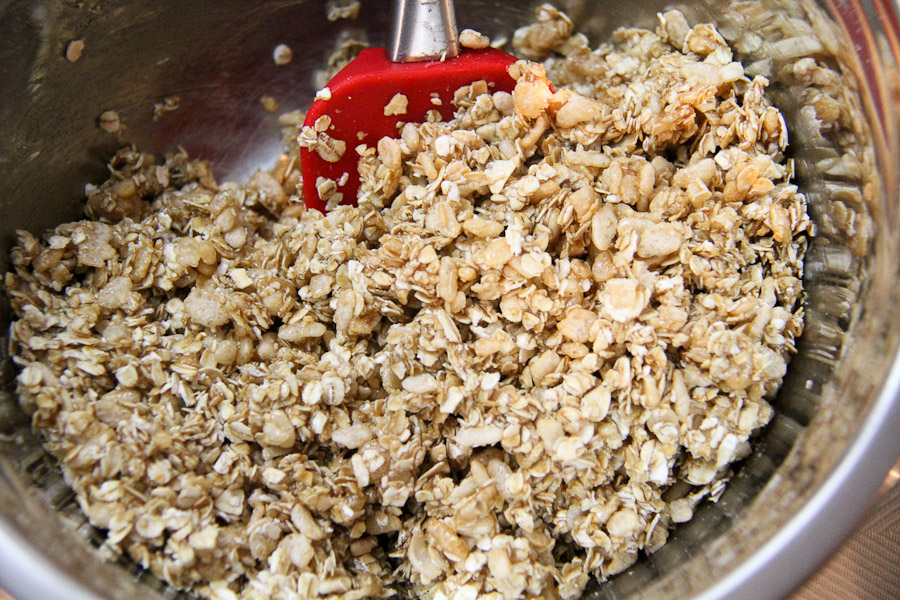
Muscle up for this part. The liquid firms up rather quickly and you have to make sure that everything is thoroughly combined.


Combining the honey mixture with the oats and cereal


Press firmly to ensure the mixture is packed tightly.  This helps to keep the bars from crumbling. I waited for it to cool for about 10 minutes (you should probably wait a little bit longer – an hour or so)


Press down *firmly* to flatten


I flipped everything onto a parchment lined cutting board. I sprinkled the chocolate chips then pressed them down. Whats funny is – they started to melt 🙂 I then used a pizza wheel (genius) and a knife to separate into bars. The kids were by my feet almost the entire time just waiting to get their hands on a piece. They had some crumbled bits, but got the real deal after it came out of the fridge for about 20 minutes or so. You know, to a child that’s like “forever”.


Granola Bars in the making!


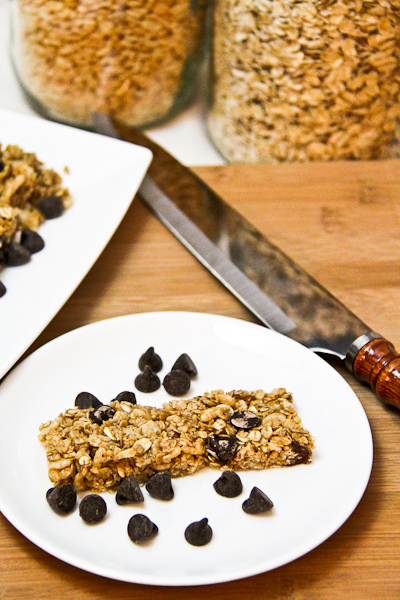
My kids loved these little bars! Okay, so did I. We all had them with a glass of milk. A sweet treat to bring the family together.


My first granola bar!


Picky eater APPROVED!


Dark Chocolate Chip Granola Bar


Happy Friday!!!

read more

Quinoa Cakes With Apple Sauce

Apr 19, 2012 by

I was super excited when I came across this recipe. I love Quinoa. It is by far my most favourite grain. It can be cooked in a variety of ways, and provides many nutritional benefits to my joy and comfort 🙂 I like to make “special pancakes” for my kids. This certainly is a very special pancake. I also wanted to make Apple Sauce to go with it. I got the Quinoa Cakes recipe from Martha Stewart. I swear, her recipes never fail me! Even when I make slight substitutions, whatever I make always comes out great.

I was attracted to this recipe because I wanted to have some kid-friendly quinoa recipes ready to go. I need them to be easy, tasty and enjoyable by my kids. I believe this did the trick. My apple sauce addition paired well with them and tasted awesome! The texture came out so smooth – the quinoa was hardly noticeable. Amazing.


Quinoa Cakes with Apple Sauce


5.0 from 1 reviews
Quinoa Pancakes With Apple Sauce
 
Prep time
Cook time
Total time
 
A healthy pancake made with superfood Quinoa
Author:
Recipe type: Breakfast or Brunch
Serves: 4-6
Ingredients
  • 1 cup cooked quinoa
  • ¾ cup all-purpose flour, unbleached
  • 2 teaspoons baking powder
  • ½ tsp coarse salt
  • 1 egg, plus 1 egg white
  • 1 tbsp unsalted butter, melted
  • ¼ cup low-fat milk
  • 2 tbsp maple syrup + more for serving
  • Cooking spray
  • Apple Sauce:
  • 2 Apples, peeled, cores removed, diced (I used Royal Gala)
  • ¼ Cup Brown Sugar
  • ¼ Tsp Cinnamon
  • 2 Tbsp Apple Juice
Instructions
  1. Start the apple sauce first - place apple, sugar, cinnamon and apple juice in a small saucepan. Cover and cook on low heat 30-45 minutes or until you have reached a desired consistency. Stir occasionally every 15 minutes.
  2. In a medium bowl, mix quinoa, flour, baking powder and salt
  3. In a medium bowl, whisk together egg, egg white, butter, milk and syrup until smooth
  4. Add wet ingredients into dry
  5. Lightly coat a non-stick skillet with cooking spray and bring to medium heat
  6. Drop batter by heaping tablespoonful into skillet
  7. Cook until bubbles appear on top for about 2 minutes
  8. Flip and cook until golden brown for another 2 minutes
  9. Repeat in batches until batter is finished
  10. Serve with apple sauce or fruits and maple syrup
Notes
This recipe yields about 18 2-inch pancakes Quinoa Cake Recipe from http://www.marthastewart.com/329047/quinoa-cakes The apple sauce took the longest to cook - about 40 minutes to reduce


See the difference between cooked and uncooked Quinoa? It fluffs up quite a bit. A little goes a long way. I usually cook one cup of quinoa at a time and it lasts me a few days – depending on what I end up doing with it.


Uncooked & Cooked Quinoa


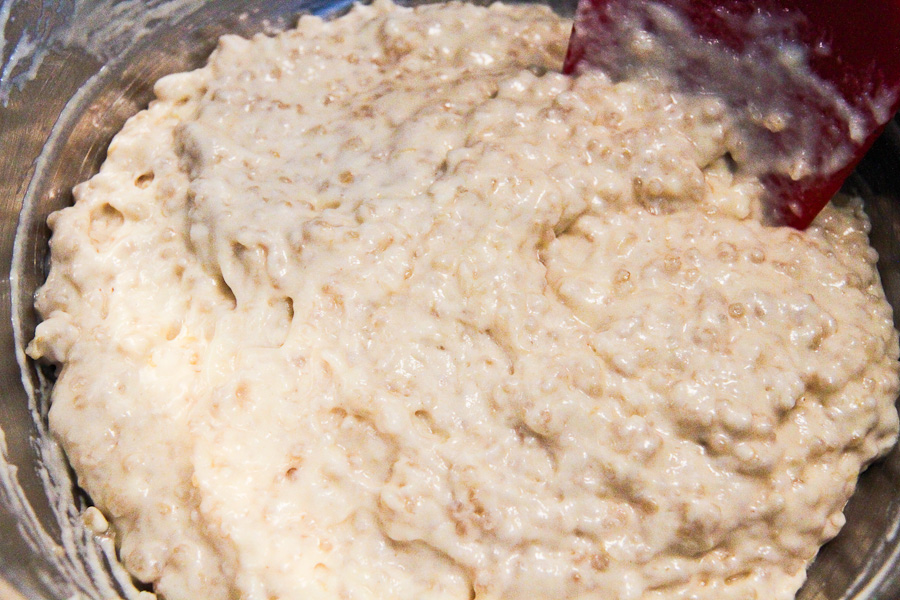
Here’s the batter – ready to be spooned into the skillet. Making them this small meant a few batches, but it was well worth it. I’ll try making them a little bigger next time.


Quinoa Cake Batter


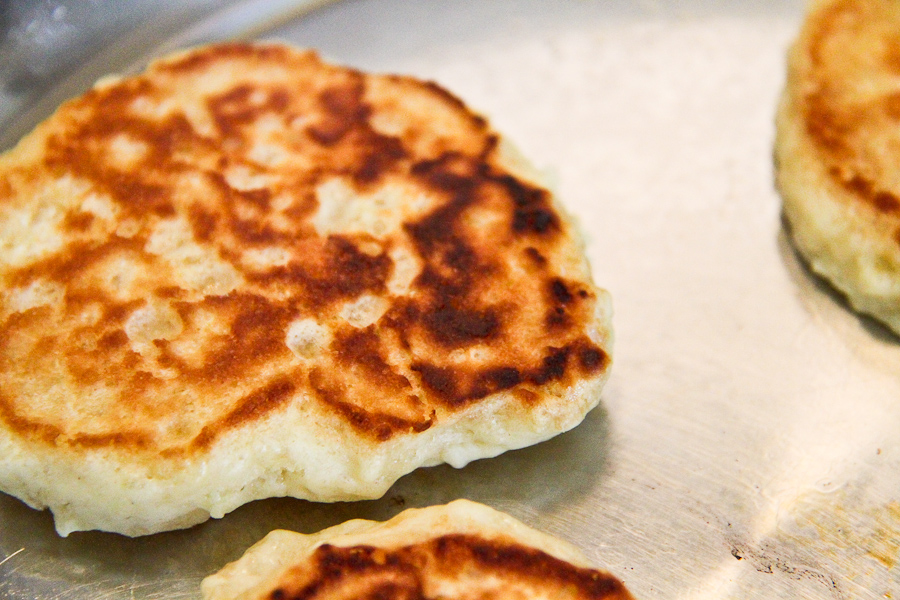
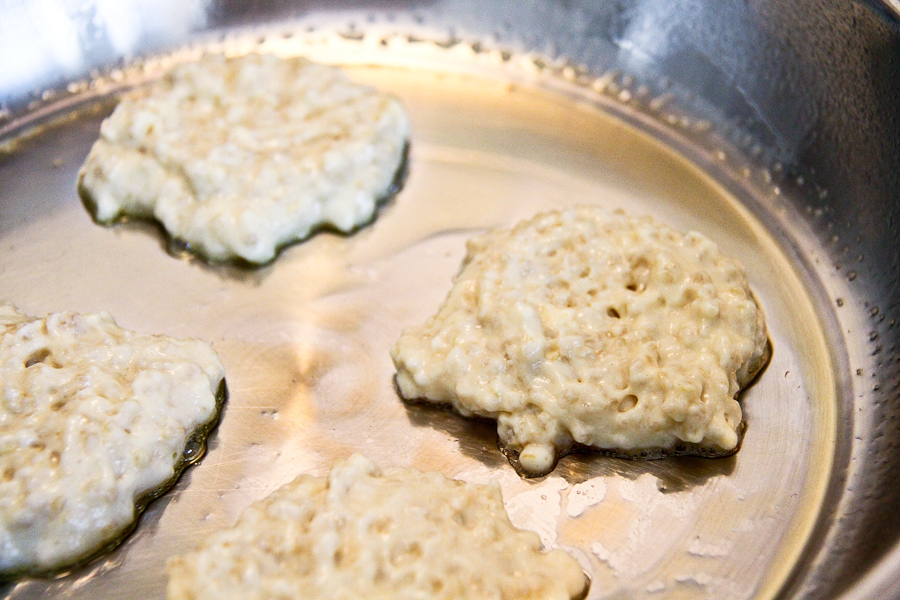
I don’t know about you, but I always mess up the first batch. The second set is usually a lot better. They taste the same, but aren’t as pretty.


Quinoa Cakes in skillet


They are so tiny and cook quickly, so you can’t leave them unattended. The most I could do was stir the apple sauce and then get back to the cakes.


Quinoa Cakes in skillet


Confession: I popped a few of these into my mouth before I added the syrup and apple sauce. Sorry. They smelled really good.


Naked Quinoa Cakes


And then there was a feast.


Quinoa Cakes with Apple Sauce and Maple Syrup


We had leftovers.

Brilliant.

Take good care, friends!

~Lyn


read more
Spicy Thai Tuna & Fennel Salad

Apr 16, 2012 by

I’ve been doing a lot of eating over the past week. I think its time to slow it down and get back into my usual eating habits. I was looking through my recipes and realized that I really don’t post enough salads. That is not to say that I don’t eat salads ~I just haven’t posted. I made a dressing that I adapted from Everyday Food over a year ago. I don’t fancy store bought dressings that much. Generally I have my salad naked – sans dressing. I adore crunchy romaine with garden vegetables. But I also like warm salads that include Quinoa, Zucchini and other root vegetables.

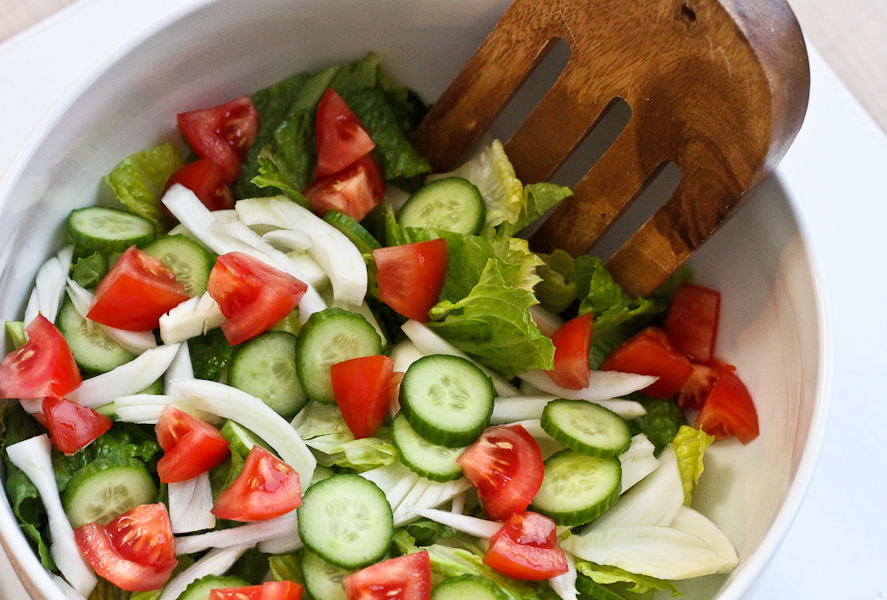
Today’s recipe is a quick and easy, nutritious salad. I usually serve the dressing on the side so that I pour what I desire. For the Tuna, I added only to the plate because it was too spicy for my son so I could not mix it into the main bowl. I find regular tuna to be one of my least favourite things when its plain, so the Spicy Thai version is the one I prefer. It is quite spicy for me, so I don’t eat more than half a can at a time. A little goes a very long way for me. Regular tuna can certainly be substituted and you can use as much as you would like from the can. You can also choose to omit the tuna and serve the salad along with dinner. I am also using Fennel for the first time in a very long time. I forgot how much I liked it. I’m happy I was able to incorporate it in this freestyle salad. I believe the Fennel and Tuna are the unusual suspects and so, I named the salad for them 🙂


Spicy Thai Tuna and Fennel Salad


Spicy Thai Tuna & Fennel Salad
 
Prep time
Total time
 
A quick salad with Spicy Thai Tuna and Fennel
Author:
Recipe type: Salad
Serves: 2
Ingredients
  • Vinaigrette:
  • 2 Tbsp White Wine Vinegar
  • 3 Tsp Honey Mustard Dijon
  • ⅓ Cup Olive Oil
  • Salt & Pepper
  • Salad:
  • 1 Head Romaine Lettuce, chopped and washed
  • 2 Baby Cucumbers, thinly sliced
  • 2 Tomatoes, diced
  • 1 Fennel, thinly sliced
  • 1 85g Can Spicy Thai Tuna (or any tuna you like)
Instructions
  1. Add all the ingredients for the vinaigrette into a jar. Shake and set aside
  2. In a large bowl, add romaine, tomatoes, fennel and cucumbers
  3. Toss to combine
  4. Add tuna and dressing, toss to coat or serve dressing on the side, serve Tuna in individual plates


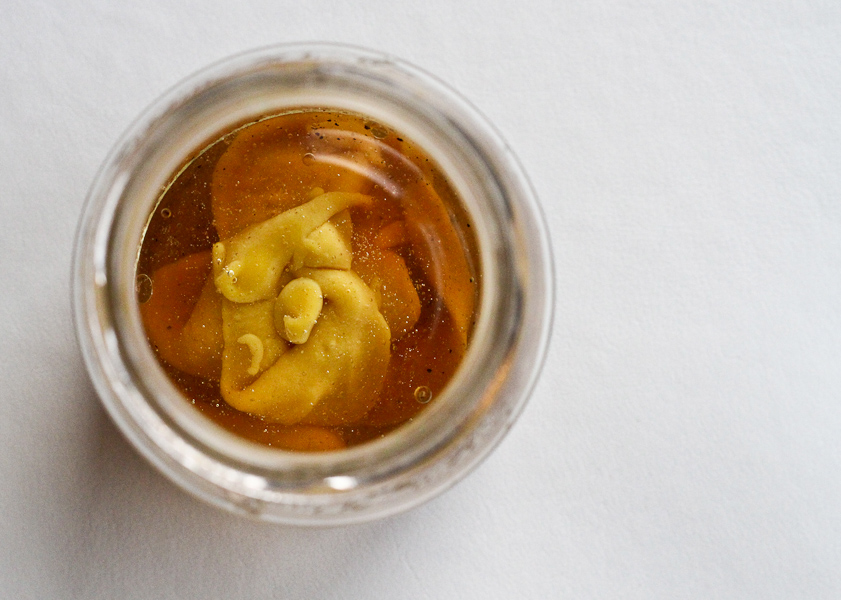
The dressing before I shook it. Not sure why, but it looked like a flower to me. I see beauty in weird places, I guess. OK, don’t stare at it! lol


Salad Dressing


I almost omitted the tuna when I saw how attractive the salad looked. Way to go tomatoes!


Tossed salad!


So here was my turning point. Do I add the Tuna? Or have it on its own, this gorgeous salad.


Fennel, Romaine, Cucumbers & Tomatoes


I added the dressing to the salad, followed by the tuna.


Spicy Thai Tuna and Fennel Salad


I feel much better about all that eating during Easter. Much better.


~Lyn

Related Posts Plugin for WordPress, Blogger... read more
Related Posts

Share This

Post Popularity Graphing by Knowledge Ring