Strawberries and Cream Popsicles, Guest Post by Chung-Ah of Damn Delicious

Jul 17, 2012 by

Today’s post is by the lovely Chung-Ah from Damn Delicious. Chung-Ah’s recipe’s often remind me of my own or something that I’d eat in a heartbeat. We pretty much like the same food. I’ve said to her a few times that we could be cook-sisters. You know, those friends who you don’t mind sharing a kitchen with? Yep, that’s her. We are a part of some really cool movements like #SundaySupper and #MuffinMonday. Such a sweet brilliant soul. I was so happy when Chung-Ah agreed with such fiery spirit to guest post for me. Take a moment and visit her blog. I guarantee that you’ll love it. Her photography is beautiful too!

Check out some of Chung-Ah’s awesome recipes! A few of my favourites are Strawberry Espresso Chocolate Chip MuffinsPancetta Fried Rice and Slow Cooker Chicken Adobo (Keeping this recipe close) 

Thank you, Chung-Ah for guest posting today while I spend some quality time with my family in Jamaica. I appreciate you!!

Please enjoy today’s post by Chung-Ah: Strawberries and Cream Popsicles

 ***

Lyn is off in Jamaica and even though I wanted to sneak into her suitcase and tag along, that didn’t quite happen as I had imagined. So here I am to provide you with a refreshing dessert option, or breakfast option for some.

Now for those of you who don’t know me, I’m Chung-Ah of Damn Delicious. I’m a recent public health graduate and I love spending time in my closet-sized kitchen, whipping up quick and easy homemade meals using fresh ingredients. With my love for food, I created a food blog over a year ago which in turn led me to meet so many wonderful foodies like Lyn. I’m definitely a big fan of hers, to say the least, and I am incredibly honored to be guest posting for her. She has the most wonderful recipes, and she never ceases to amaze me with her Jamaican favorites. I mean have you seen her Jamaican Cornmeal Pudding? I could seriously gobble that up for breakfast every morning!

Anyway, before I spend the whole day talking on and on about how I adore Lyn and how I need to try every single one of her recipes, we should get down to business and talk about these popsicles.

So I bought these cute popsicle molds from Crate & Barrel a while back and even though I had like 10 popsicle recipes lined up, these molds just sat in their box, unopened, for several weeks. I don’t know why but I have this tendency to leave brand new kitchen products in their original packaging for an indefinite amount of time. I did that with my Le Creuset dutch oven and I did it again with my KitchenAid mixer. I think that sat on the couch for like a month.

It’s a sickness really. Maybe I should see someone about that.

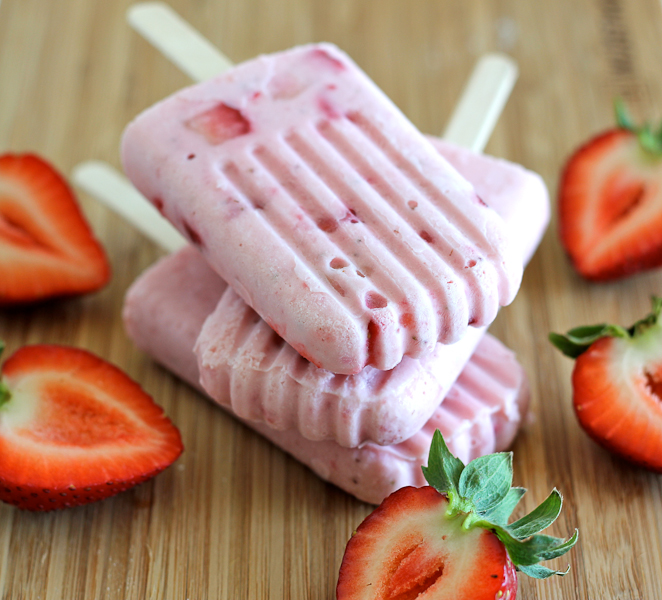
Anyway, when I finally managed to get the molds out of their box, I inaugurated them with this awesome strawberries and cream recipe I found over at My Baking Addiction. It’s seriously one of the easiest things to make, and the only hard part is pouring the mixture into the molds without making a mess on your kitchen counter.

Yeah, like I said, super easy.


Strawberries and Cream Popsicles – Damn Delicious, Chung-Ah Rhee


5.0 from 4 reviews
Strawberries and Cream Popsicles, Guest Post by Chung-Ah of Damn Delicious
 
Prep time
Total time
 
Super easy summer popsicle, using fresh strawberries and greek yogurt
Author:
Recipe type: Treat, Dessert
Serves: 6
Ingredients
  • 1 cup strawberries, pureed
  • 6 tablespoons milk
  • 1 (5.3-ounce) container Greek yogurt
  • 4 teaspoons agave
  • ½ teaspoon vanilla extract
  • ½ cup diced strawberries
Instructions
  1. In a large bowl, combine the strawberry puree, milk, yogurt, agave and vanilla.
  2. Stir in the diced strawberries.
  3. Scoop the mixture evenly into the popsicle molds.
  4. Place into freezer and freeze until hard, at least 4 hours.
  5. Remove from freezer and run the mold under warm water to loosen popsicle, about 20 seconds.
  6. Serve immediately.
Notes
Strawberries and Cream Popsicles (adapted from My Baking Addiction) Yields 6 popsicles


Strawberries and Cream Popsicles – Damn Delicious, Chung-Ah Rhee


Strawberries and Cream Popsicles – Damn Delicious, Chung-Ah Rhee

Strawberries and Cream Popsicles – Damn Delicious, Chung-Ah Rhee


Strawberries and Cream Popsicles – Damn Delicious, Chung-Ah Rhee


If you don’t have a popsicle mold, you should totally get one. The popsicle recipe options are endless, and you get to use up such fresh ingredients that bring natural sweetness to these babies, unlike the sugar-loaded store-bought ones. Plus, it’s a sure way to cool off on these hot summer days!


read more

Mixed Mashed Roots, Guest Post by Sofie of The German Foodie

Jul 10, 2012 by

Hi friends! Its been a little while since my last post – and I have an awesome excuse! I am in beautiful Jamaica spending some time with my loved ones. I really needed a break and I’m embracing my time here completely. I’ve had a weeks worth of rest so far and look forward to getting out and about, to experience my most favourite foods and places. I’ll be sure to have fun with my friends, take lots of photographs, collect Jamaican Cook Books and  most important of all – get some sand between my toes! Time with my family and friends is something I treasure deeply. It’s really good to be home!

While I’m away, I have some fantastic friends who have been so kind to guest post for me. I can’t tell you enough how excited I am to have a few of my favourite food bloggers share great healthy meals right here at The Lovely Pantry!

To kick things off, Sofie is going to share her own personal family recipe – Mixed Mashed Roots. Brilliant! Why didn’t I think of doing this? For those who don’t know Sofie, she’s this really smart and cool lady that loves to cook and bake. Sofie inspires me with her German recipes and gorgeous food photography. We are regular participants in #SundaySupper and members of the Food Bloggers NetworkPlease visit her blog called The German Foodie. I want to try EVERY recipe on her blog. A few of my favourites are: Strawberry Shortcake, Sofie’s Southern Corn Fritters, and German Cheesecake. Sofie, perhaps now is a great time to tell you that I have made your Corn Fritters about 3 times. The fritters always seem to disappear before I get to take photographs and actually create a post. I will make them again and again!

I’m so glad to have met Sofie. Please enjoy her post today.

***

I am an expat German living in Northeast Ohio, and blogging mostly about authentic German food and my own original recipes inspired by German food. Having grown up in the border region with France in a very cosmopolitan city, even for its size, I am also drawn to all sorts of ethnic recipes.

I have been baking ever since I could hold a spoon, and it is my great passion in life. I have somehow always baked. I love to explore and experiment, to create and yes, eat what I have created. I am not just a consummate baker; I like to cook as well, especially seasonally.

I am thrilled to be guest posting at the Lovely Pantry today, and since Lyn specifically requested something healthy, I decided to pull something out of my cooking hat that’s been a popular side dish in our household for years. It’s also one of the ways I can get my husband to eat potatoes without complaining (he’s not a huge fan of potatoes).

This is a simple dish, and one you can either make in a vegetable mill (moulin à légumes), with a potato masher, or simply in a food processor. I like mine chunky, so whatever the veggie mill produces is fine with me – if you like yours smoother, pass it through a fine-meshed strainer as a last step.

Mashed Roots – Photography by Sofie Dittman of The German Foodie


5.0 from 1 reviews
Mixed Mashed Roots
 
Author:
Ingredients
  • ¾ lb (350 g) potatoes
  • 2 lb (900 g) yams
  • 1⅓ lb (600 g) carrots
  • 1 – 2 medium onions
  • Olive oil
  • Salt, pepper to taste
Instructions
  1. Peel and cut all vegetables into chunks about 1 inch (2.5 cm) in length and put in a stockpot (about 8 quart or 7.5 liters capacity).
  2. Add one tablespoon of salt, a little olive oil and enough water to comfortably cover all of the vegetable pieces.
  3. Bring to a boil and then cook until all ROOTS are tender (they should be on the soft side). Strain the broth and save in a bowl.
  4. Mash all of the vegetables until they become creamy and no large chunks are left. If needed, add some broth to achieve the desired consistency.
  5. Add salt and pepper (and more olive oil if desired) to taste.
  6. Serve warm as a side dish.
  7. Serves 4 – 6.


Mashed Roots – Photography by Sofie Dittman of The German Foodie


Mashed Roots – Photography by Sofie Dittman of The German Foodie


Mashed Roots – Photography by Sofie Dittman of The German Foodie


read more

Almond Banana Espresso Dark Chocolate Chip Muffins

Jun 25, 2012 by

That title was a mouthful. The best mouthful I’ve had in a while. I can’t tell you enough how much I enjoyed these muffins. Thank goodness for Muffin Mondays!

When I saw this recipe, my first thought was…this isn’t the healthiest muffin recipe but I can work with it! I was determined to make this muffin as healthy as possible. Ah well, I’ll experiment some more at a later time but these muffins were terrific. They were beautifully moist with a lovely hint of espresso, and of course a few Dark Chocolate Chips to make it really special. You know Dark Chocolate is good for you, right?

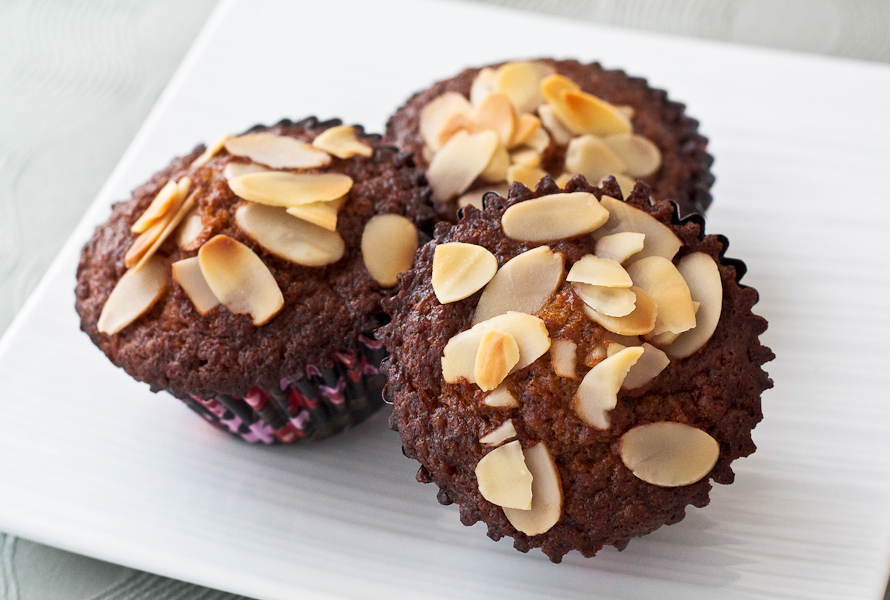
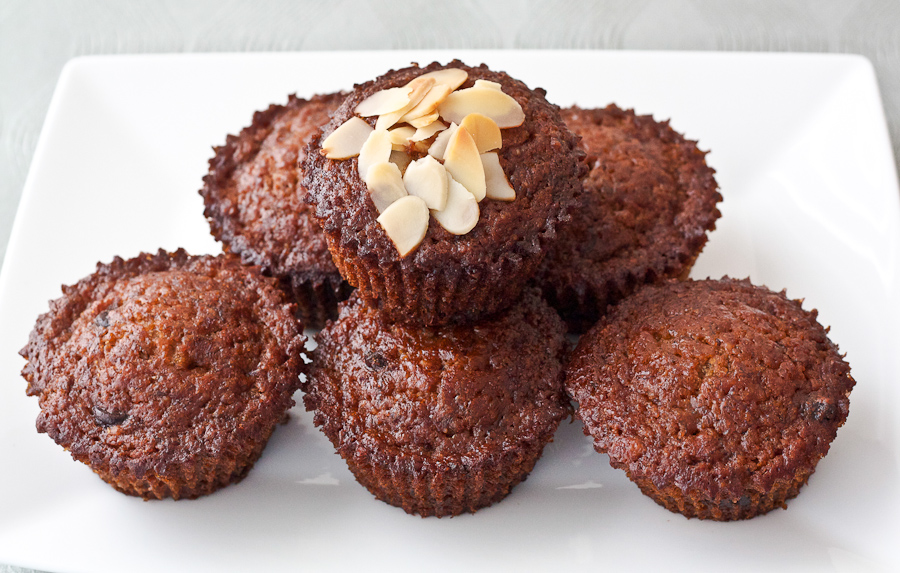
Todays recipe is adapted from the book called Baked: New Frontiers In Baking by Matt Lewis & Renato Poliafito. I made a few changes that would hopefully ease my conscience even just a little. I wanted to incorporate almonds so I replaced regular milk with almond milk. I also substituted 1/2 cup all-purpose flour with almond flour (or almond meal). I had a bag of sliced almonds just waiting to be used. I put some in a food processor and pulsated until it was finely ground. I placed a few sliced almonds on the muffin batter just to see what it would be like and it turned out just fine. I knew the kids wouldn’t like them there so they had the ones without the almonds. I only used 1/2 cup of dark chocolate chips. Good call – it was just the right amount for me.


Almond Banana Espresso Dark Chocolate Chip Muffins


5.0 from 3 reviews
Almond Banana Espresso Chocolate Chip Muffins
 
Prep time
Cook time
Total time
 
An almond infused muffin with a hint of espresso and dark chocolate chips
Author:
Recipe type: Muffin
Ingredients
  • 1½ cups mashed, very ripe bananas (about 3 large bananas)
  • ½ cup sugar
  • ¼ cup firmly packed light brown sugar
  • ½ cup (1 stick) unsalted butter, melted
  • ¼ cup almond milk
  • 1 large egg
  • 1 cup all-purpose flour, unbleached
  • ½ cup almond flour (3/4 cup sliced almonds in a food processor)
  • 1 tsp instant espresso powder
  • 1½ tsp baking soda
  • 1 tsp salt
  • ½ cup dark chocolate chips
  • A few tablespoons sliced almonds for garnish (optional)
Instructions
  1. Preheat the oven to 350F
  2. Line a 12 hole muffin pan with muffin liners or grease with cooking spray
  3. In a medium bowl, mash the bananas then stir in sugars, butter, milk, and egg. Set aside
  4. In another medium bowl, whisk together the flour, instant espresso powder, baking soda and salt
  5. Make a well in the middle of the dry ingredients. Pour the wet ingredients into the well and stir just until combined
  6. Fold in the chocolate chips
  7. Fill each cup about ¾ full
  8. Sprinkle a few sliced almonds on top of the muffin batter (optional)
  9. Bake in the center of the oven for 20-25 minutes, until a toothpick inserted in the center of the muffin comes out clean
  10. Move the muffin pan to a cooling rack, and let cool for 15 minutes
Notes
This recipe is adapted from Baked: New Frontiers In Baking Yields 16 muffins


We started eating these muffins before I took photos. How on earth did I let that happen!? Once you’ve had one of these muffins, I kid you not, you won’t be able to stop…


Almond Banana Espresso Dark Chocolate Chip Muffins


I was quite pleased with the almond slices on top. They were perfectly toasted and crunchy.


Almond Banana Espresso Dark Chocolate Chip Muffins


Extremely moist and rich in flavour. These muffins are a delightful breakfast or snack!


A bite from an Almond Banana Espresso Dark Chocolate Chip Muffin


We thoroughly enjoyed my adaptation. I will continue to convince myself that I made myself a healthy version of the original recipe.

Muffin Monday is an initiative by Baker Street. A culinary journey of sharing a wickedly delicious muffin recipe every week. Drop in a quick line to join her on her journey to make the world smile and beat glum Monday mornings week after week.

I hope you enjoyed todays post. Have a wonderful week!

~Lyn

read more

Broiled Chicken Thighs With Pineapple-Cucumber Salad

Jun 20, 2012 by

Have you ever had a pineapple-cucumber salad? I haven’t. I saw the photo on the cover of May 2012 issue of Everyday Food. I had to try it. So I did! Such a refreshing recipe! I was certainly glad to try it. Double points for me because my son ate it all ~ and asked for more! He has excellent taste buds although they are still maturing. The original recipe called for cilantro. I’m so not a fan. I used parsley from my little herb planter that sat by the bay window in the kitchen. It felt very rewarding to use it! Now that its gone (RIP indoor herbs) I’ll have to try again. But I won’t stop until I have my own flourishing indoor herb collection.

This bright zesty salad is so easy and would be perfect for a summer barbecue or a quick side dish. The chicken was fast and flavourful – I should try it on the grill next time!

Broiled Chicken Thighs with Cucumber Pineapple Salad


5.0 from 1 reviews
Broiled Chicken Thighs With Pineapple-Cucumber Salad
 
Prep time
Cook time
Total time
 
A light and easy dinner
Author:
Recipe type: Main
Serves: 4
Ingredients
  • 8 Chicken Thighs, Bone in, Skin on
  • zest and juice from 2 limes
  • 2 Tsp Chilli Powder
  • 2 Cups diced pineapple
  • 1 English Cucumber, diced (1/4 inch cubes)
  • ¼ Cup Parsley
  • Kosher Salt & Ground Pepper
Instructions
  1. Place oven rack about 4 inches from the top
  2. Heat broiler (I set mine to high)
  3. In a small bowl, combine lime zest, chilli powder and salt
  4. Season the chicken with the zesty rub
  5. On a rimmed baking tray, place chicken skin side down
  6. Broil for 5 minutes
  7. Flip so that the skin side is up, broil for 10 minutes more until the chicken is cooked through
  8. In a medium bowl, combine lime juice, pineapple, cucumber and parsley
  9. Serve the chicken with the salad
Notes
Original Recipe from Everyday Food http://www.marthastewart.com/900179/chicken-pineapple-cucumber-salad


This is the easiest rub you could ever do. Such a terrific idea for a last-minute meal.


Lime Zest, Chilli Powder and Salt Rub


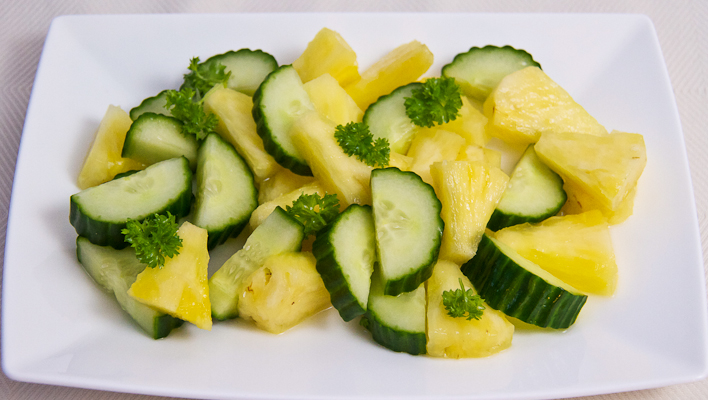
This is the first time I’m pairing cucumbers with fruit. The lime juice gave it a nice zesty kick and everything together felt so very refreshing.


Cucumber, Pineapple and Parsley Salad


A fast summer meal! Keep this recipe in mind if you’d rather be spending time soaking up the sun, than labouring in the kitchen.


Broiled Chicken Thighs & Cucumber Pineapple Salad with Parsley


Happy Wednesday!

~Lyn

read more

Roasted Garlic Muffins with Bacon

Jun 18, 2012 by

I can’t believe its Monday already! What a busy week! I was so consumed with various tasks/deadlines, I haven’t been able to post much but I am happy that I’m able to participate in another Muffin Monday! This weeks muffin selection is what my husband calls “a really good breakfast muffin”. I’ll be honest, savoury is not my thing. My sweet tooth simply won’t allow it. But one thing I’ve learned is – savoury just needs a little bacon to make it right. Is that the truth? Or is that the TRUTH?

I was very grateful for this recipe because for starters, I’ve never used cottage cheese before. Like ever. I’ve also never roasted a head of garlic before. Brilliant! It was fun to do and smelled great (if you like garlic). The original recipe called for Parmigiano-Reggiano but I couldn’t find one small enough so I chose Asiago, which also has a great texture and flavour. I used half cup instead of the suggested quarter cup that seemed like such a tiny portion. I went half and half with all-purpose flour and spelt flour. I really like using other flours aside from whole wheat.  And for this recipe, I’m happy with the result.


Roasted Garlic Muffins with Bacon


Roasted Garlic Muffins with Bacon
 
Prep time
Cook time
Total time
 
Author:
Ingredients
  • 1 medium garlic head
  • 1 Tbsp olive oil for the garlic
  • ¼ cup Olive Oil
  • 2 large eggs, at room temperature
  • ¾ Cup milk (I used 2%)
  • ¾ Cup small-curd cottage cheese, or cream-style cottage cheese (regular or low-fat, but not non-fat)
  • 1 Cup All-Purpose Flour
  • 1 Cup Spelt flour
  • ½ Cup grated Asiago Cheese
  • 2 Tbsp sugar
  • 1 Tbsp baking powder
  • ½ teaspoon salt
  • 5 Strips crispy bacon, coarsely chopped
Instructions
  1. Preheat the oven to 400°F.
  2. Cut the top quarter off the garlic head so that the cloves are exposed. Discard the top quarter. Place the garlic on a small sheet of aluminum foil, drizzle with 1 tablespoon of the olive oil, then fold and seal the sides of the foil to create a pouch around the garlic. Place directly on the oven rack and bake for about 35 minutes, or until the garlic smells sweet and the cloves are soft. Remove from the oven and cool for 15 minutes without unwrapping. Maintain the oven’s temperature.
  3. To prepare the muffin tins, spray the indentations and the rims around them with nonstick spray, or line the indentations with paper muffin cups. If using silicon muffin tins, spray as directed, then place the tins on a baking sheet.
  4. Squeeze the cooled pulp from the garlic cloves into a large bowl, discarding the papery husks. Mash the garlic with a fork, then whisk in the eggs, milk, cottage cheese, and remaining ¼ cup of the olive oil. Set aside for 10 minutes to infuse the garlic flavor into the mixture.
  5. Whisk the all-purpose flour, spelt flour, Asiago, sugar, baking powder, and salt in a small bowl until combined. Stir this dry mixture into the garlic mixture until moistened.
  6. Add the bacon and fold until incorporated
  7. Fill the prepared tins three-quarters full. Use additional greased tins or small, oven-safe, greased ramekins for any leftover batter, or reserve the batter for a second baking. Bake for 20 minutes, or until the muffins have lightly browned, rounded tops and a toothpick inserted in the center of one muffin comes clean
  8. Set the pan on a wire rack to cool for 10 minutes. Gently rock each muffin back and forth to release and remove it from the tin. Cool the muffins for 5 minutes more on the rack before serving.
Notes
This recipe yields about 14 muffins If storing or freezing them, cool them completely before sealing in an airtight container or in freezer-safe plastic bags. The muffins will stay fresh for up to 24 hours at room temperature or up to 1 month in the freezer.


I remember when I did not like garlic at all. Look at me now!! I was so happy to try it. Roasted garlic is a wonderful base for so many recipes.


Garlic with oil, ready to go into the oven


Straight out of the oven! This was quite hot even after 15 minutes so be careful.


Roasted garlic, aromatic and very moist


After all that mashing… I was left with no more than a few tablespoons of garlic mush.


Mashed roasted garlic


These muffins were lovely, especially served with bacon on the side! I haven’t had bacon in so long, I just had to alternate bites. Muffin, bacon. Muffin, bacon… I’m so naughty!


Roasted Garlic Muffin with Bacon AND Bacon on the side!


Muffin Monday is an initiative by Baker Street. A culinary journey of sharing a wickedly delicious muffin recipe every week. Drop in a quick line to join her on her journey to make the world smile and beat glum Monday mornings week after week.

I hope you enjoyed todays post! Have a marvellous and naughty week, friends!

~Lyn

Related Posts Plugin for WordPress, Blogger... read more
Post Popularity Graphing by Knowledge Ring